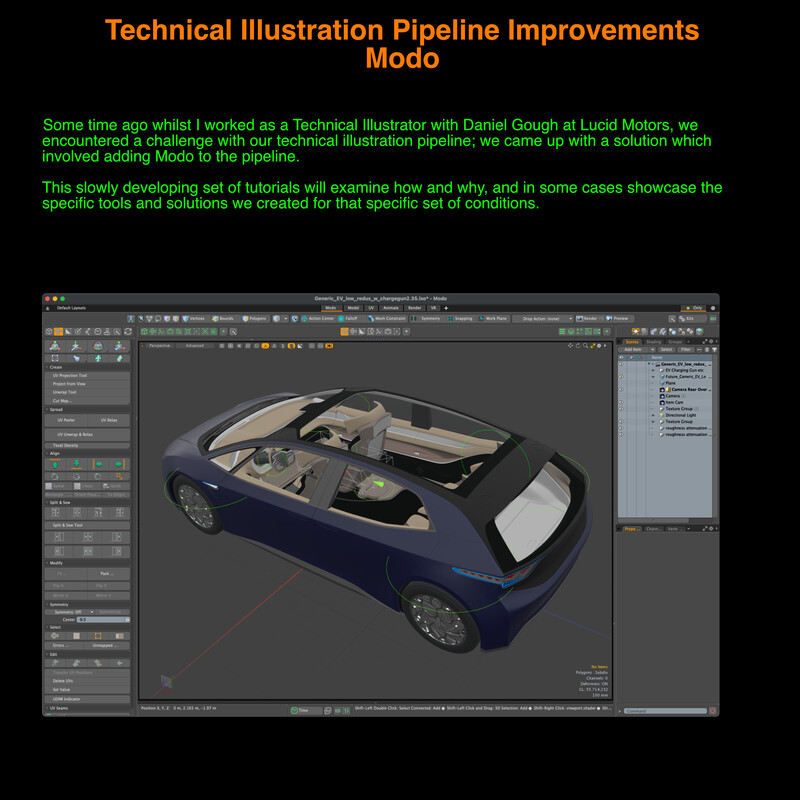
Technical Illustration for EVs in a Modo-centric pipeline
Why this mini-folio? Why not all the illustrations I completed at Lucid? Well, I'm glad you asked....
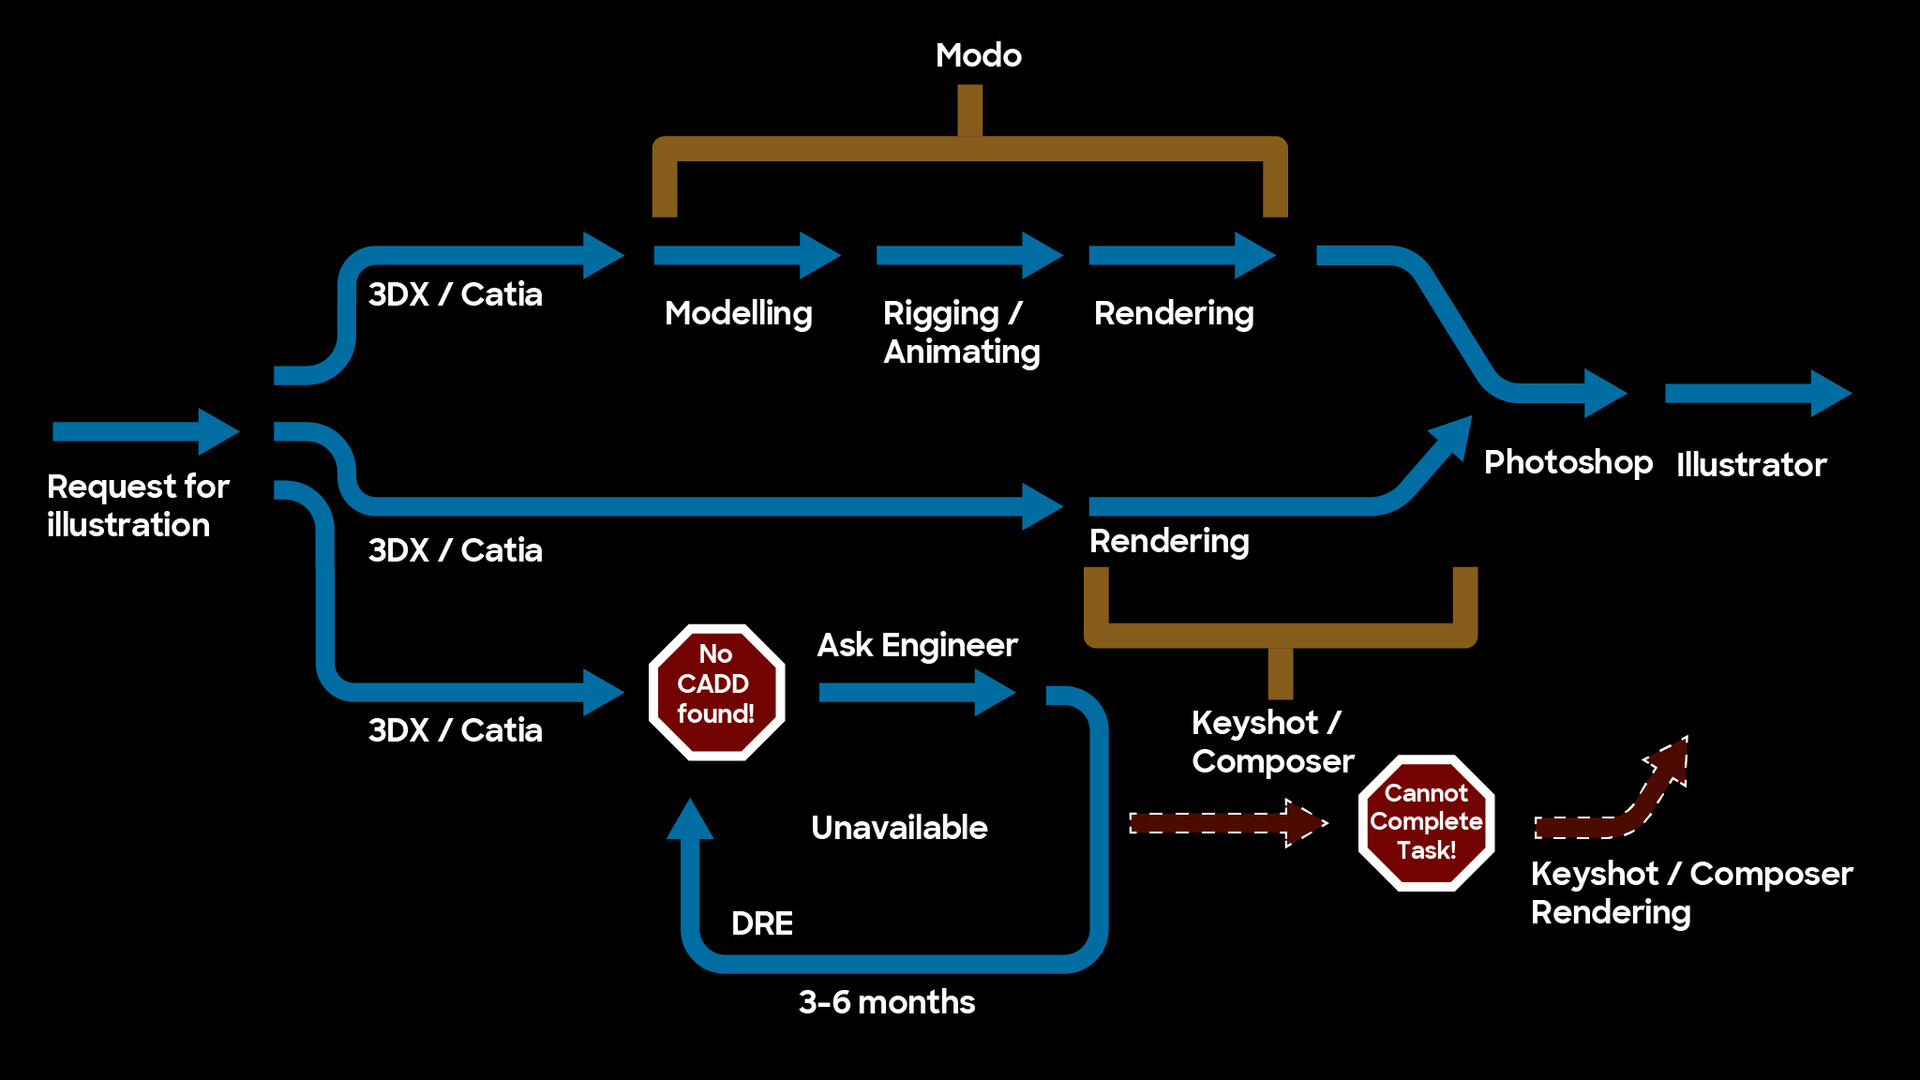
This diagrams the broken workflow issues with a rigid CADD to Composer or Keyshot tech illustration pipeline; it also illustrates the Modo-centric advantages Dan and I brought to Lucid's pipeline: fluent modelling & rigging & rendering.
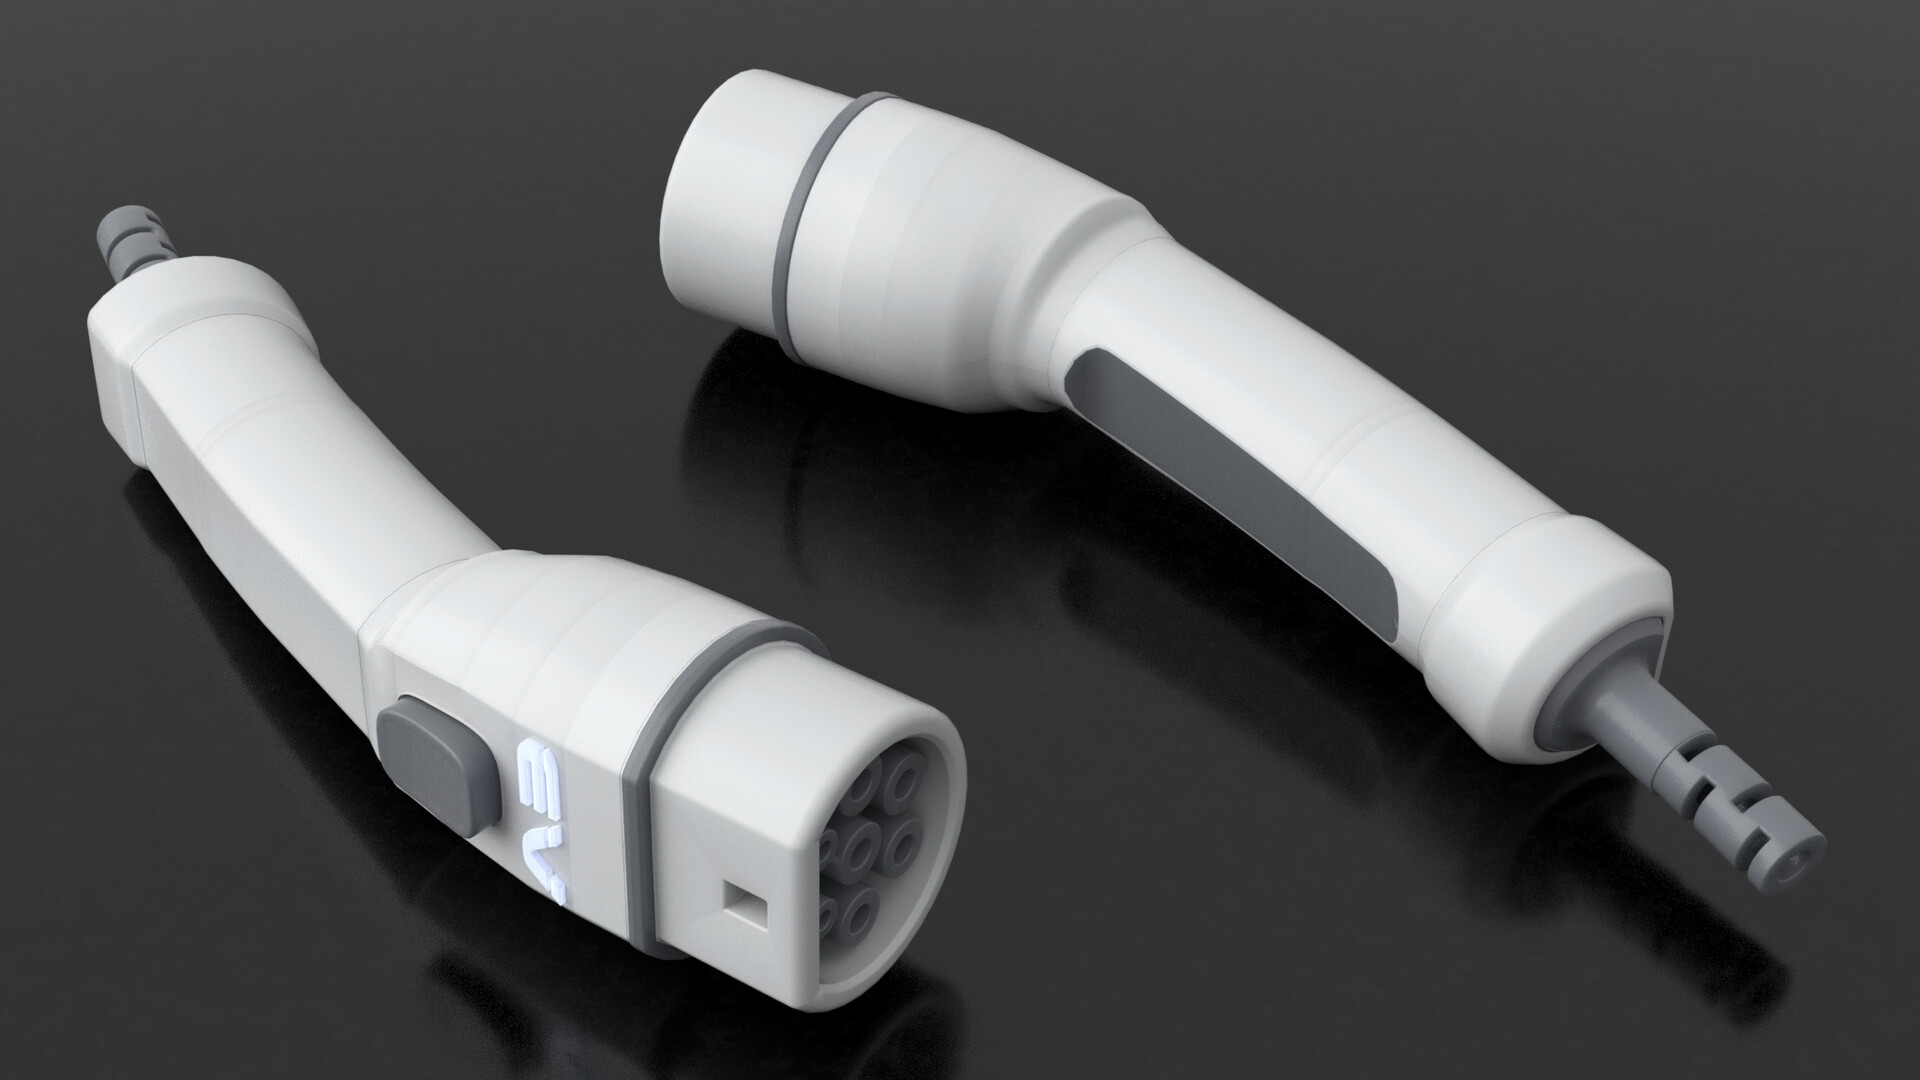
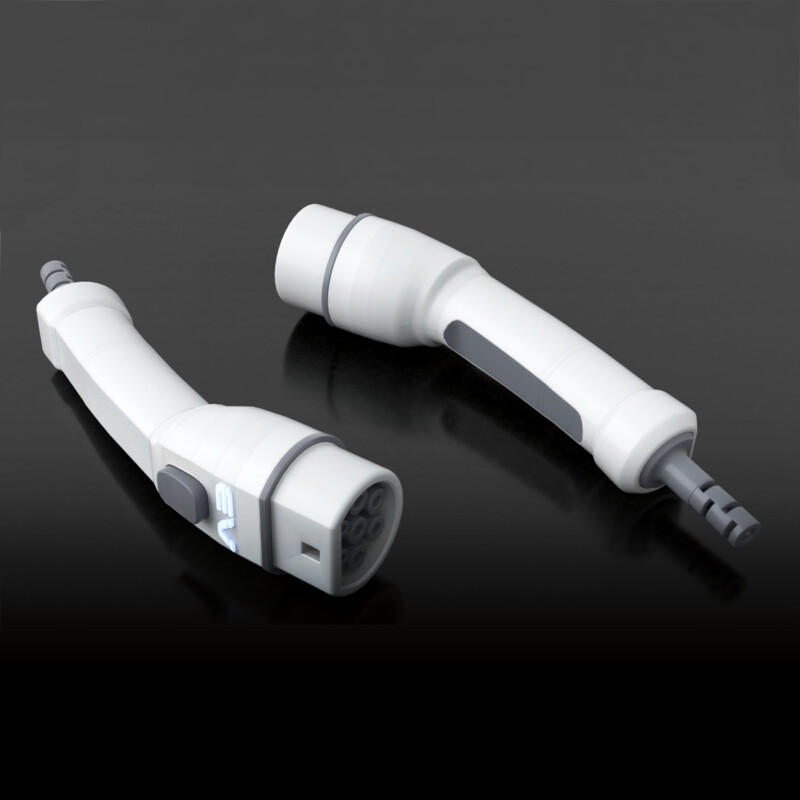
A generic EV charging gun I initially designed and prototyped in Plasticity, only to later completely redesign from scratch in Modo.
This is a generic EV wall charger I designed for my use in this effort to rebuild specific illustrations.
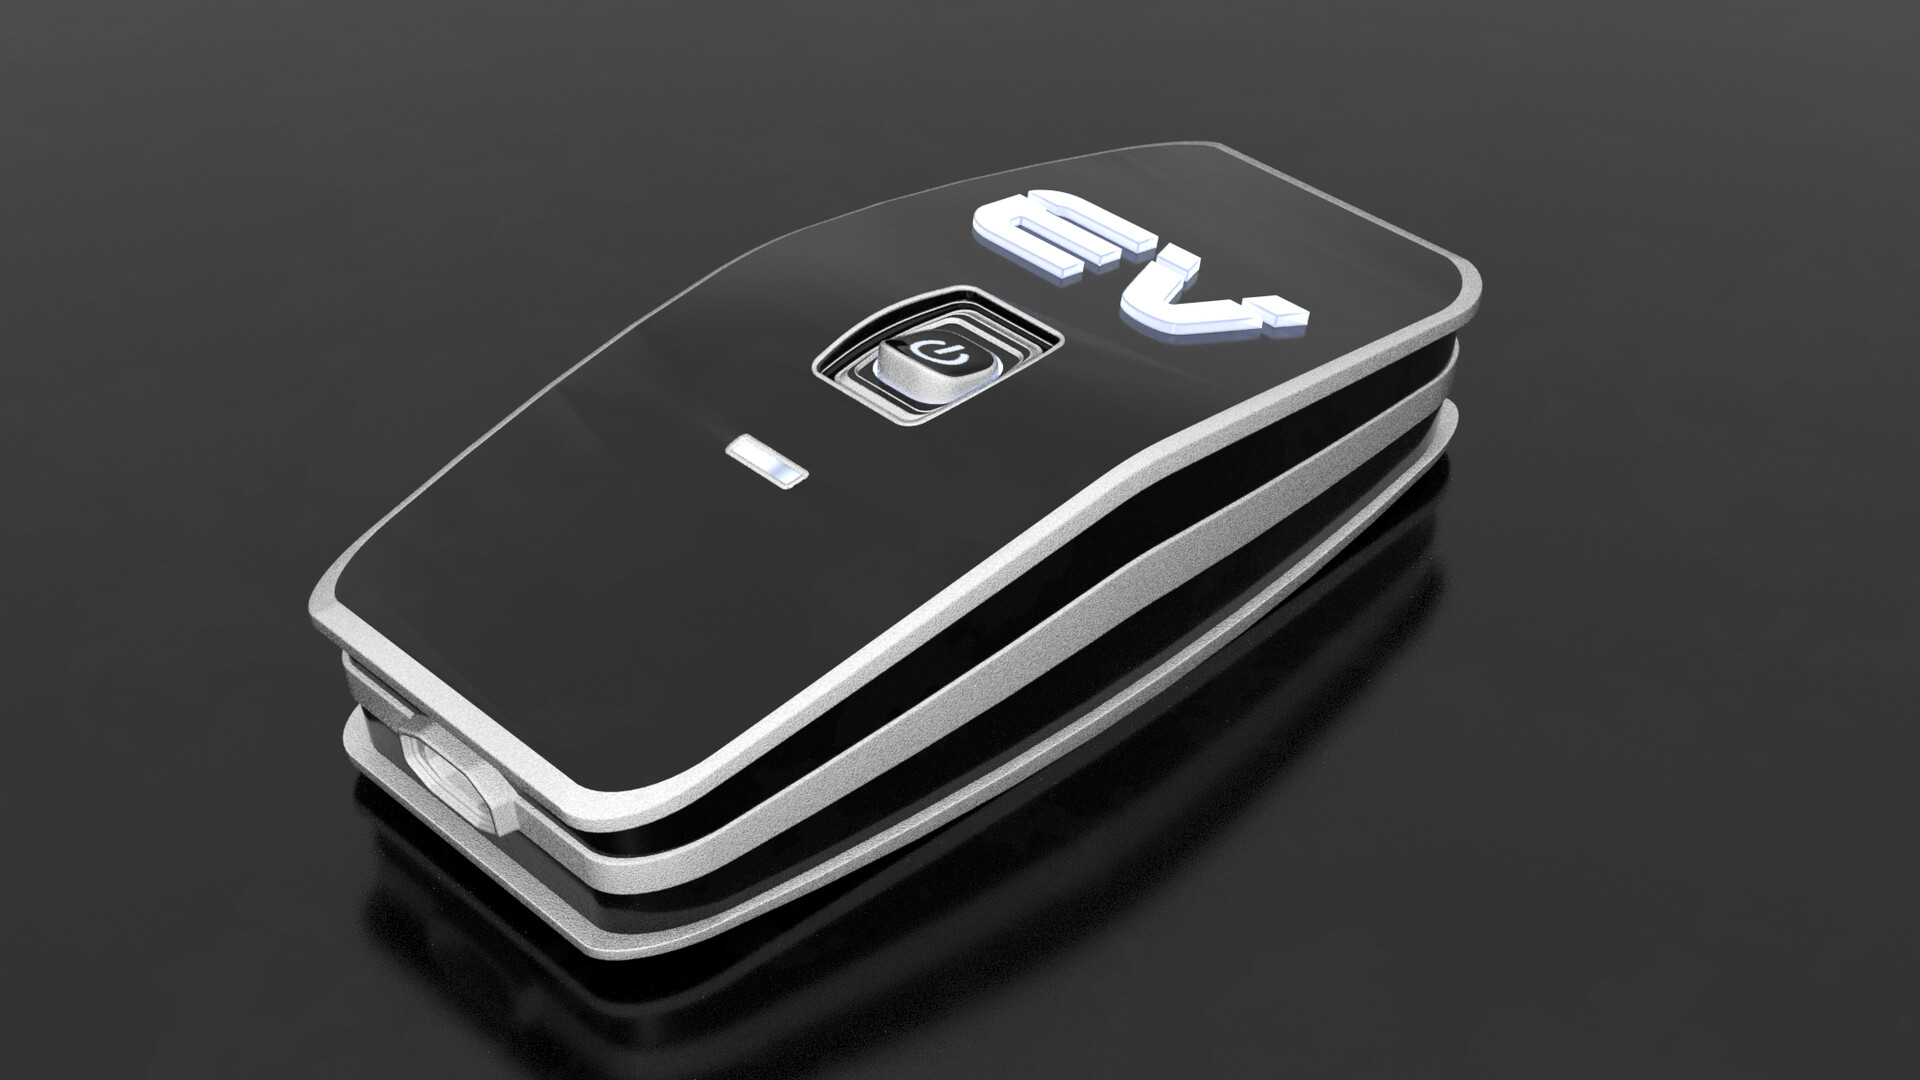
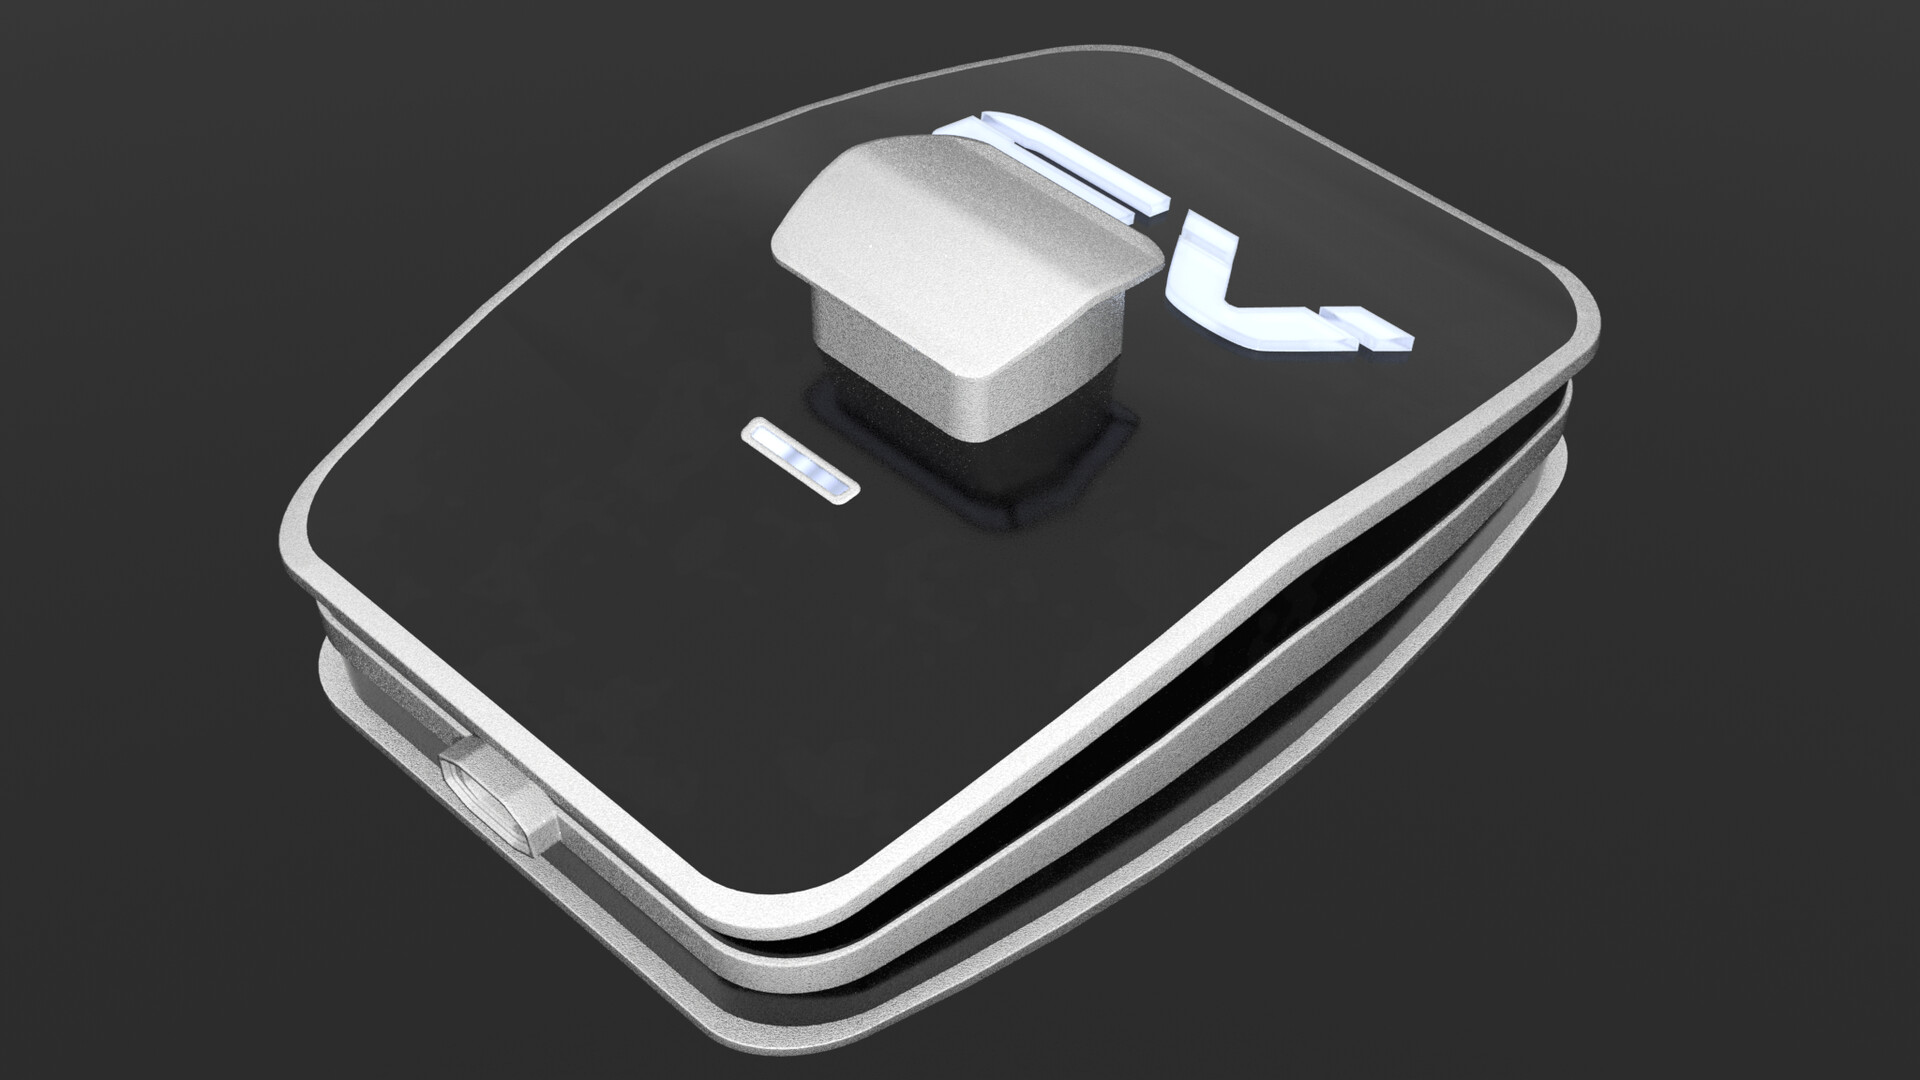
This is a generic EV mobile charger I designed for my use in this effort to rebuild specific illustrations.
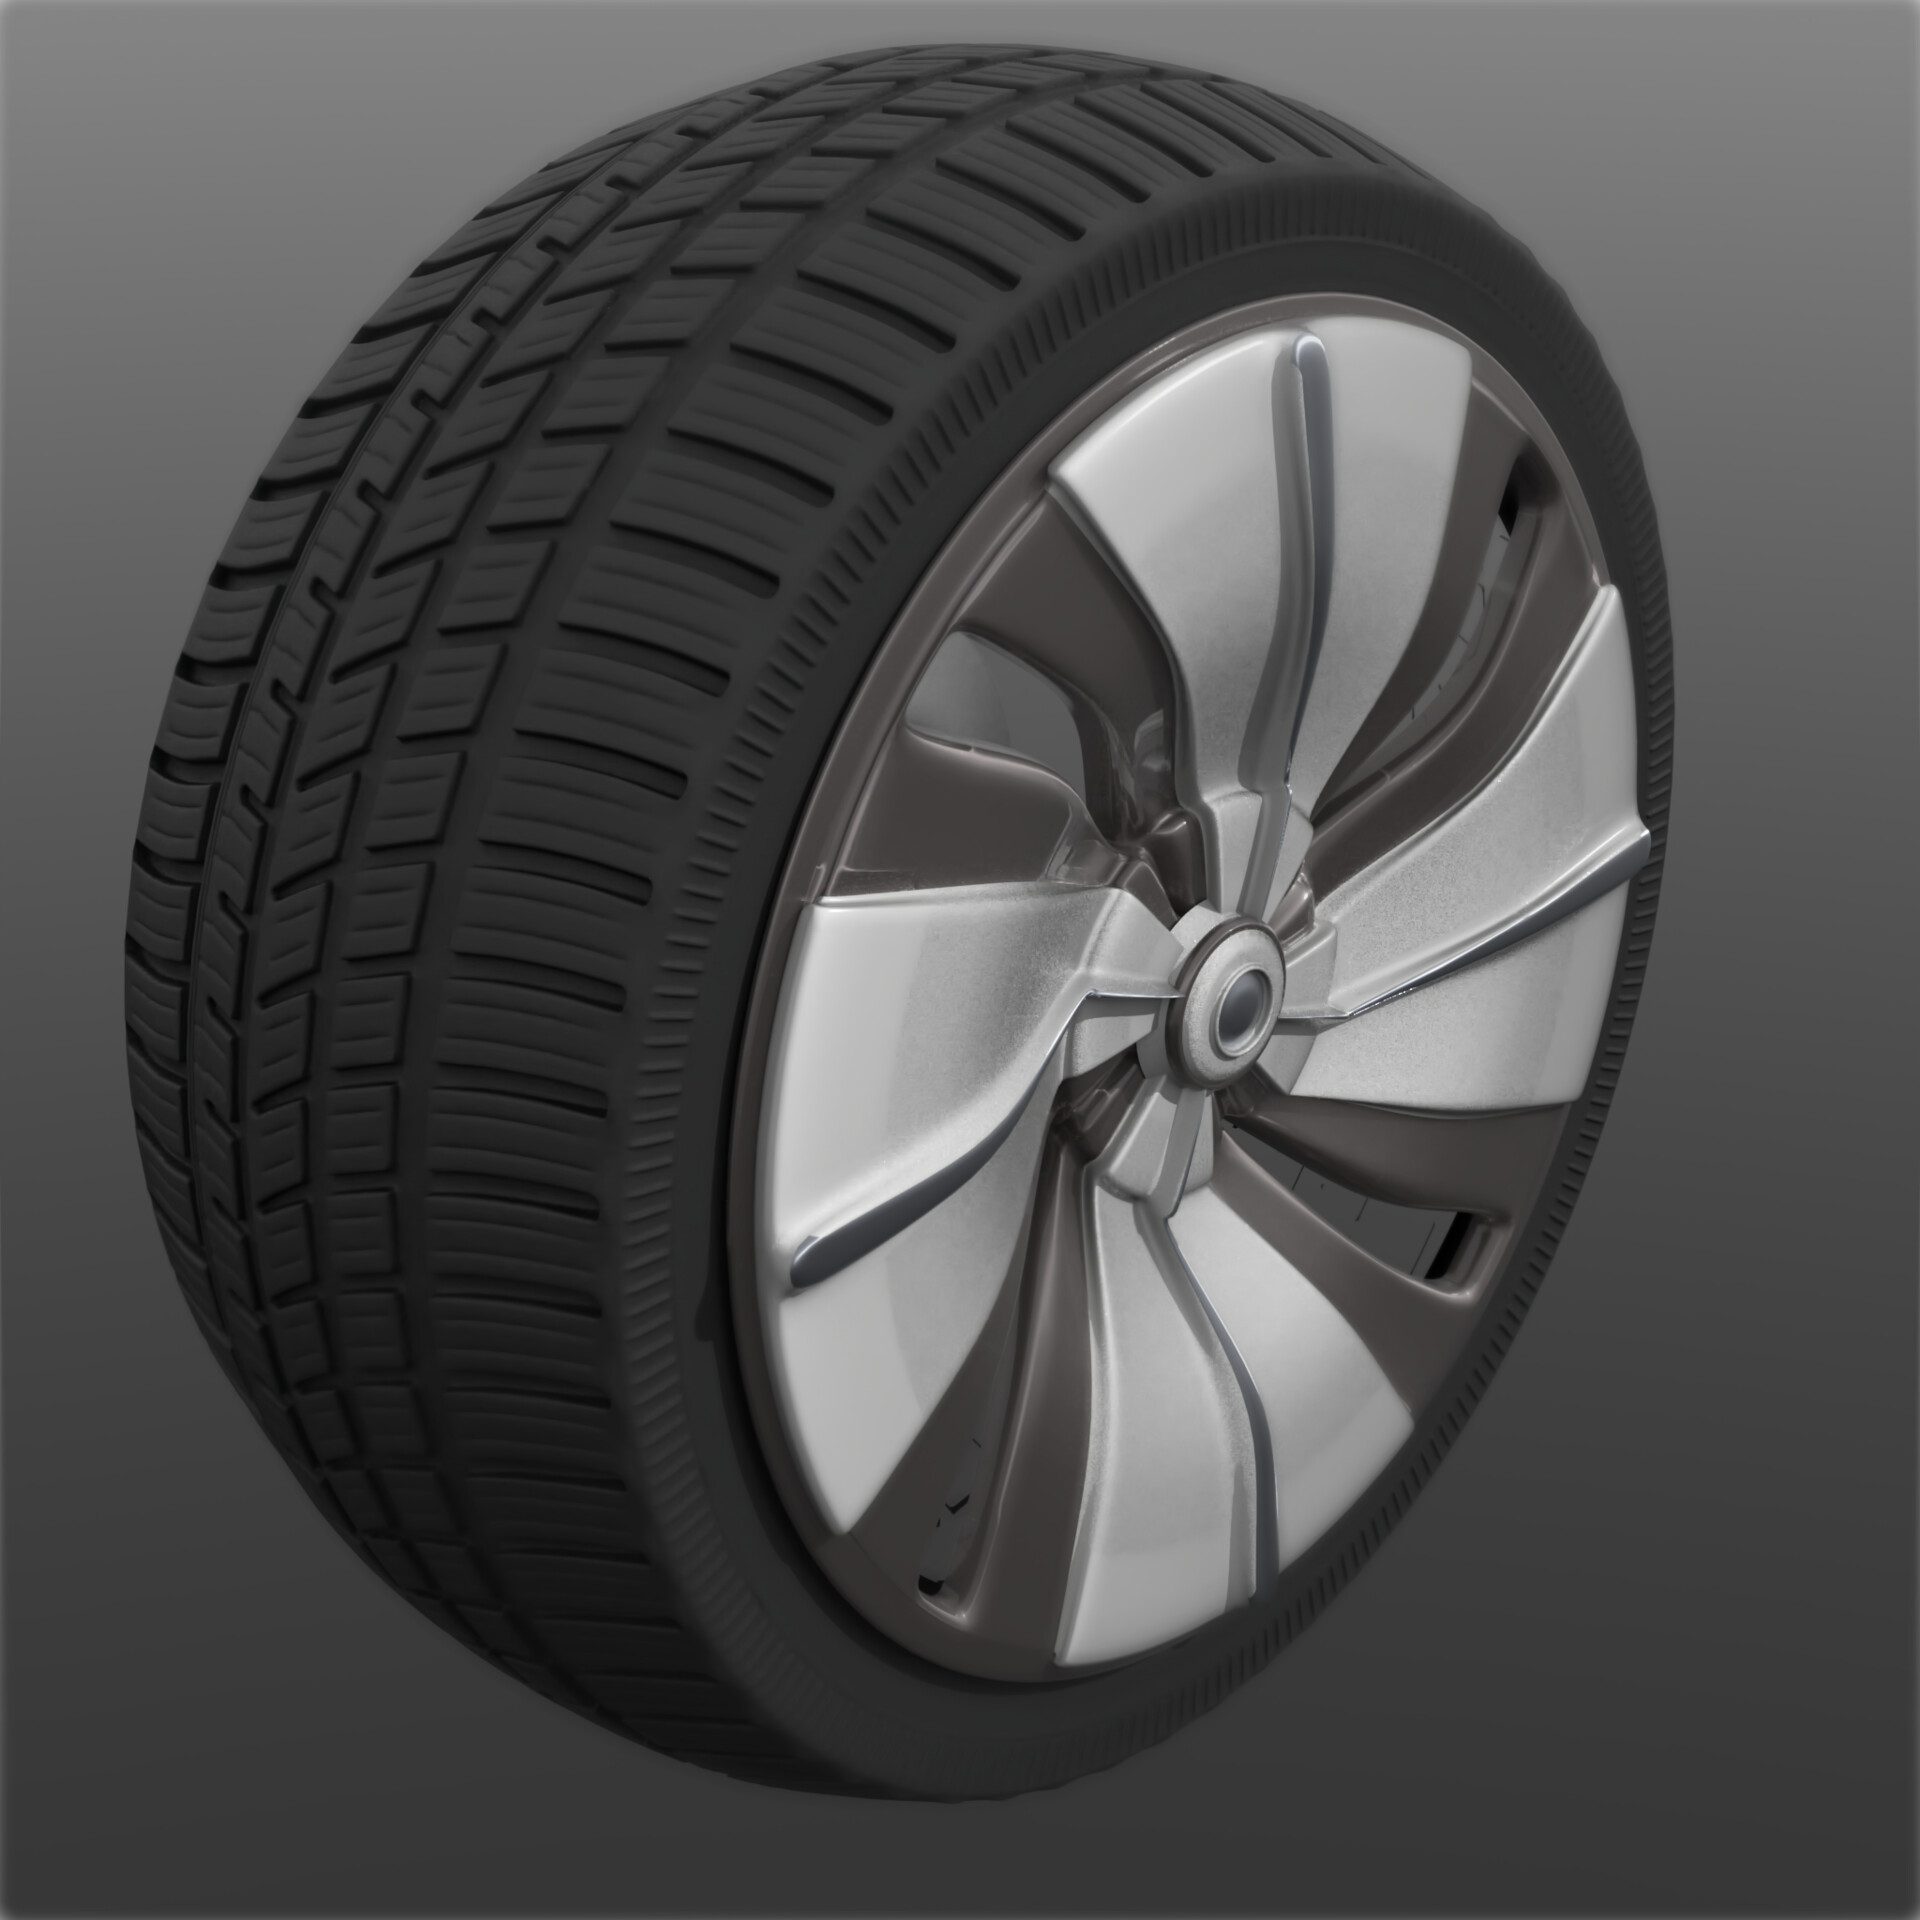
This is a wheel-and-tyre I modelled in Modo using a procedural setup (With some significant assistance from an exemplar by Eugene Fil (https://www.artstation.com/eugenethemodeler) - cheers mate!)
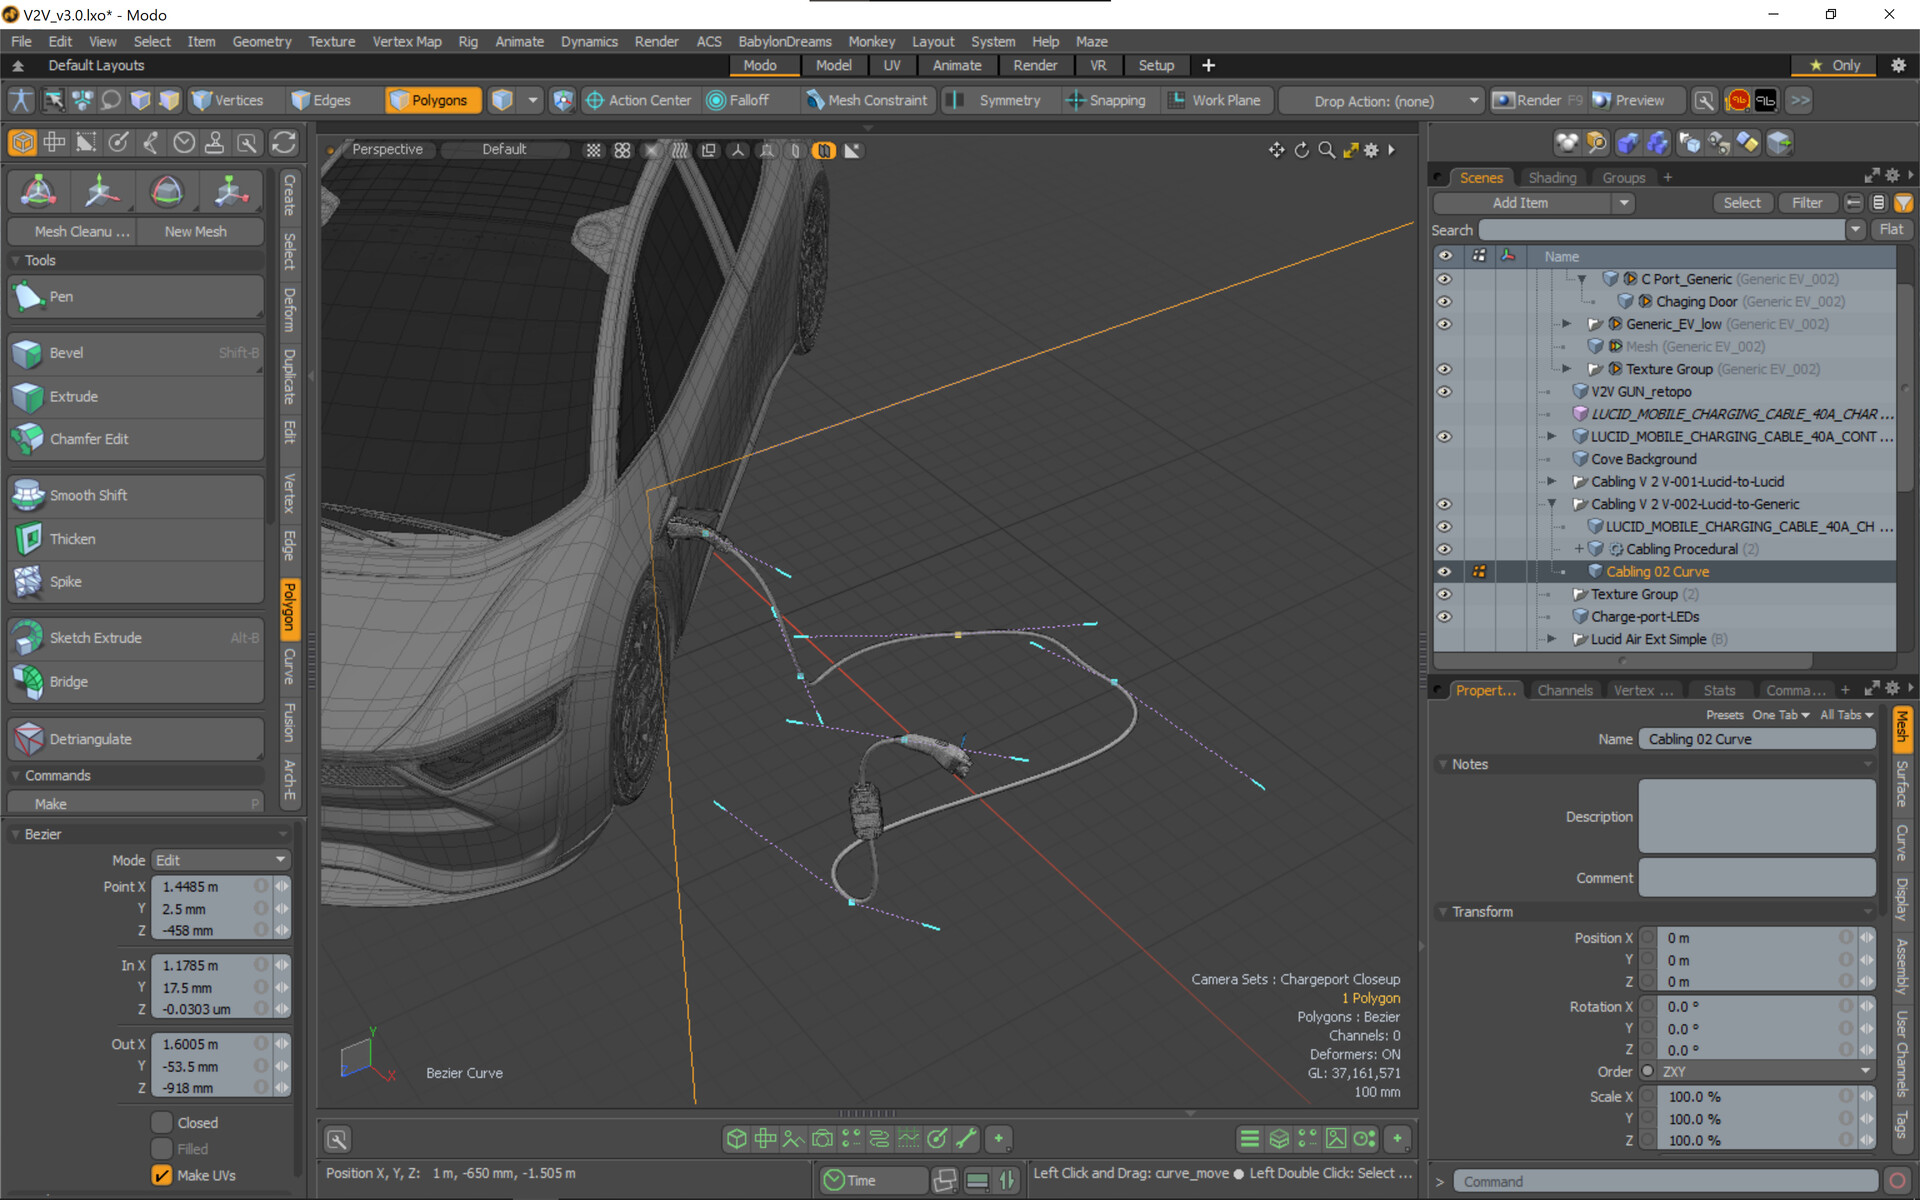
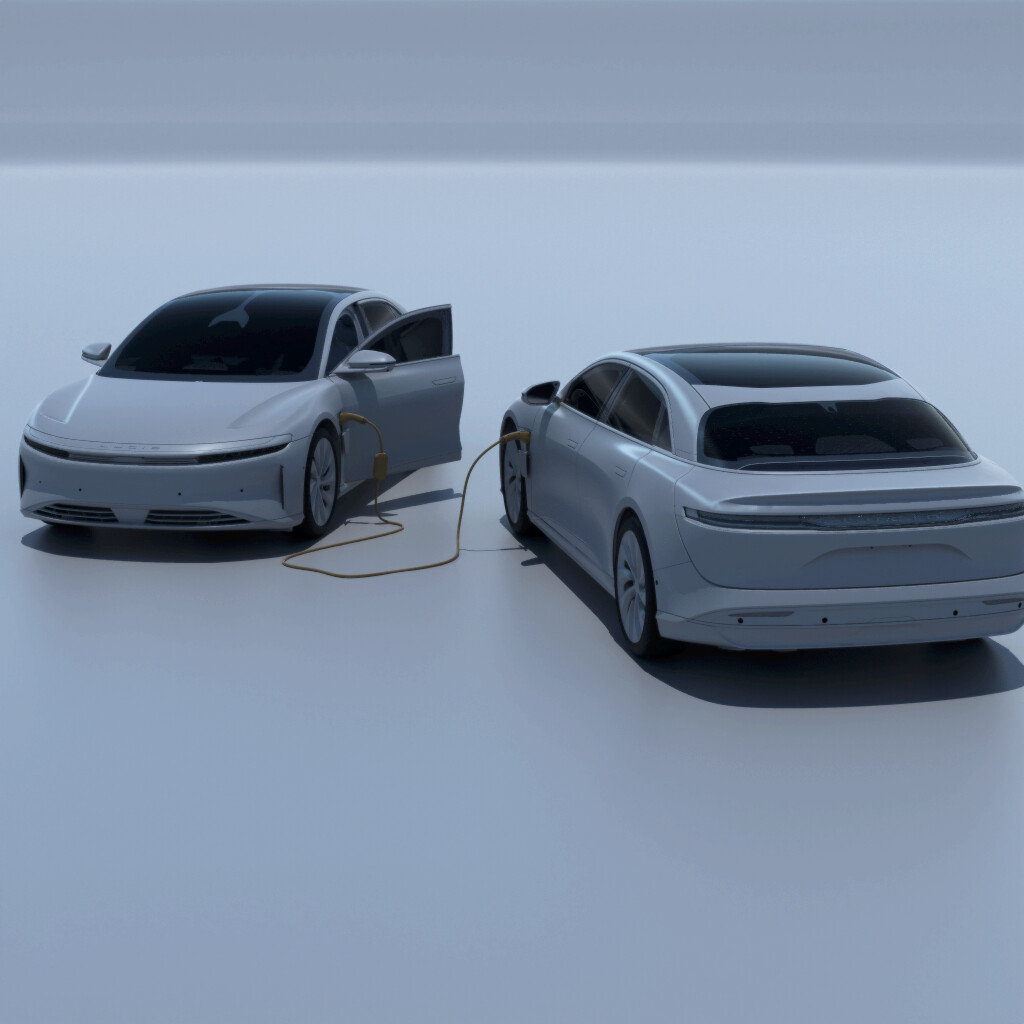
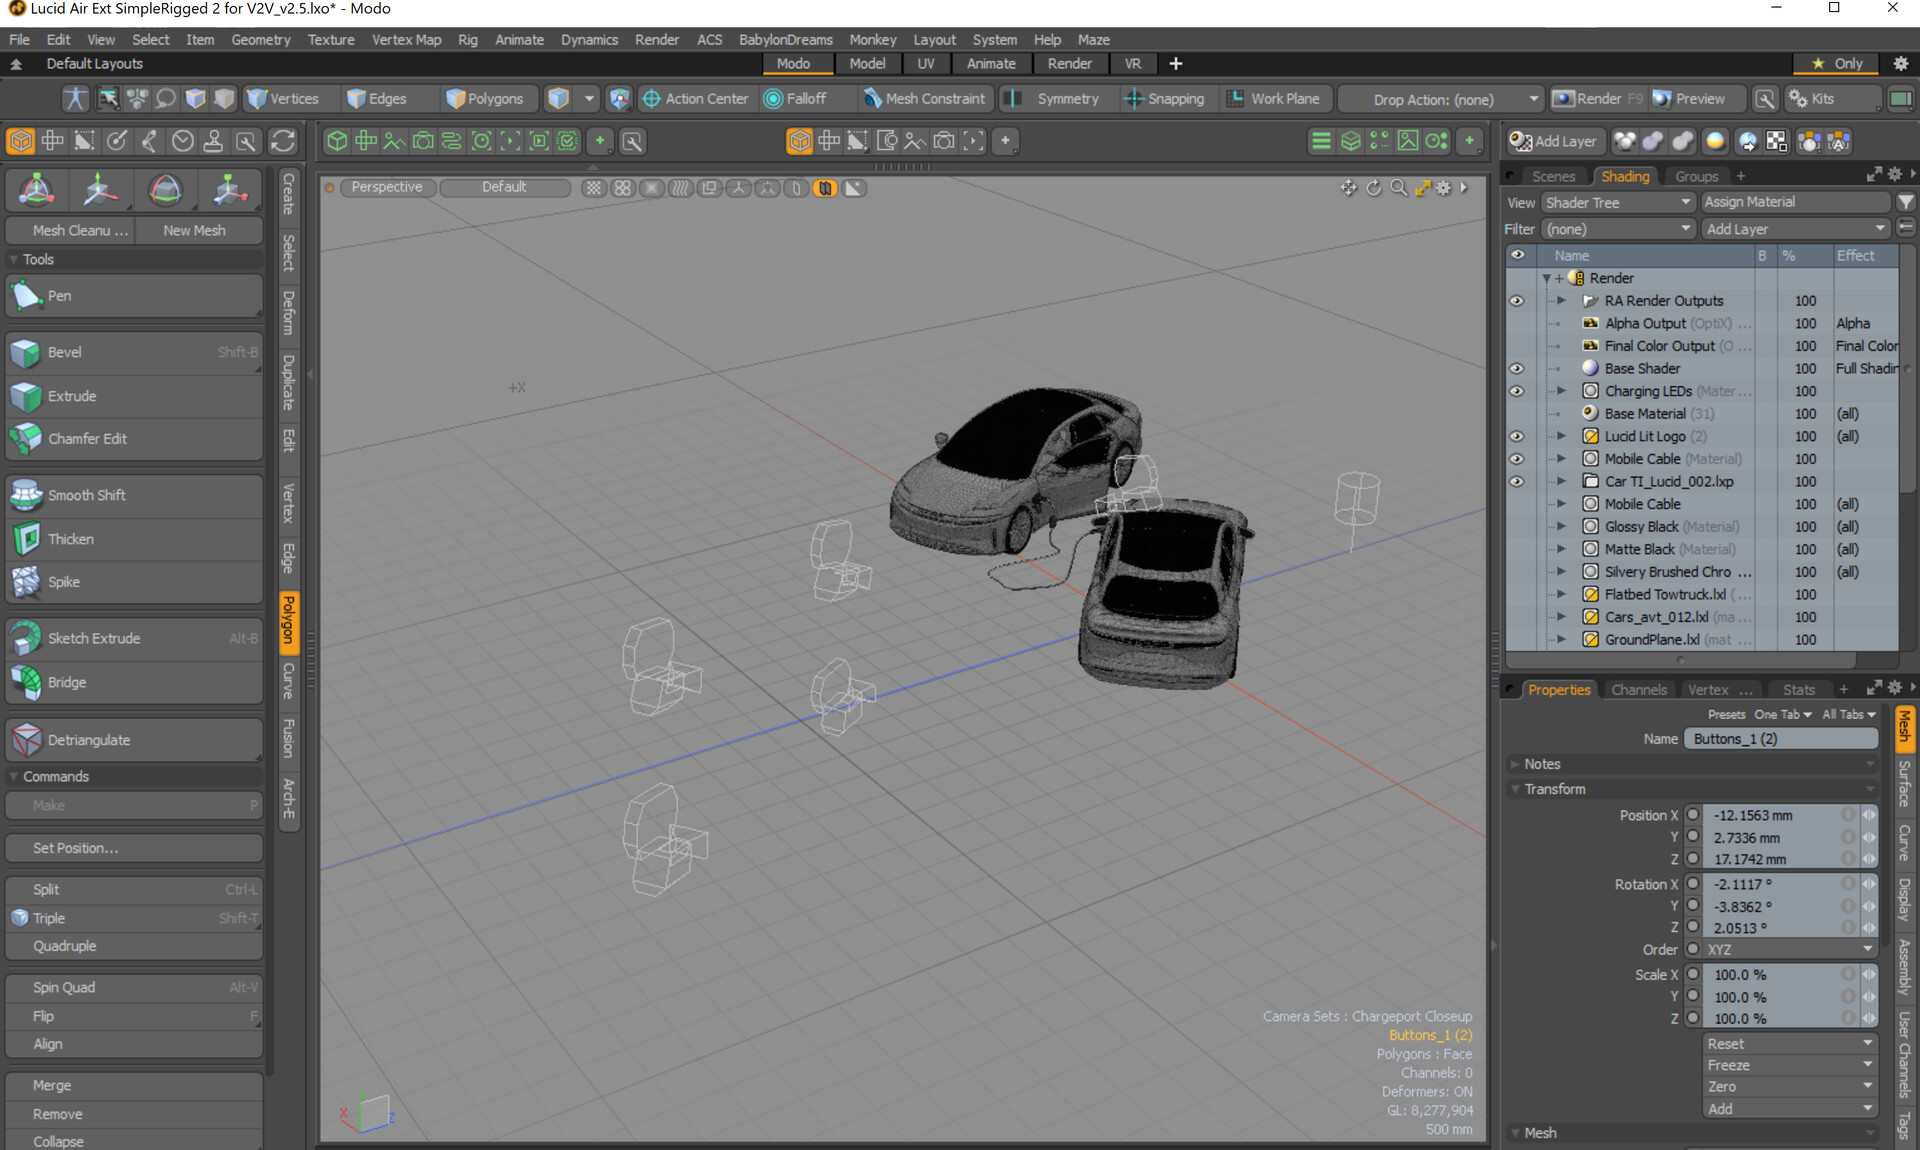
This shows how using a bezier deformer combined with some procedural geometry leads to an *easily* art-directable EV charging cable.
Bezier-based arrow asset thumbnail: I created arrows which matched Lucid's extant style-guide Illustrator "3D" arrows for use in annotations; these being native to the 3D scene, and literally flexible to needs, provided greater legibility and consistency.

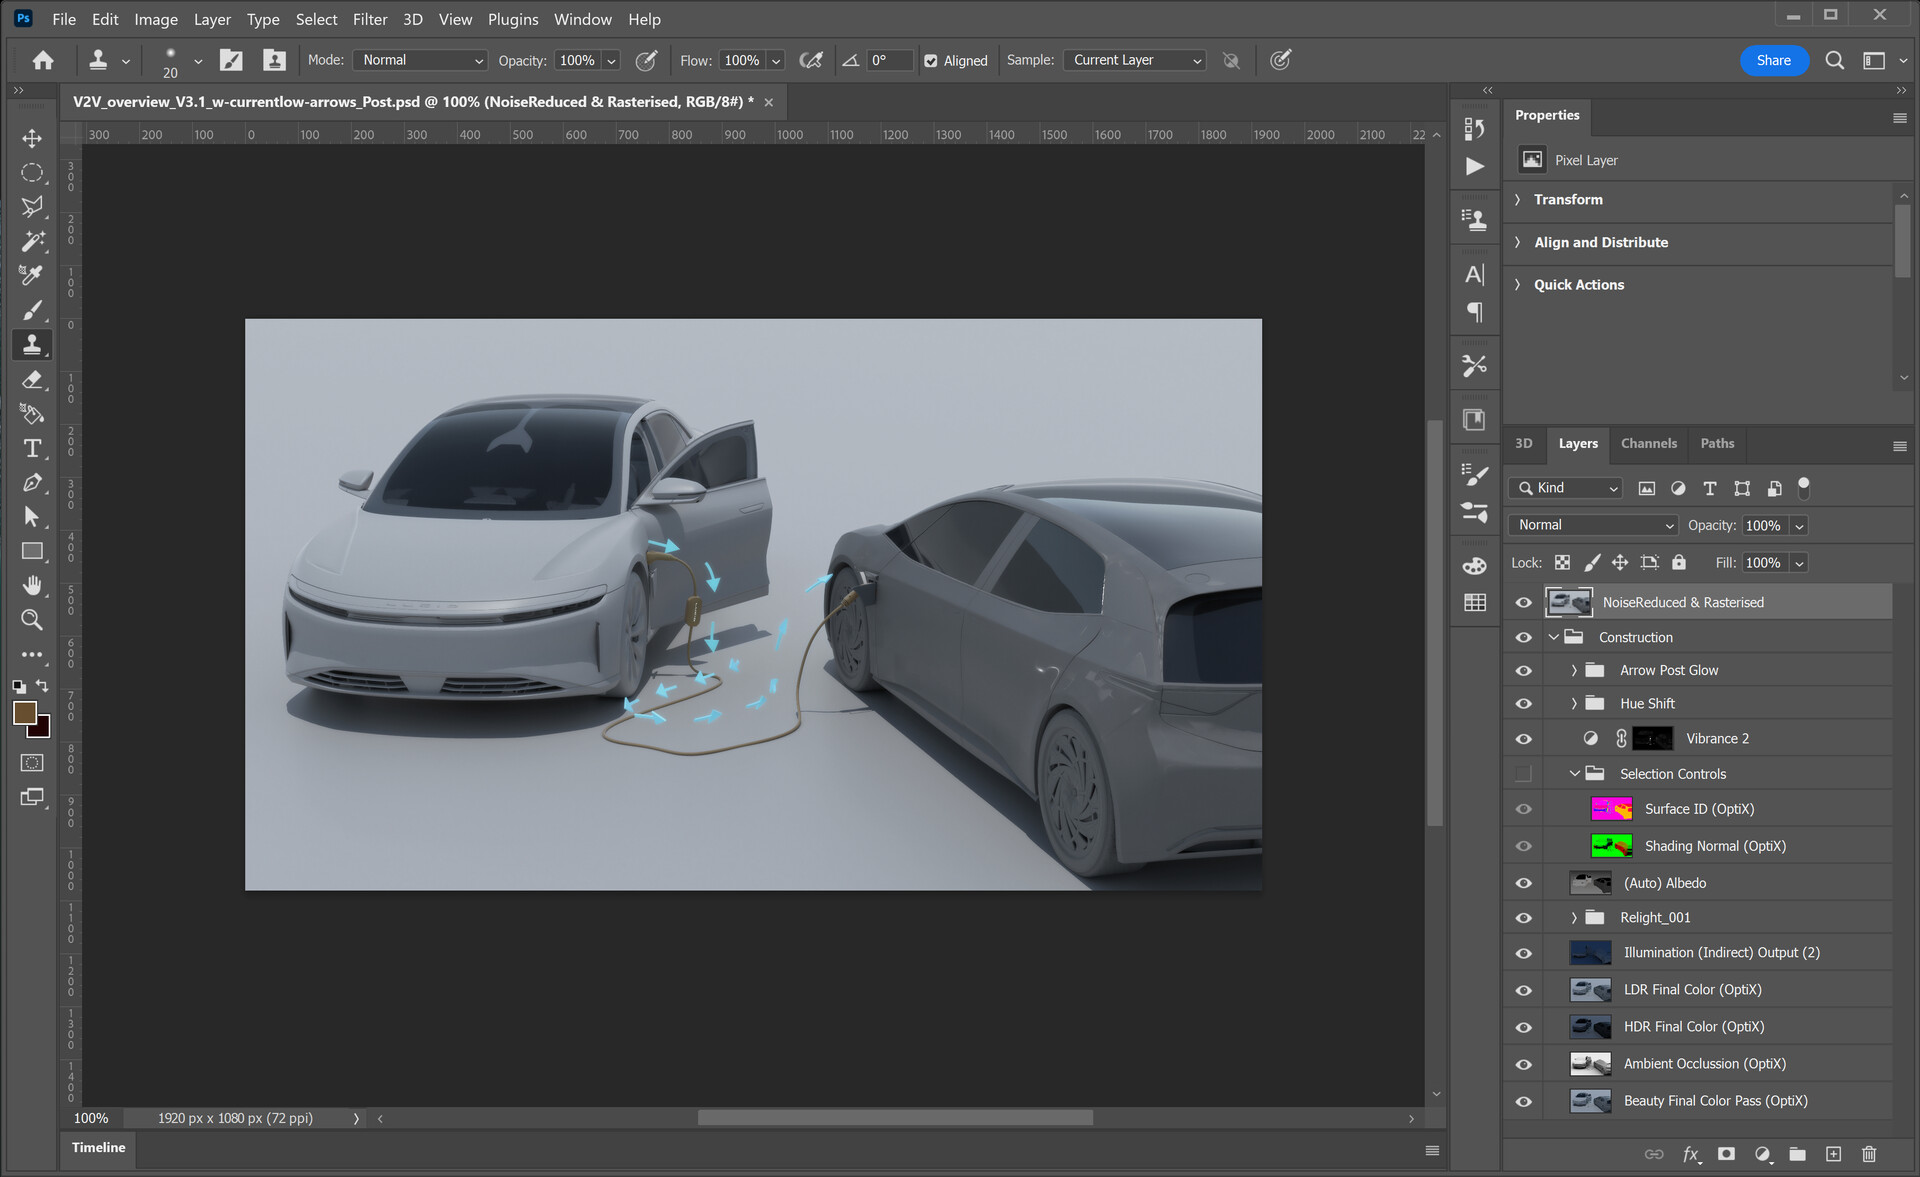
Typical post-processing PSD file showing our use of Modo's simultaneous multiple pass output to one layered PSD file setup.
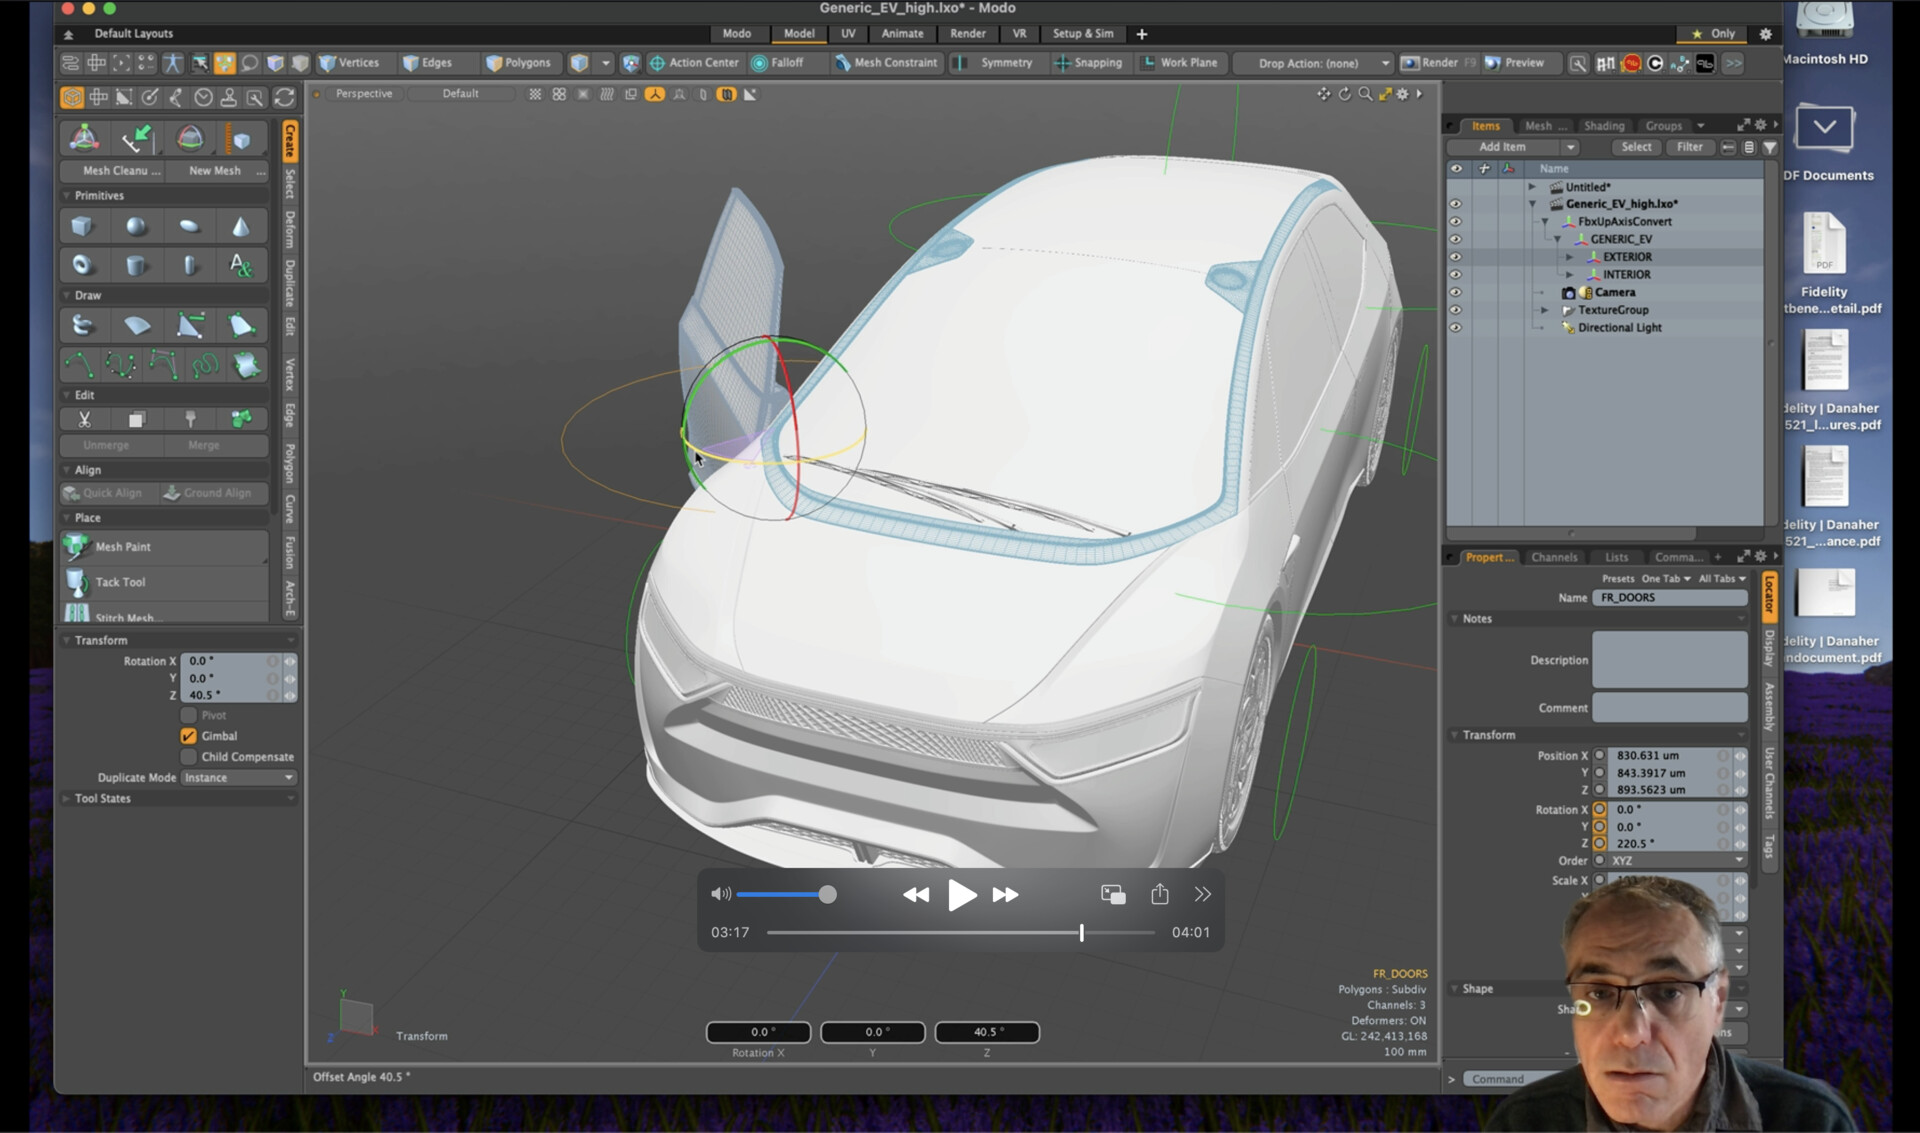
This is a screengrab of one of the tutorial videos I created: part of the meta-documentation I developed for each asset type I produced in this pipeline development process.
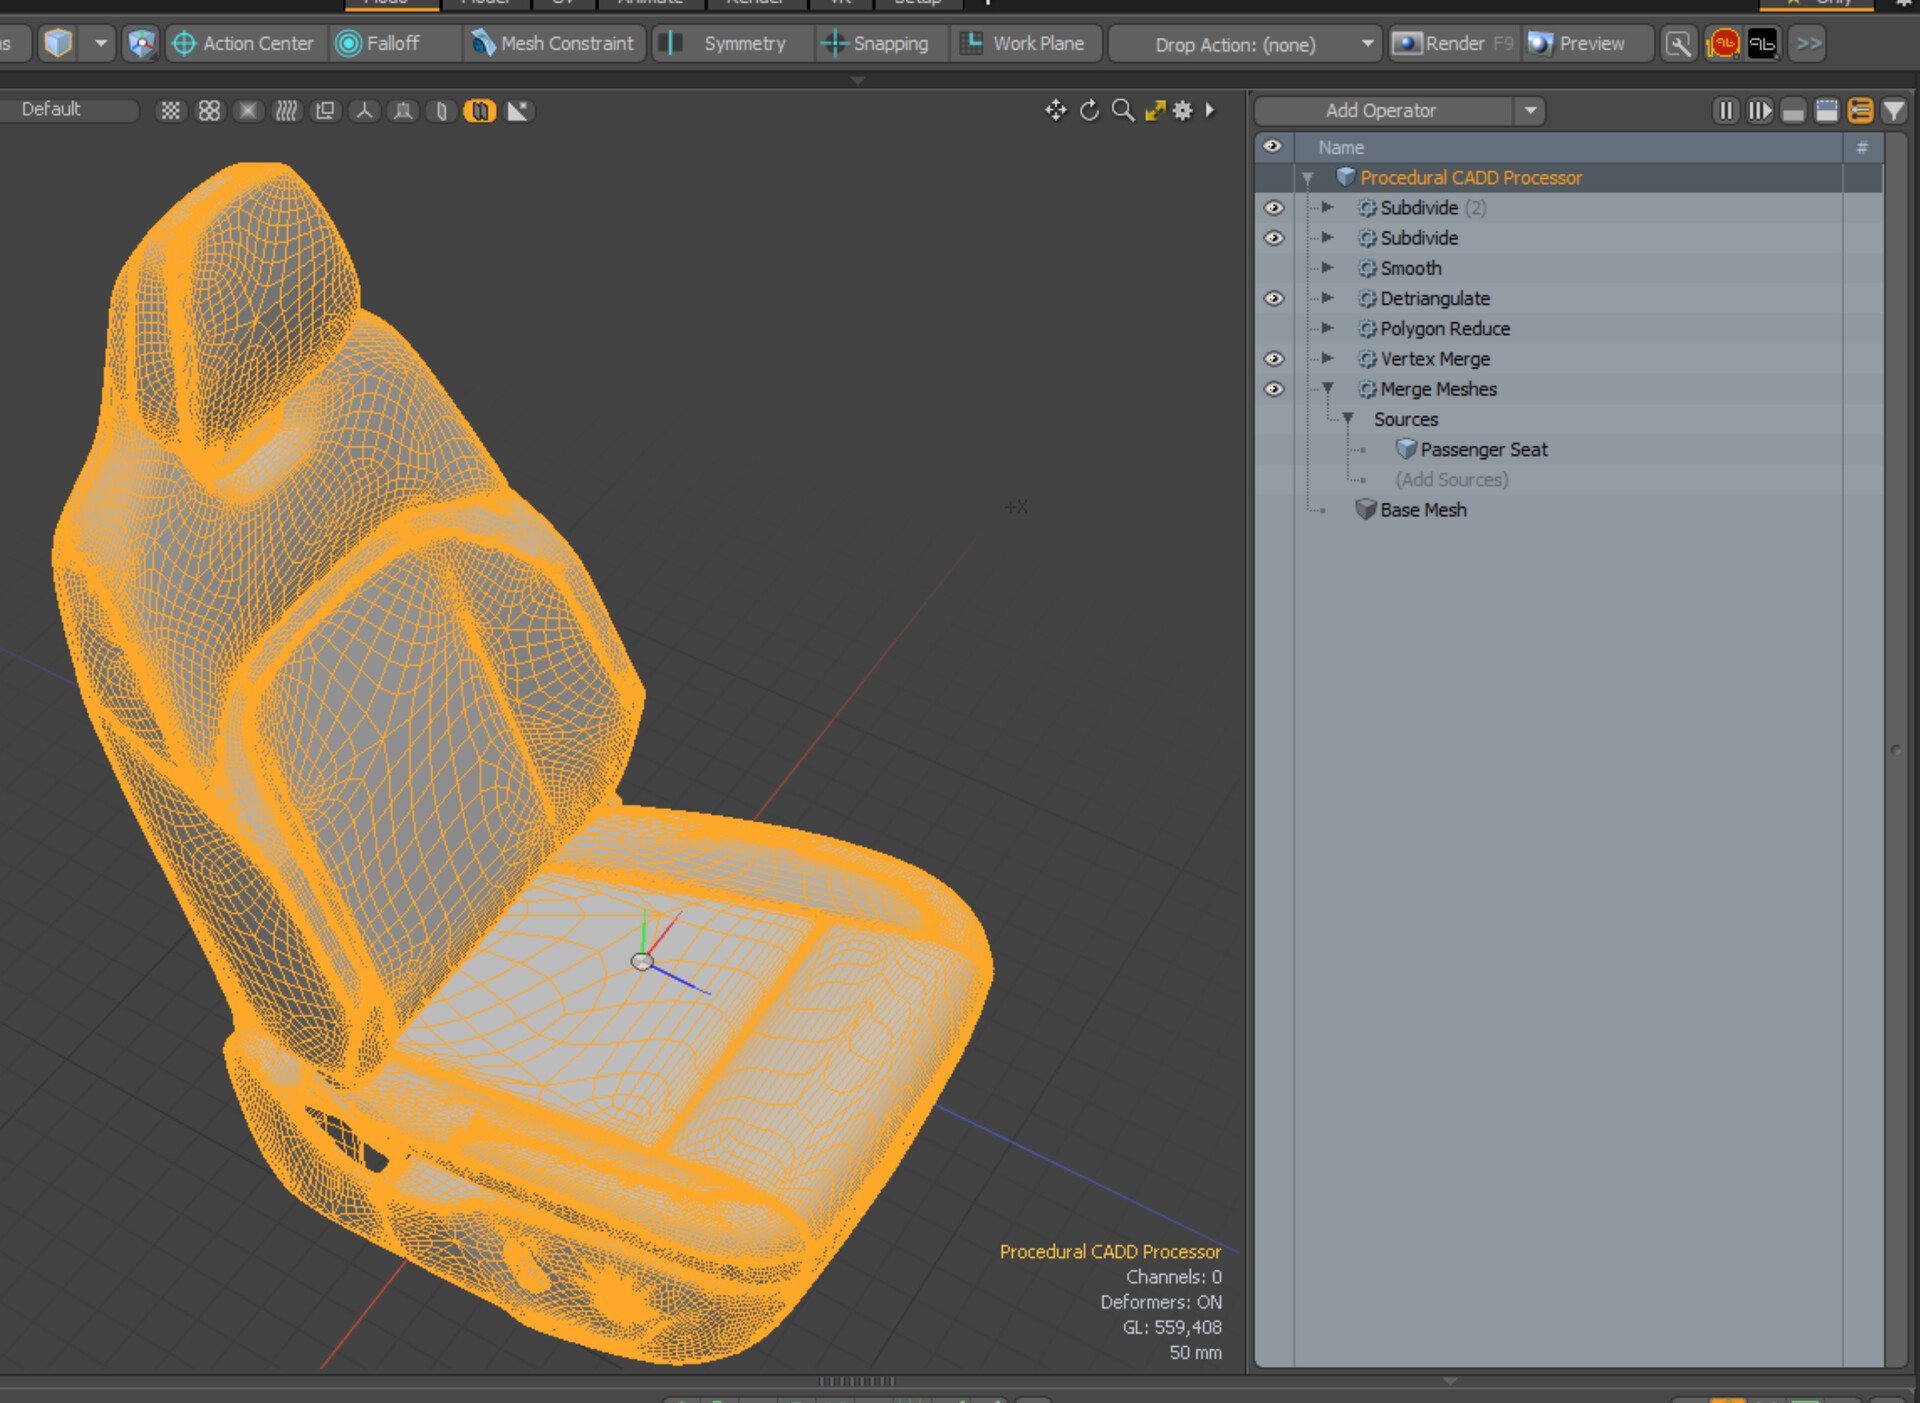
Procedural CADD processor assembly I developed in Modo to handle incoming CADD meshes in Modo.

Part of an internal Job Aide meta doc I created to explain use of the bezier flexible arrow preset I developed, used and deployed for Lucid Motors.
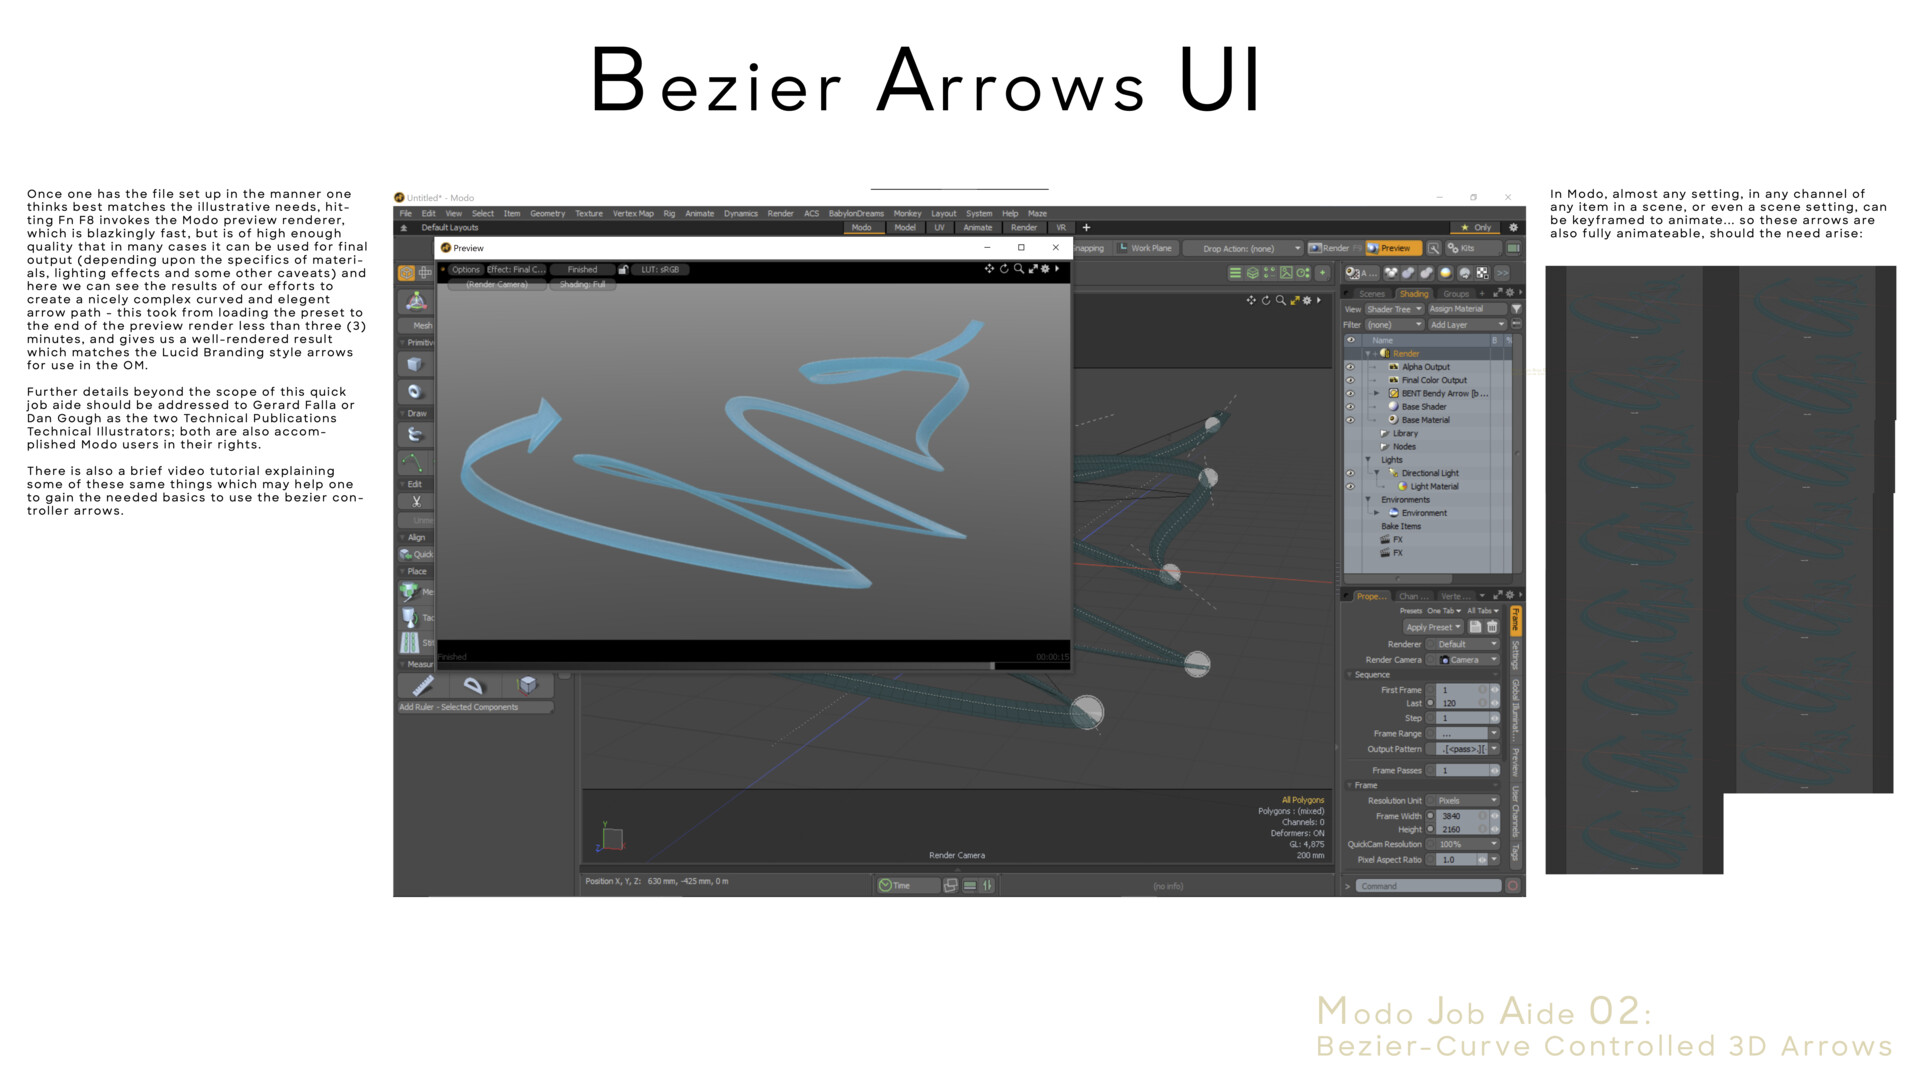
Part of an internal Job Aide meta doc I created to explain use of the bezier flexible arrow preset I developed, used and deployed for Lucid Motors.
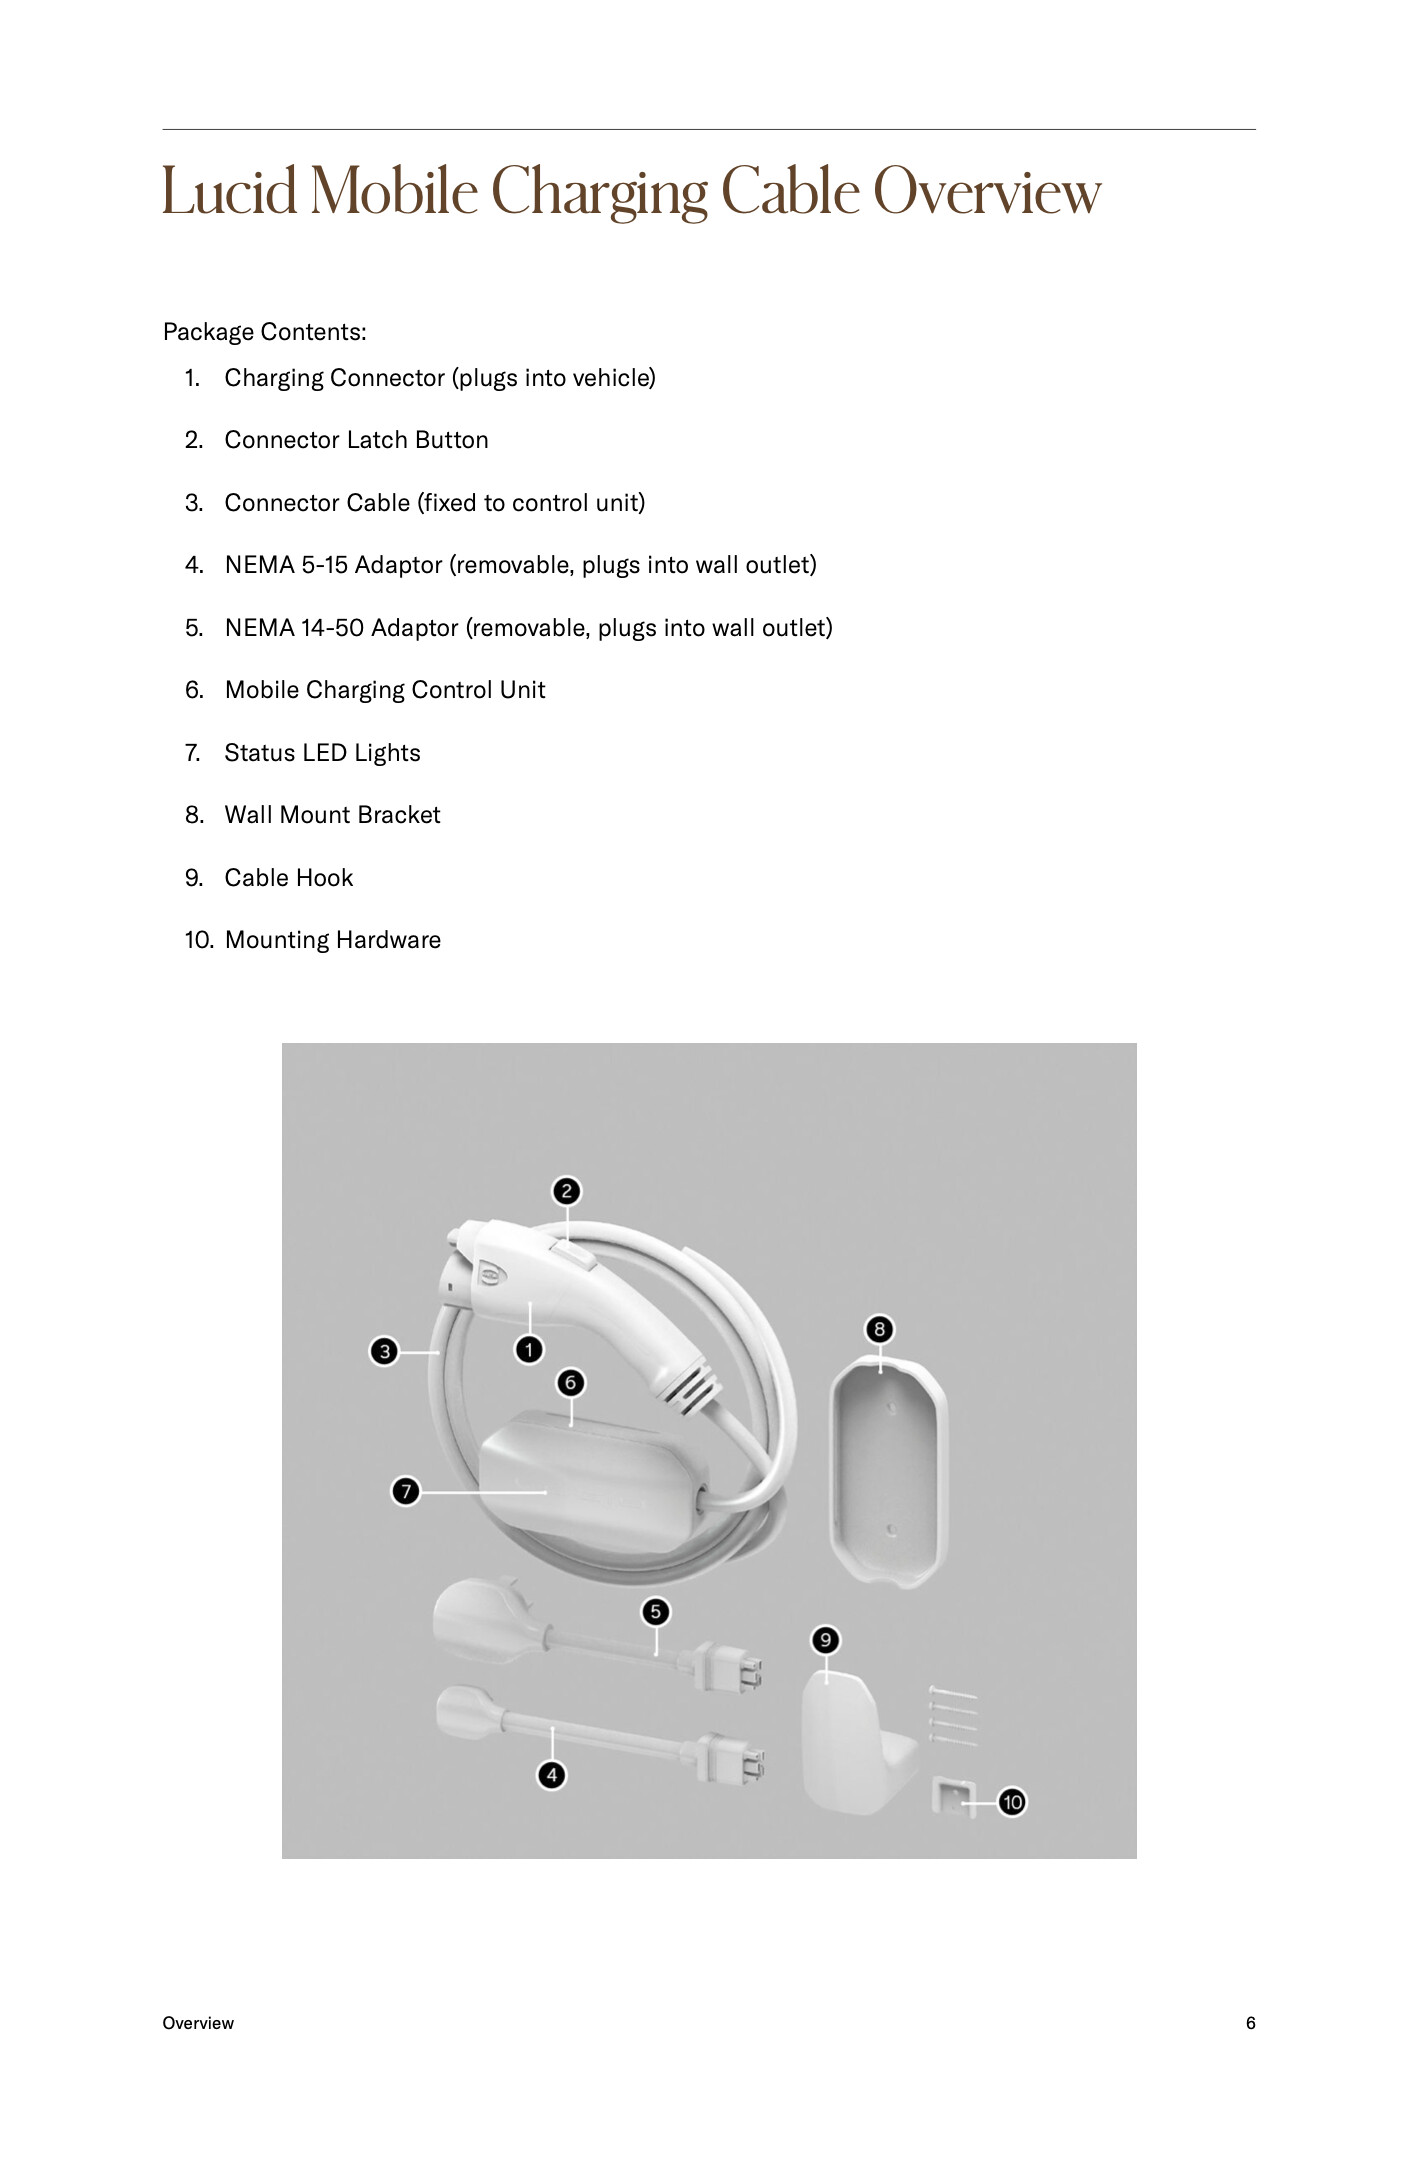
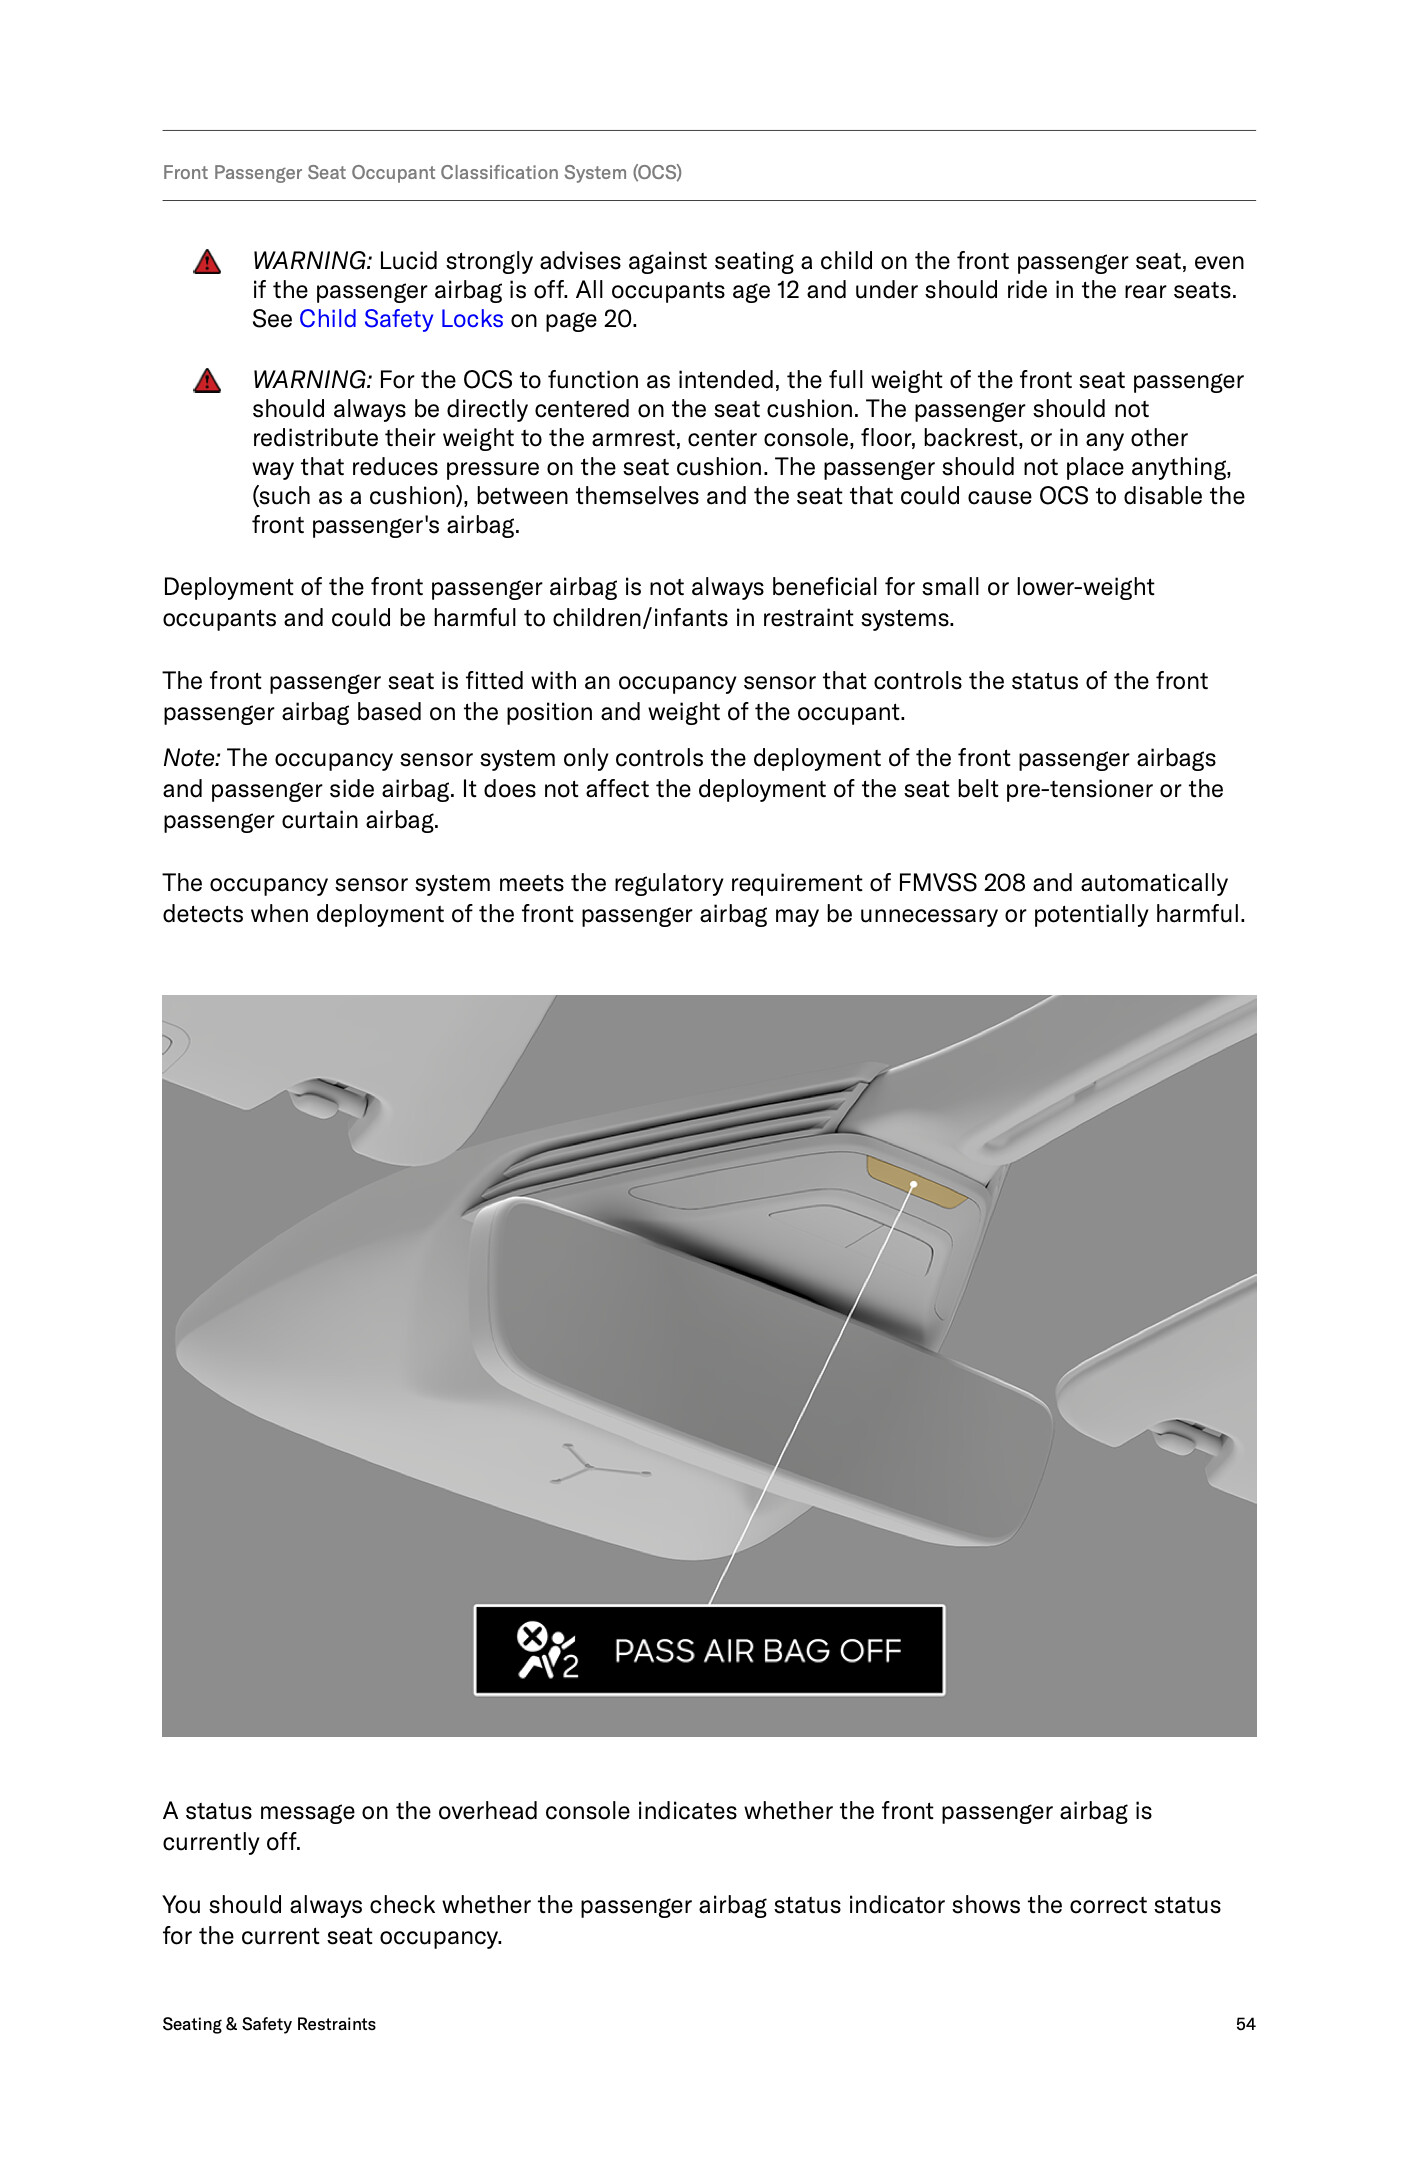
Illustrations I completed for Lucid public-facing documents, which can readily be found on their website. This is from the Mobile Charging Cable User's Guide.
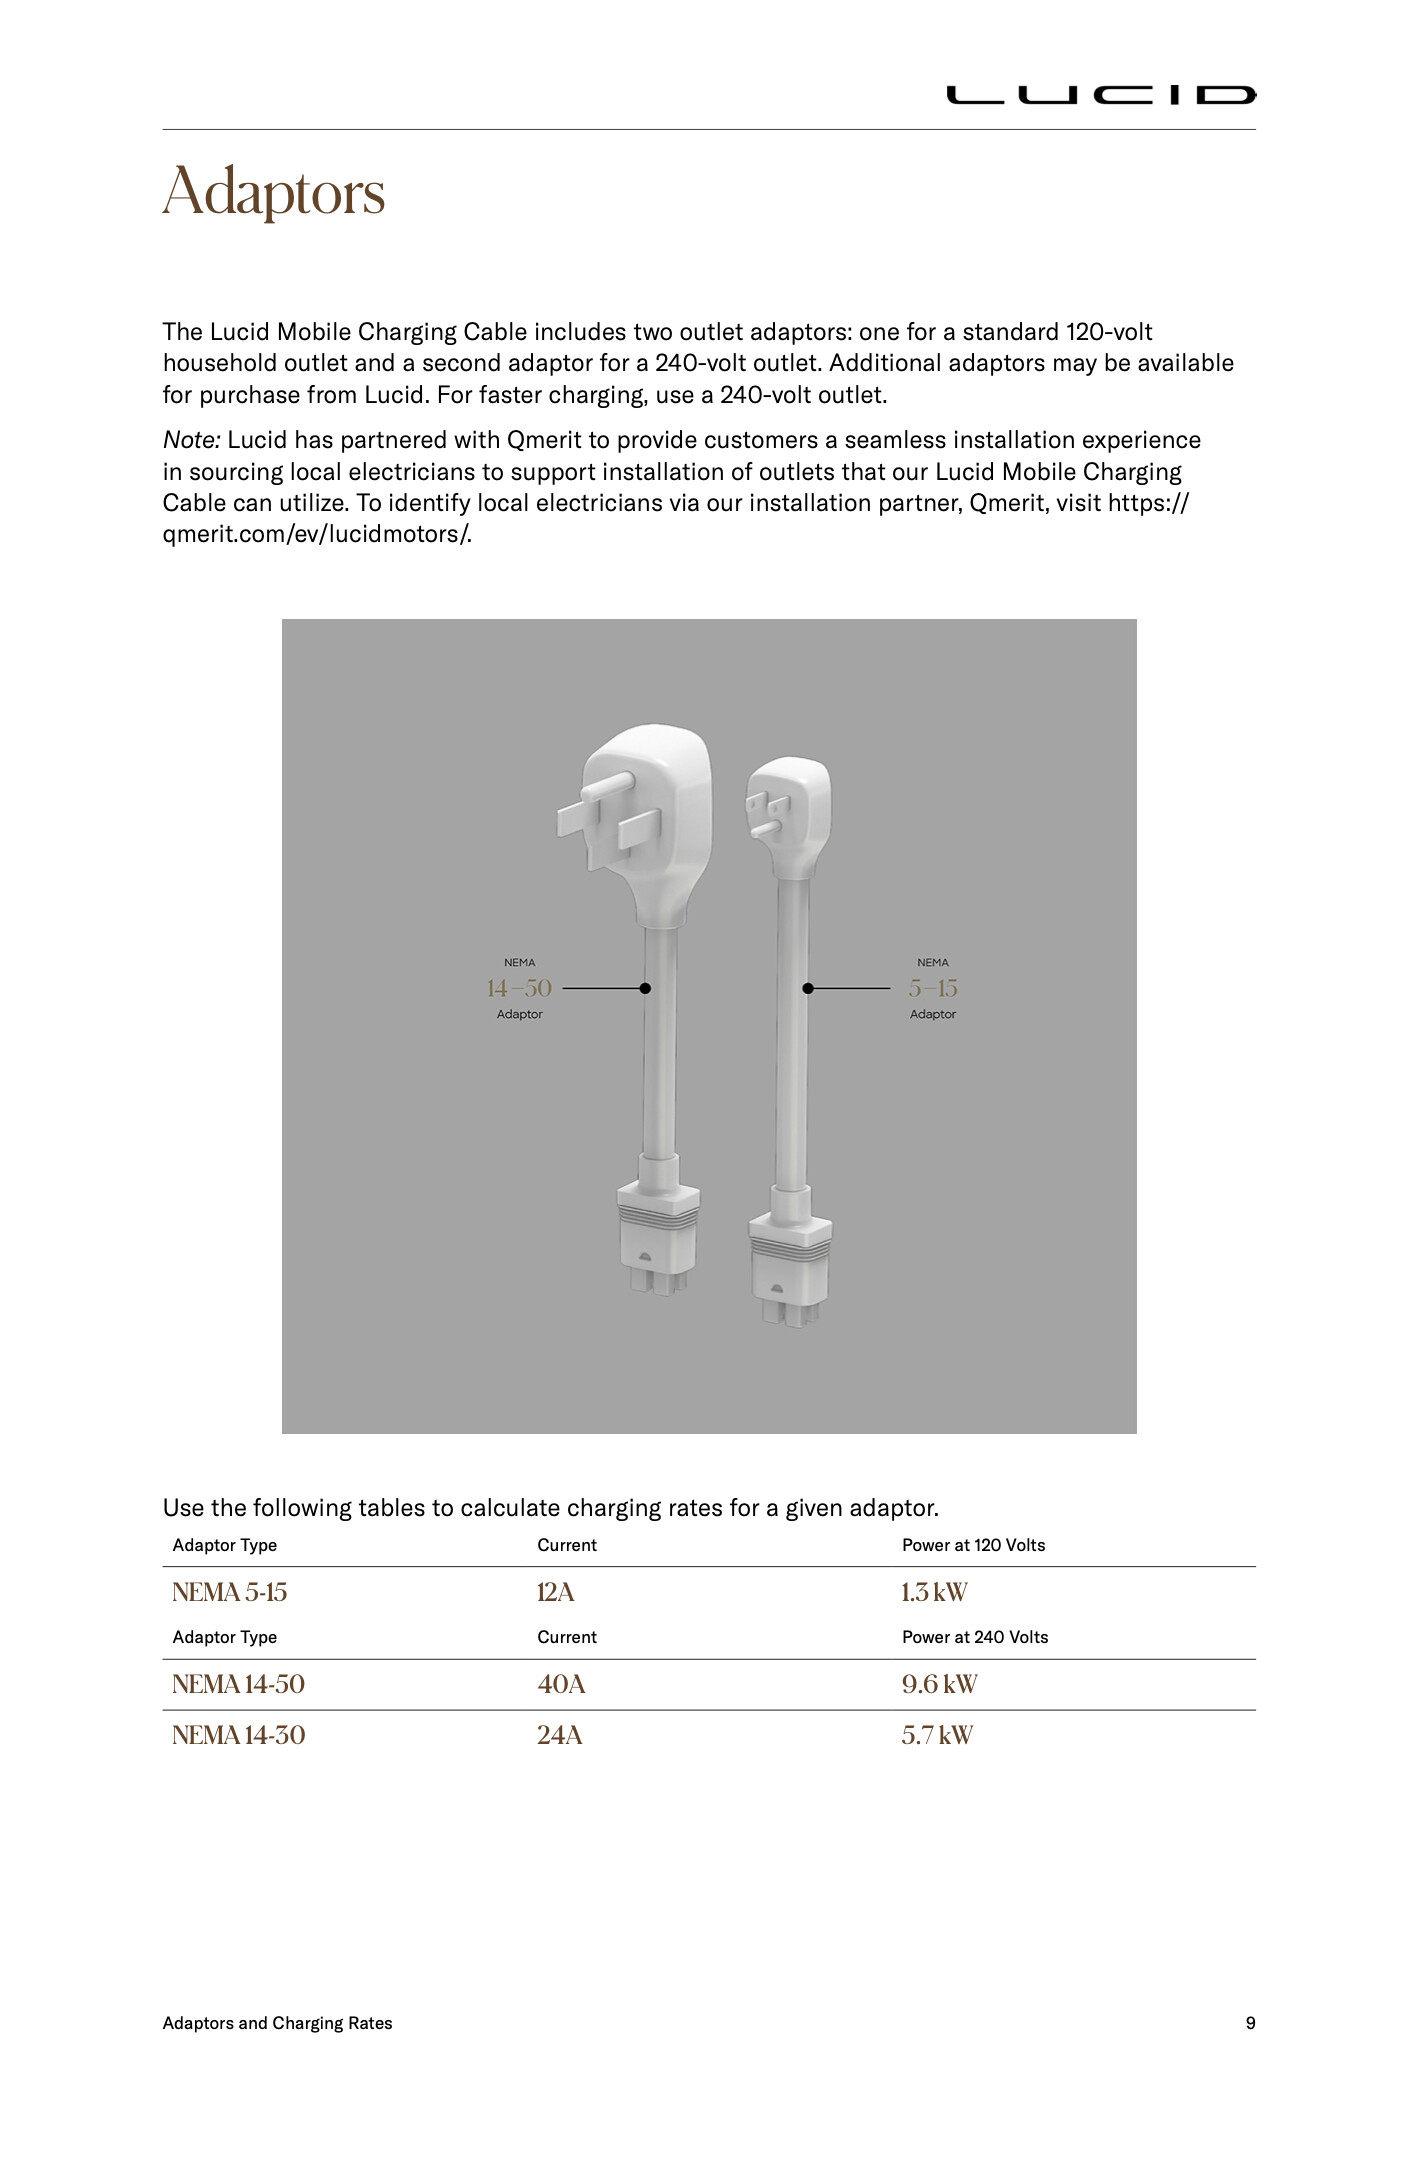
Illustrations I completed for Lucid public-facing documents, which can readily be found on their website. This is from the Mobile Charging Cable User's Guide.
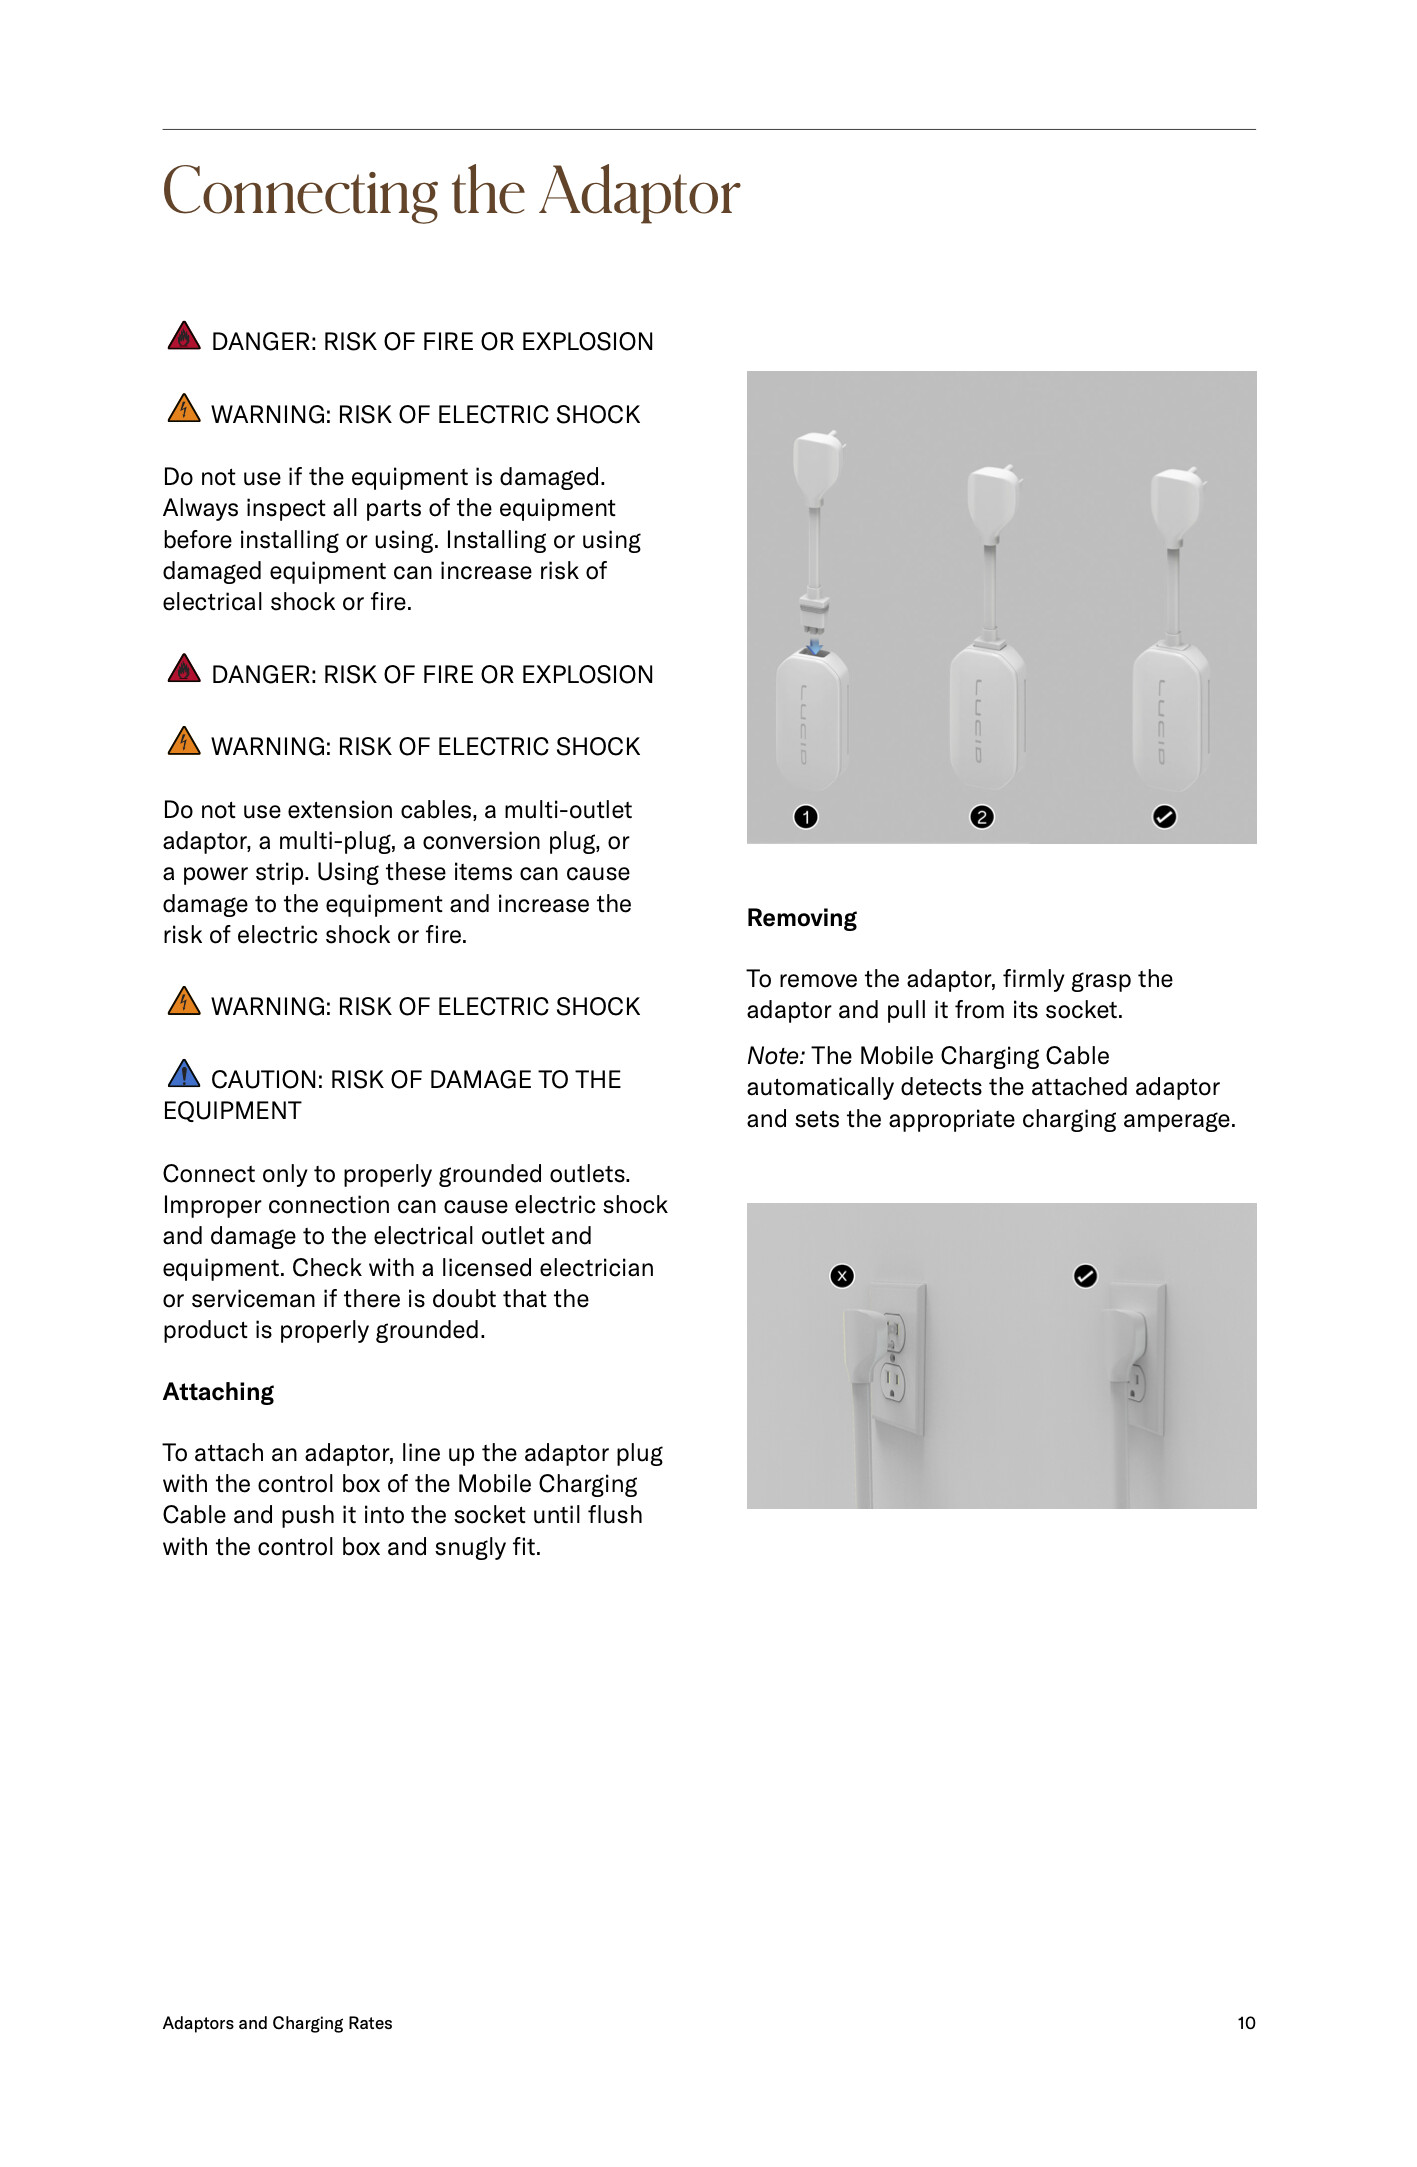
Illustrations I completed for Lucid public-facing documents, which can readily be found on their website. This is from the Mobile Charging Cable User's Guide.
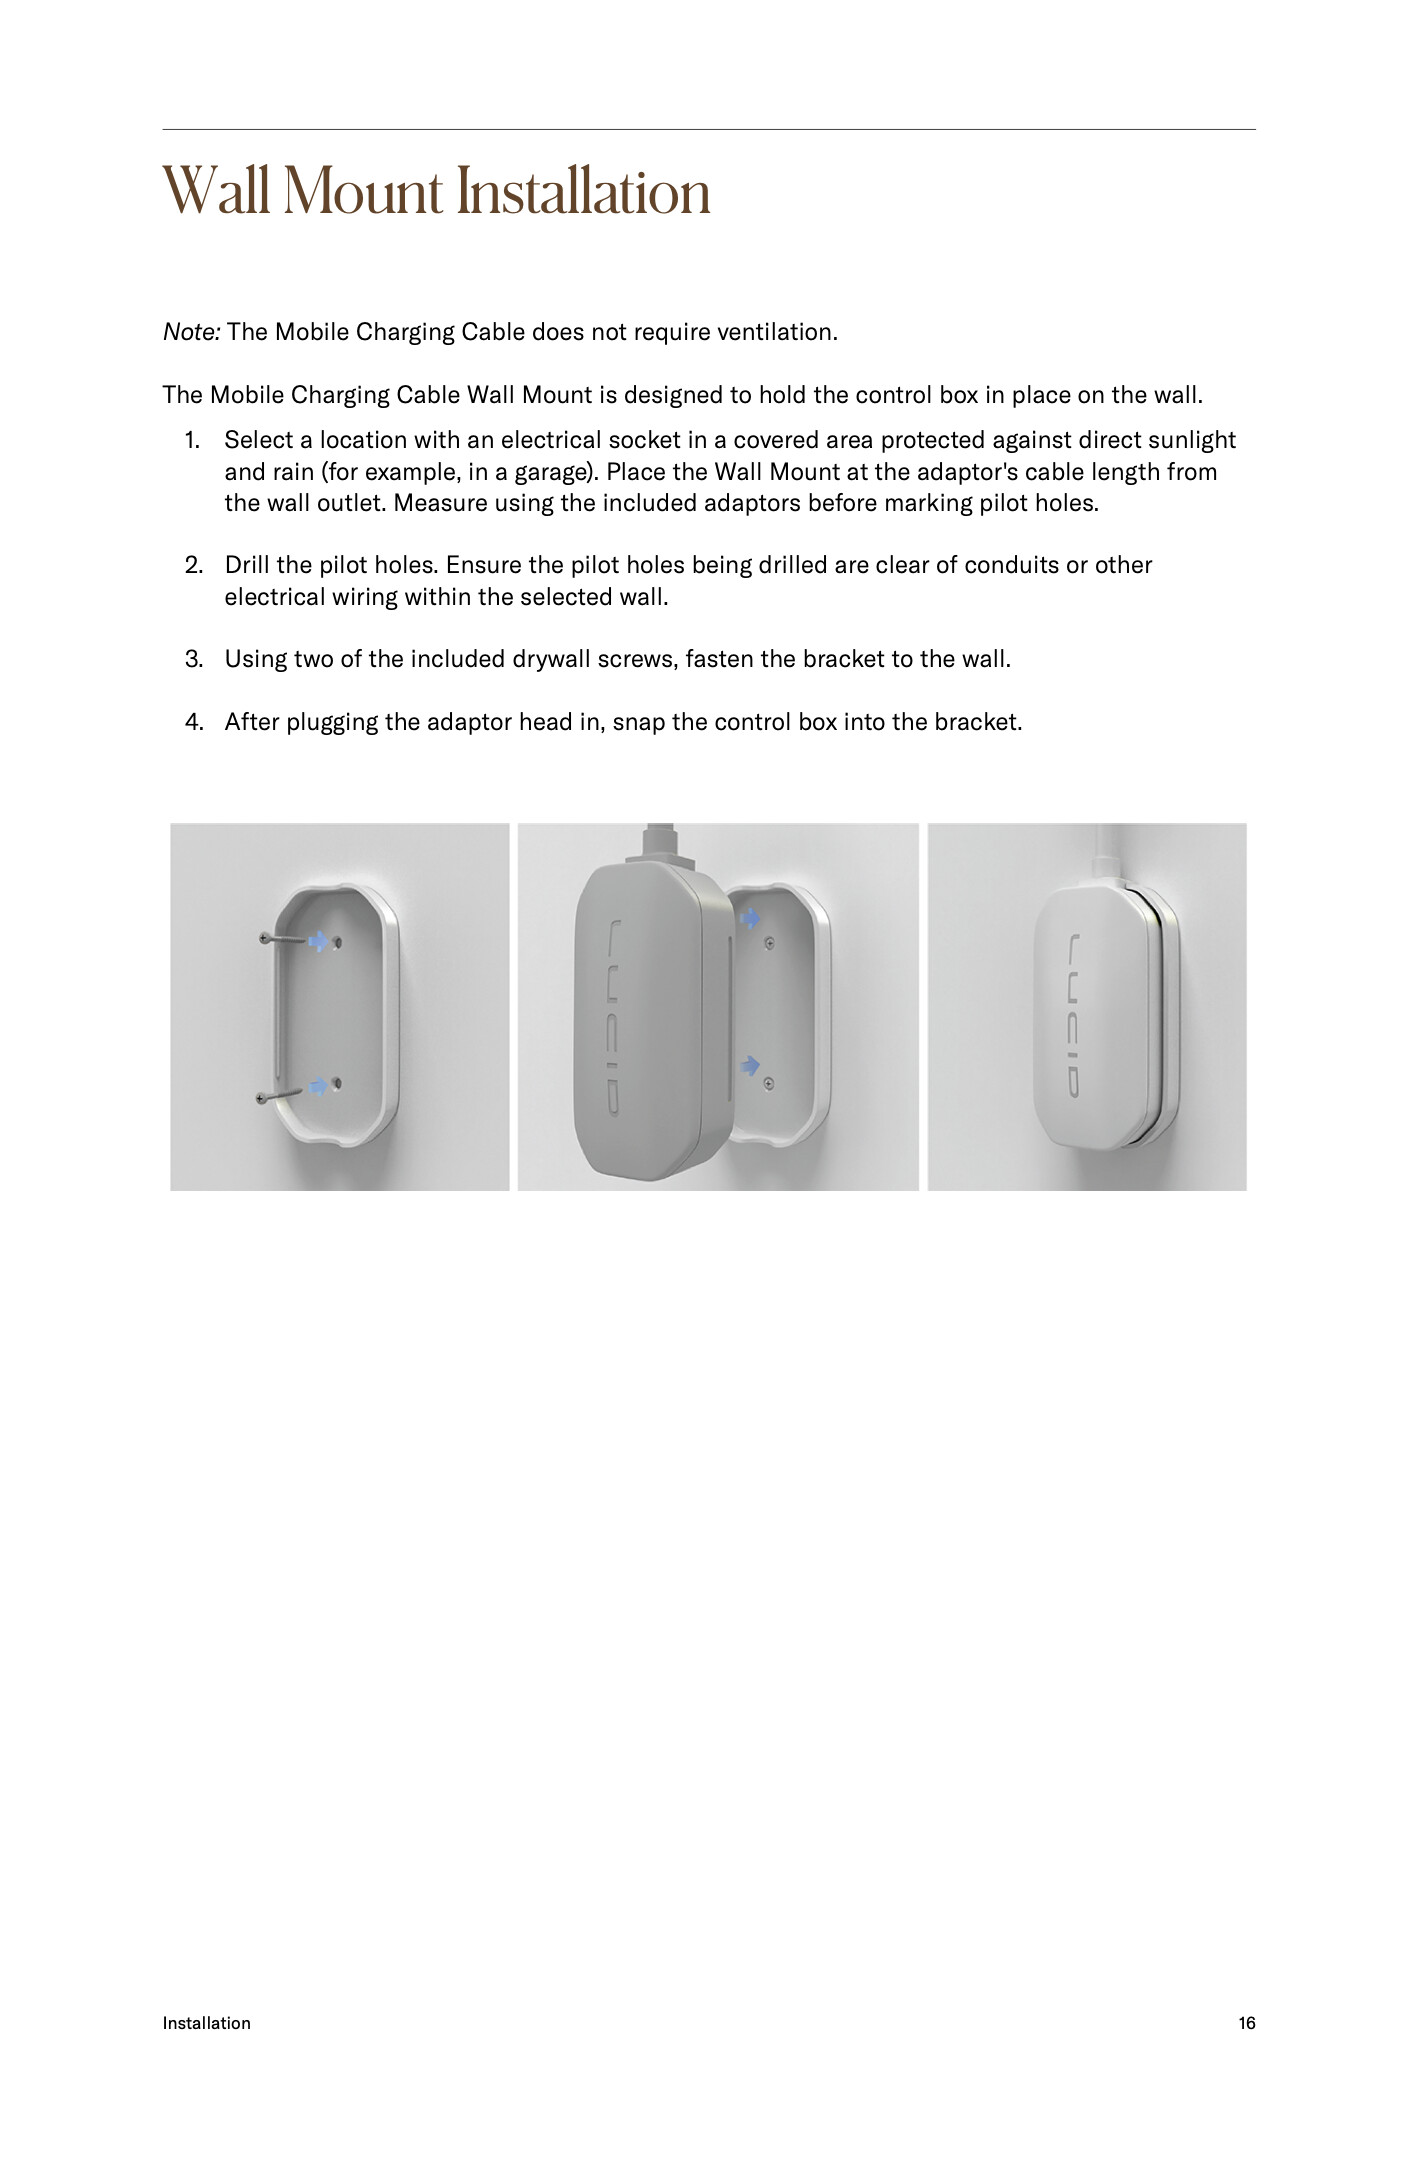
Illustrations I completed for Lucid public-facing documents, which can readily be found on their website. This is from the Mobile Charging Cable User's Guide.

Illustrations I completed for Lucid public-facing documents, which can readily be found on their website. This is from the Mobile Charging Cable User's Guide.
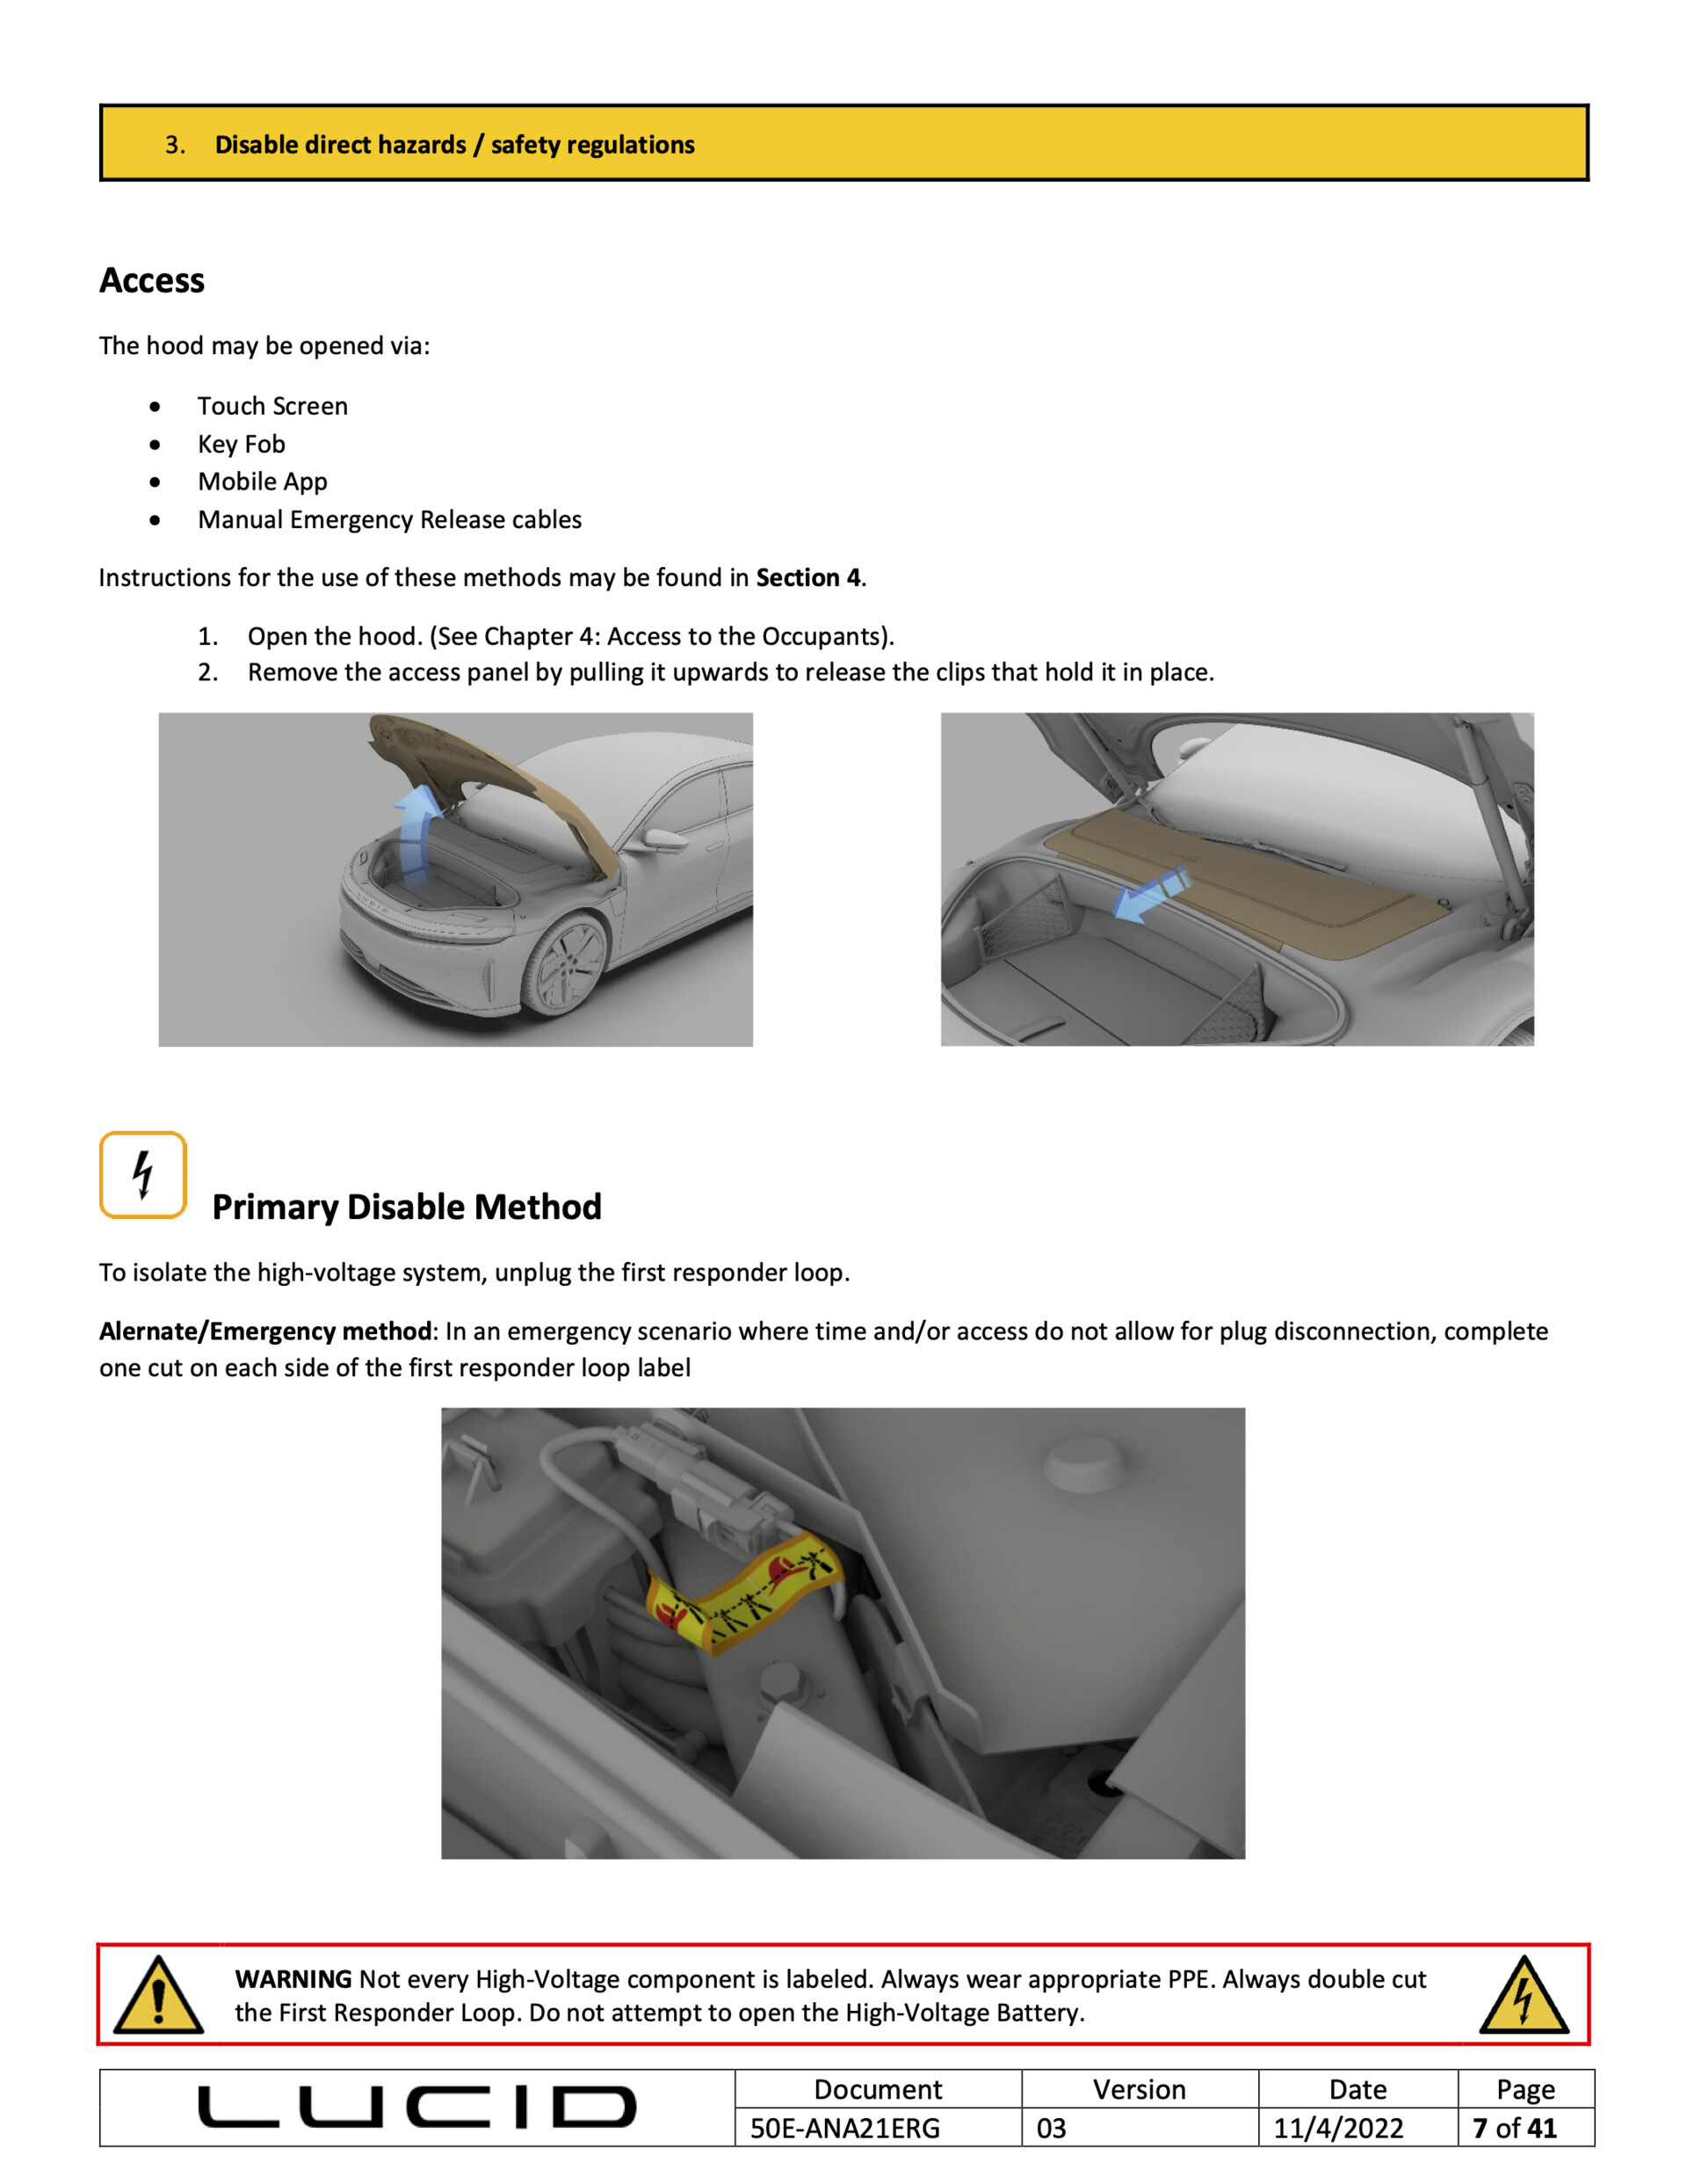
These are whole-page excerpts of ERGs & Safety Sheets (available publicly on Lucid's website). In this one, Dan was unable to correctly deform the cutloop label to fit; I deformed it in Modo.
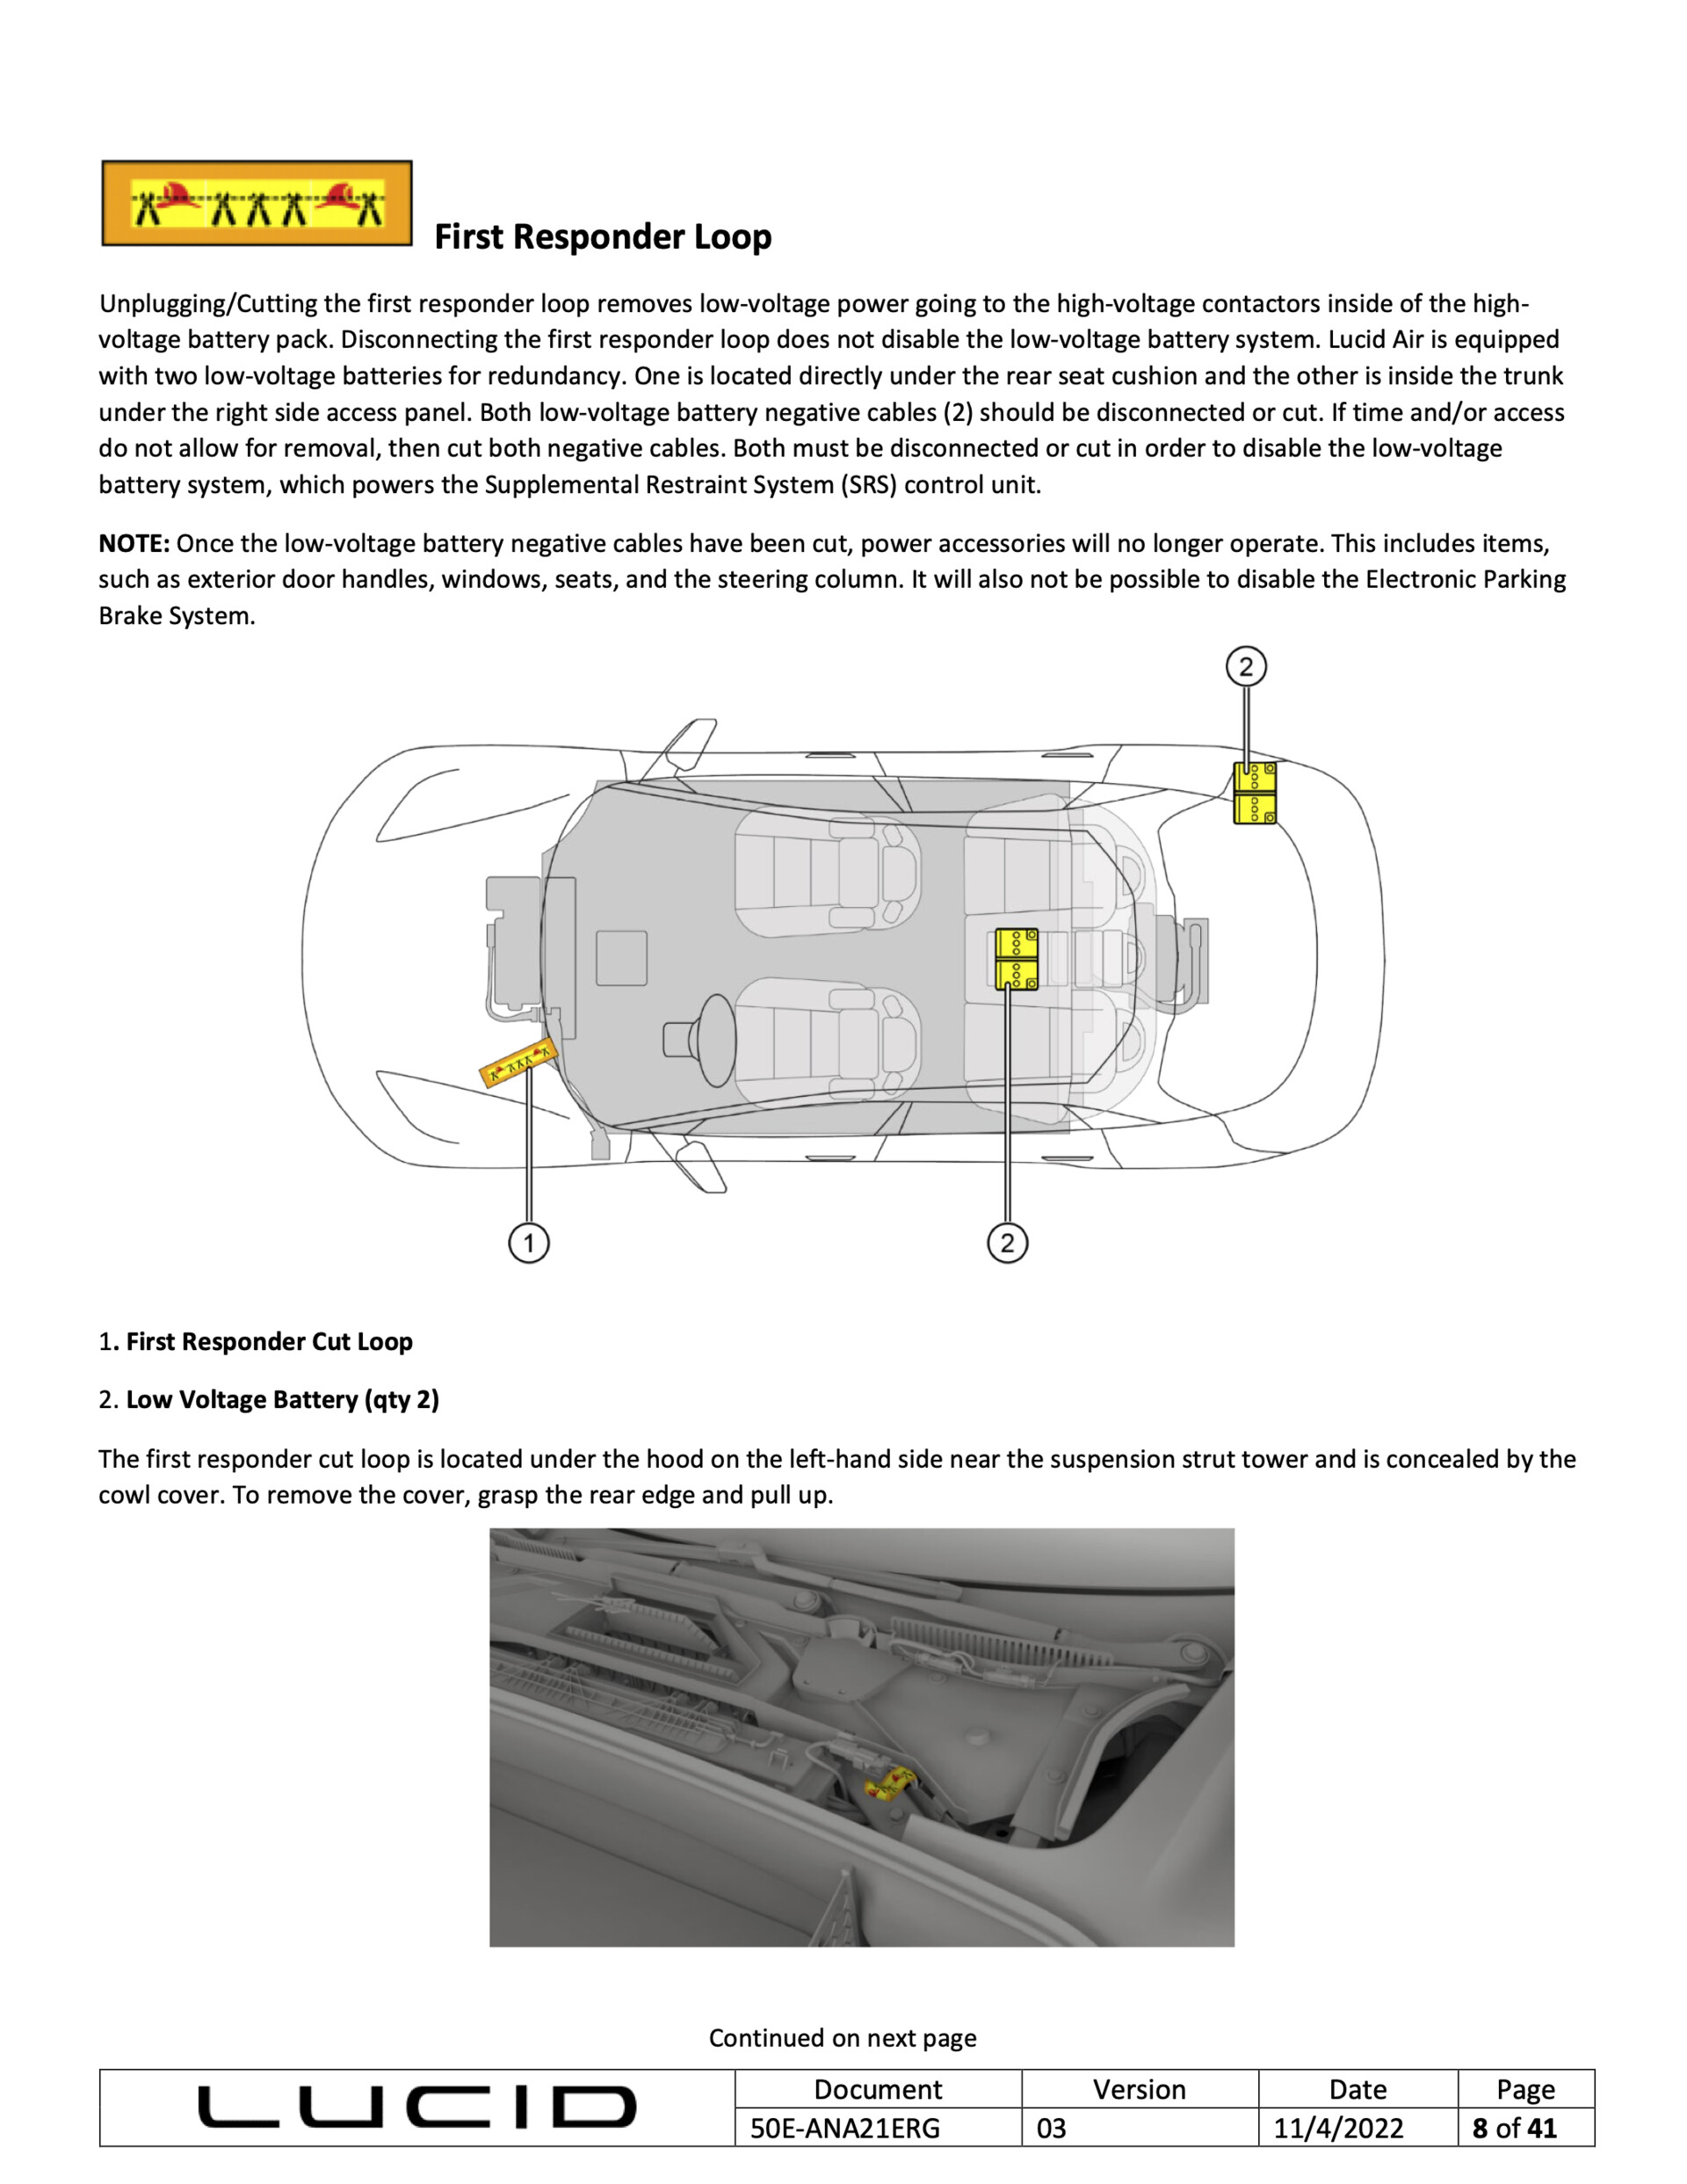
These are whole-page excerpts froERGs & Safety Sheets (available publicly on Lucid's website) and in whose illustrations I participated one way or another: in this one, I rendered the deformed the cutloop label in Modo.
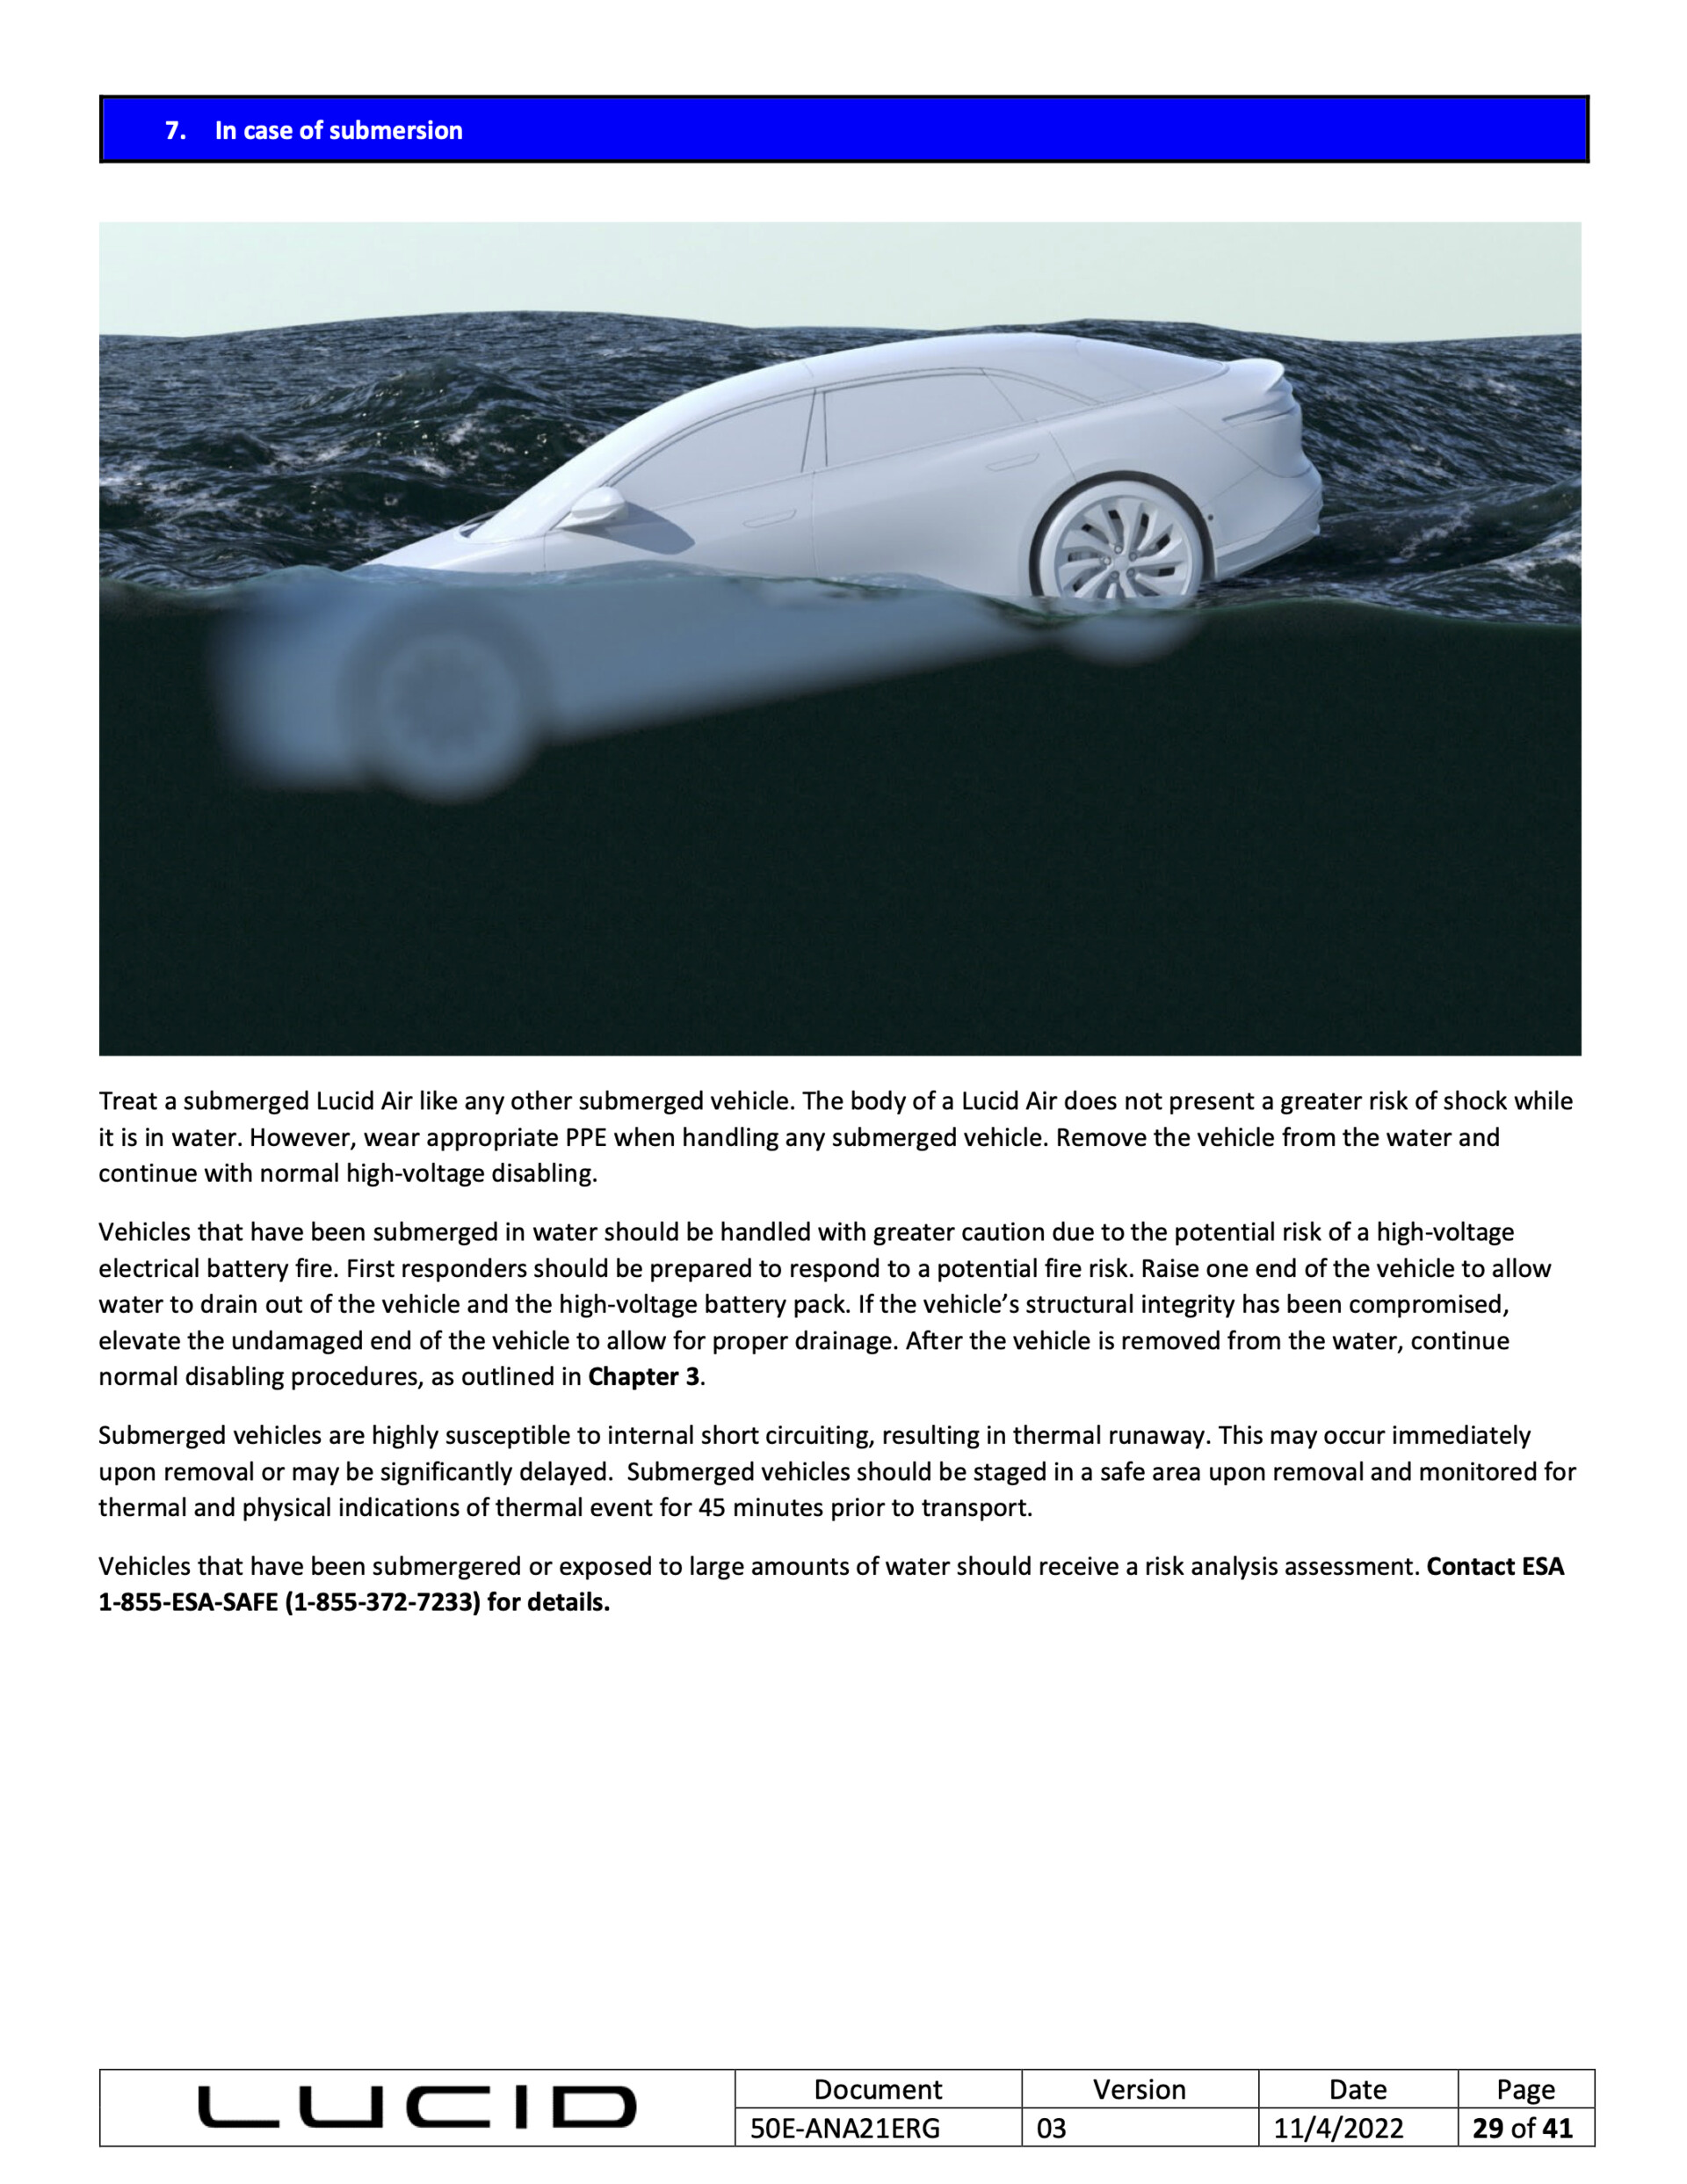
This is an excerpt from the Towing guide, and I accomplished the submersion illustration in Modo; I was very happy with the all-procedural ocean water material I built. Large waves were sculpted, all the rest is in the material.
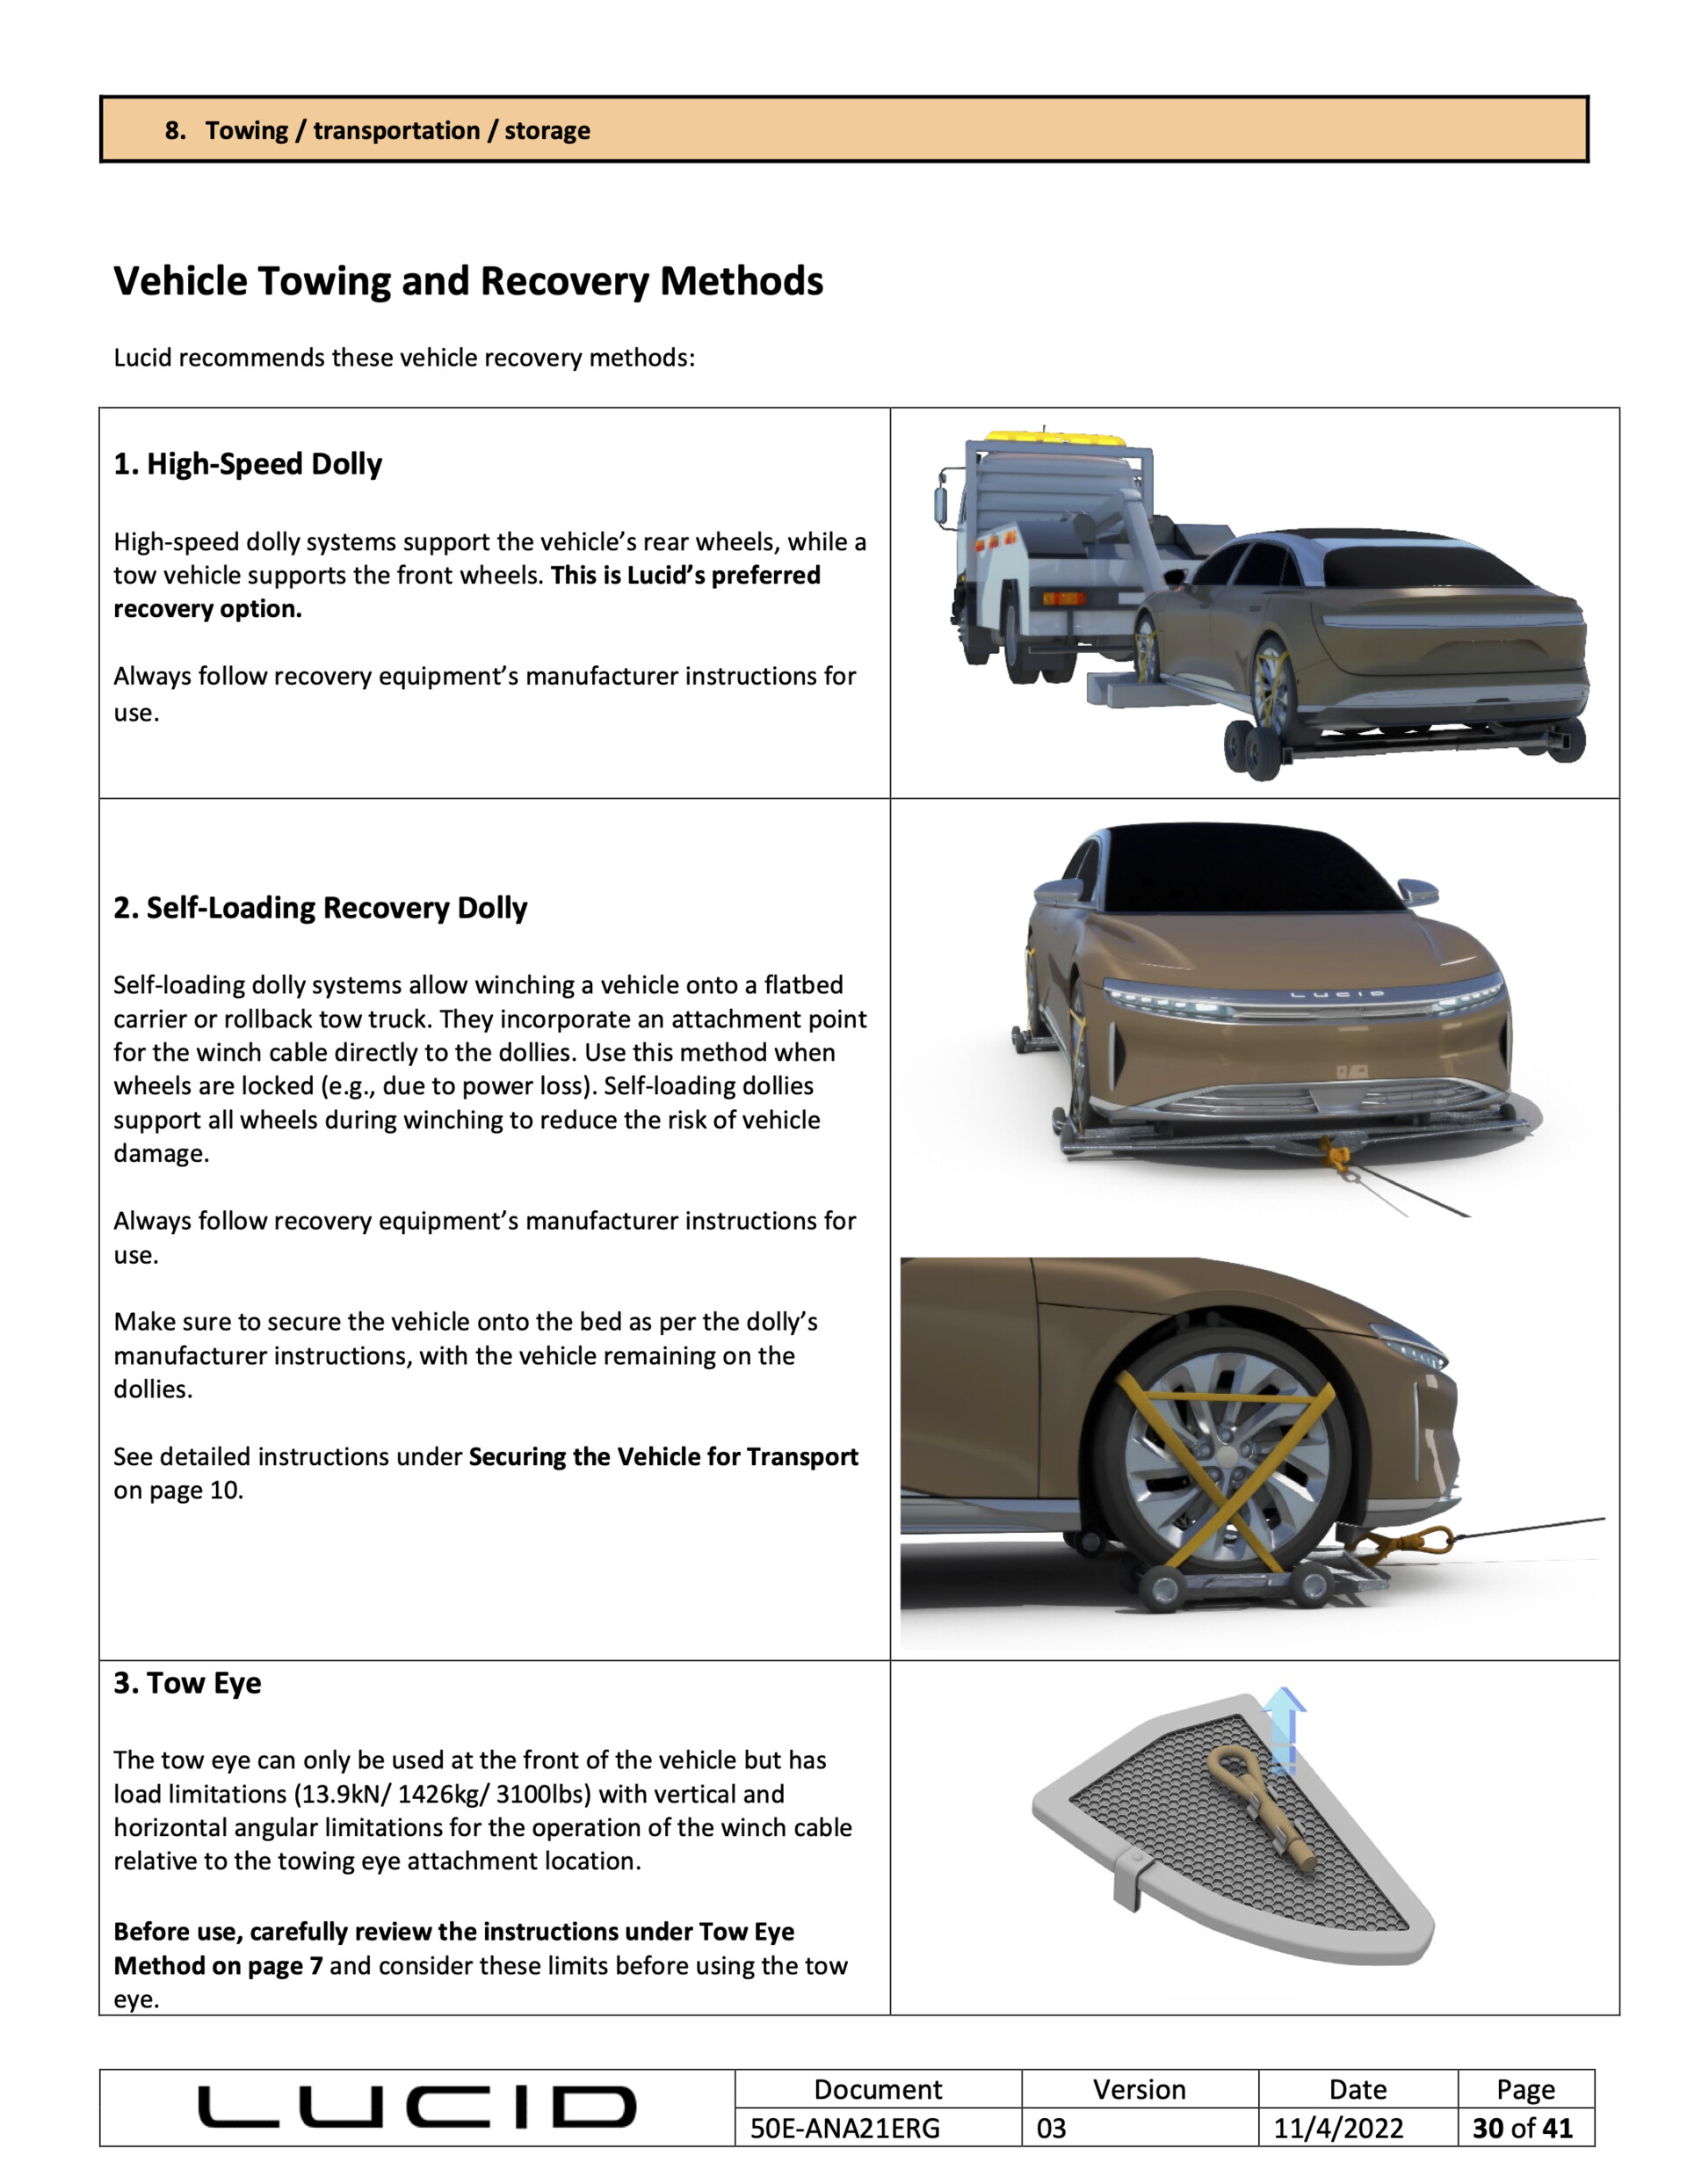
From the Towing Guide: I modeled and rigged all non-Lucid equipment here in Modo and rendered in Modo too
From the Towing Guide - I modeled and rigged all the non-Lucid equipment here in Modo and rendered in Modo too
From the Towing Guide - I modeled and rigged all the non-Lucid equipment here in Modo and rendered in Modo too

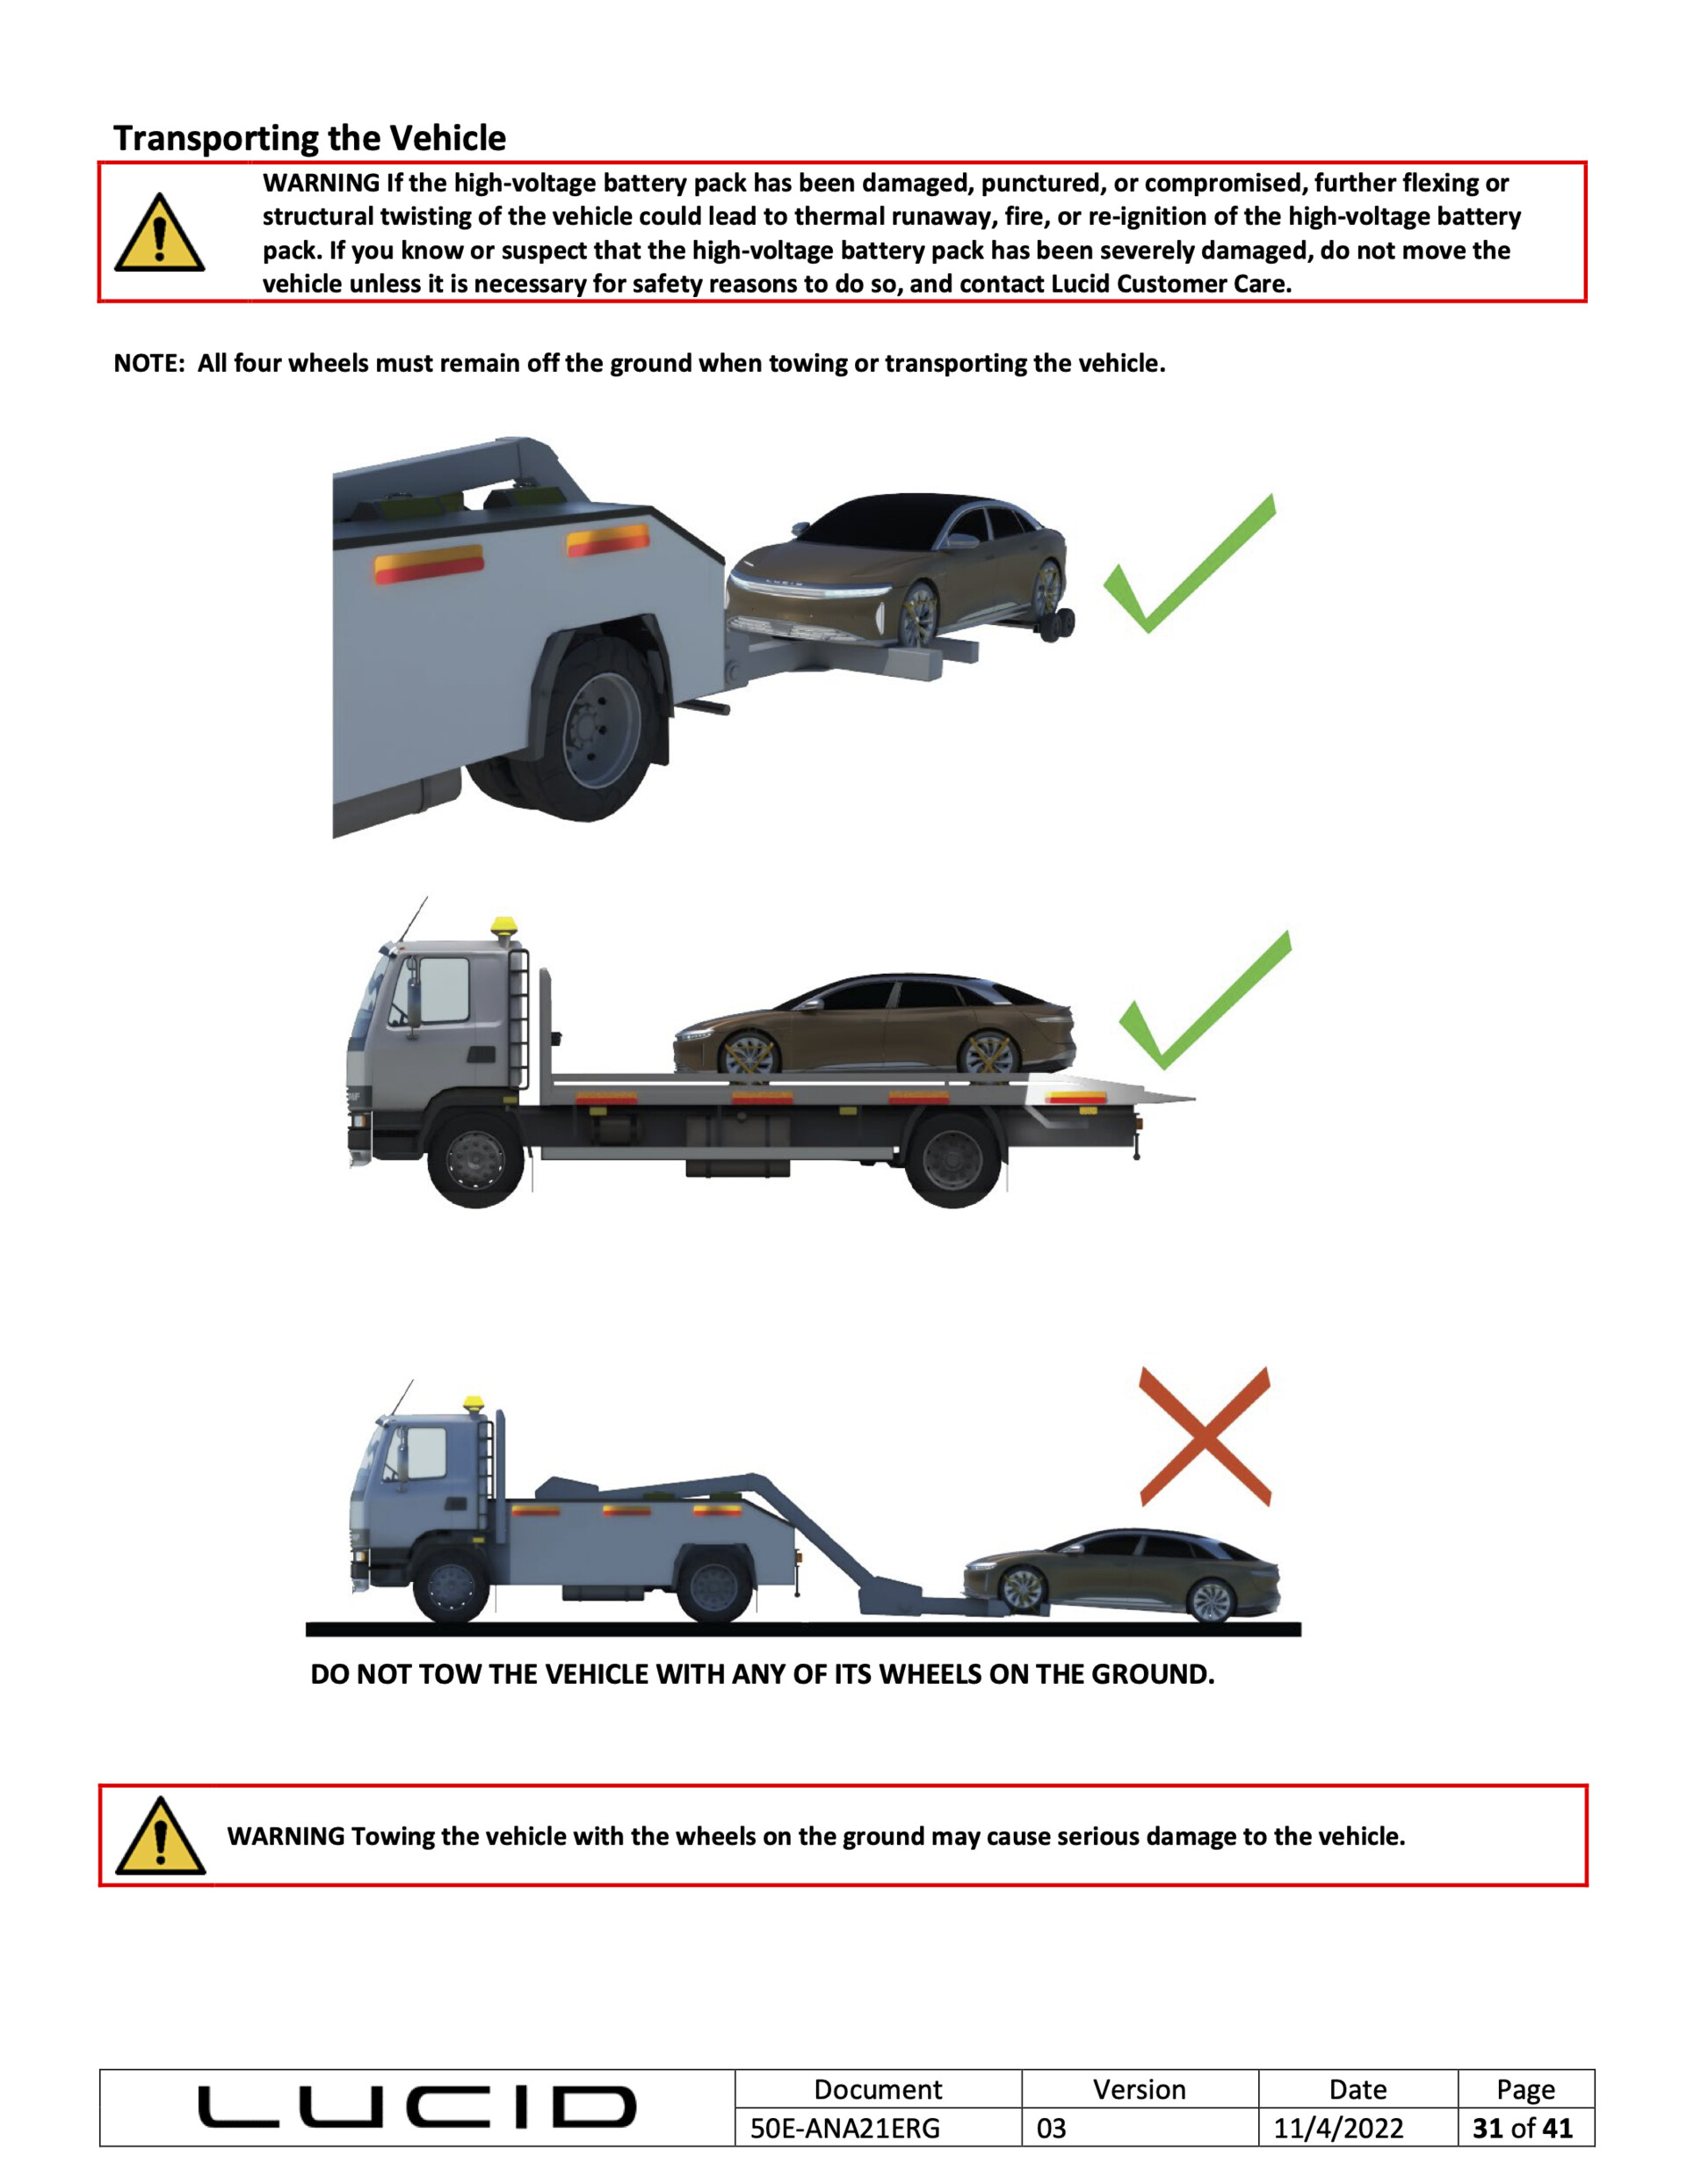
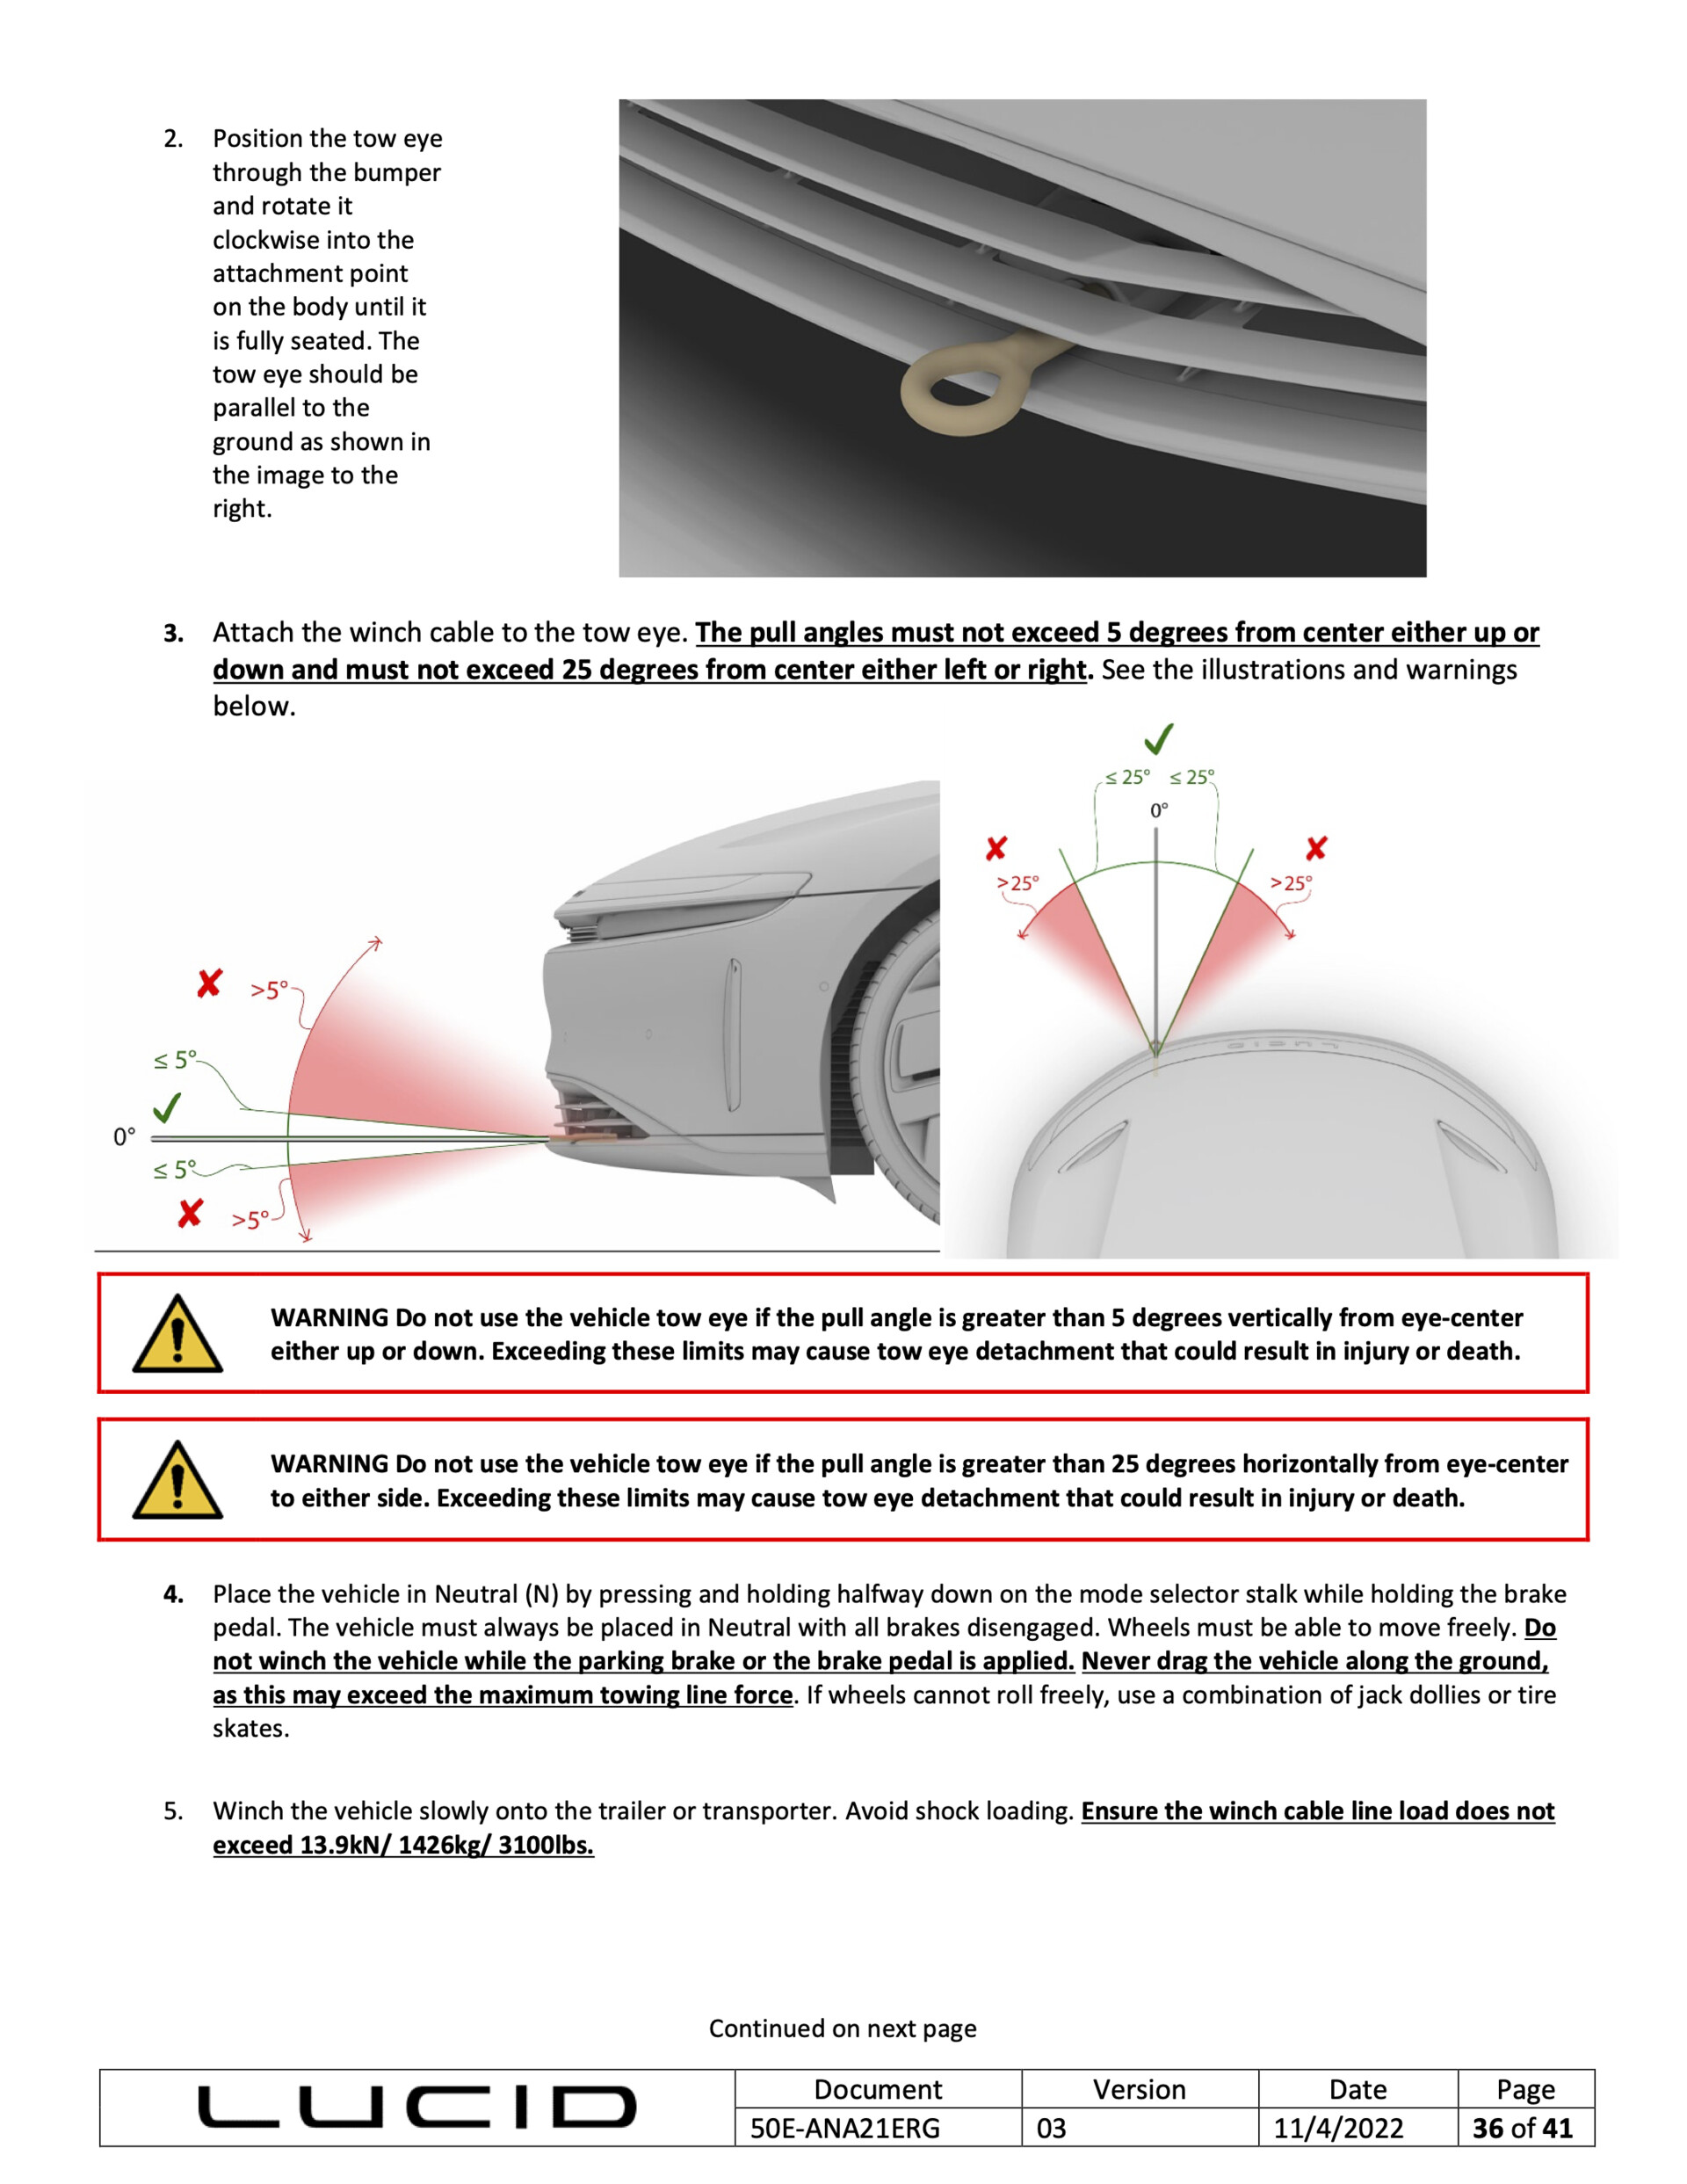
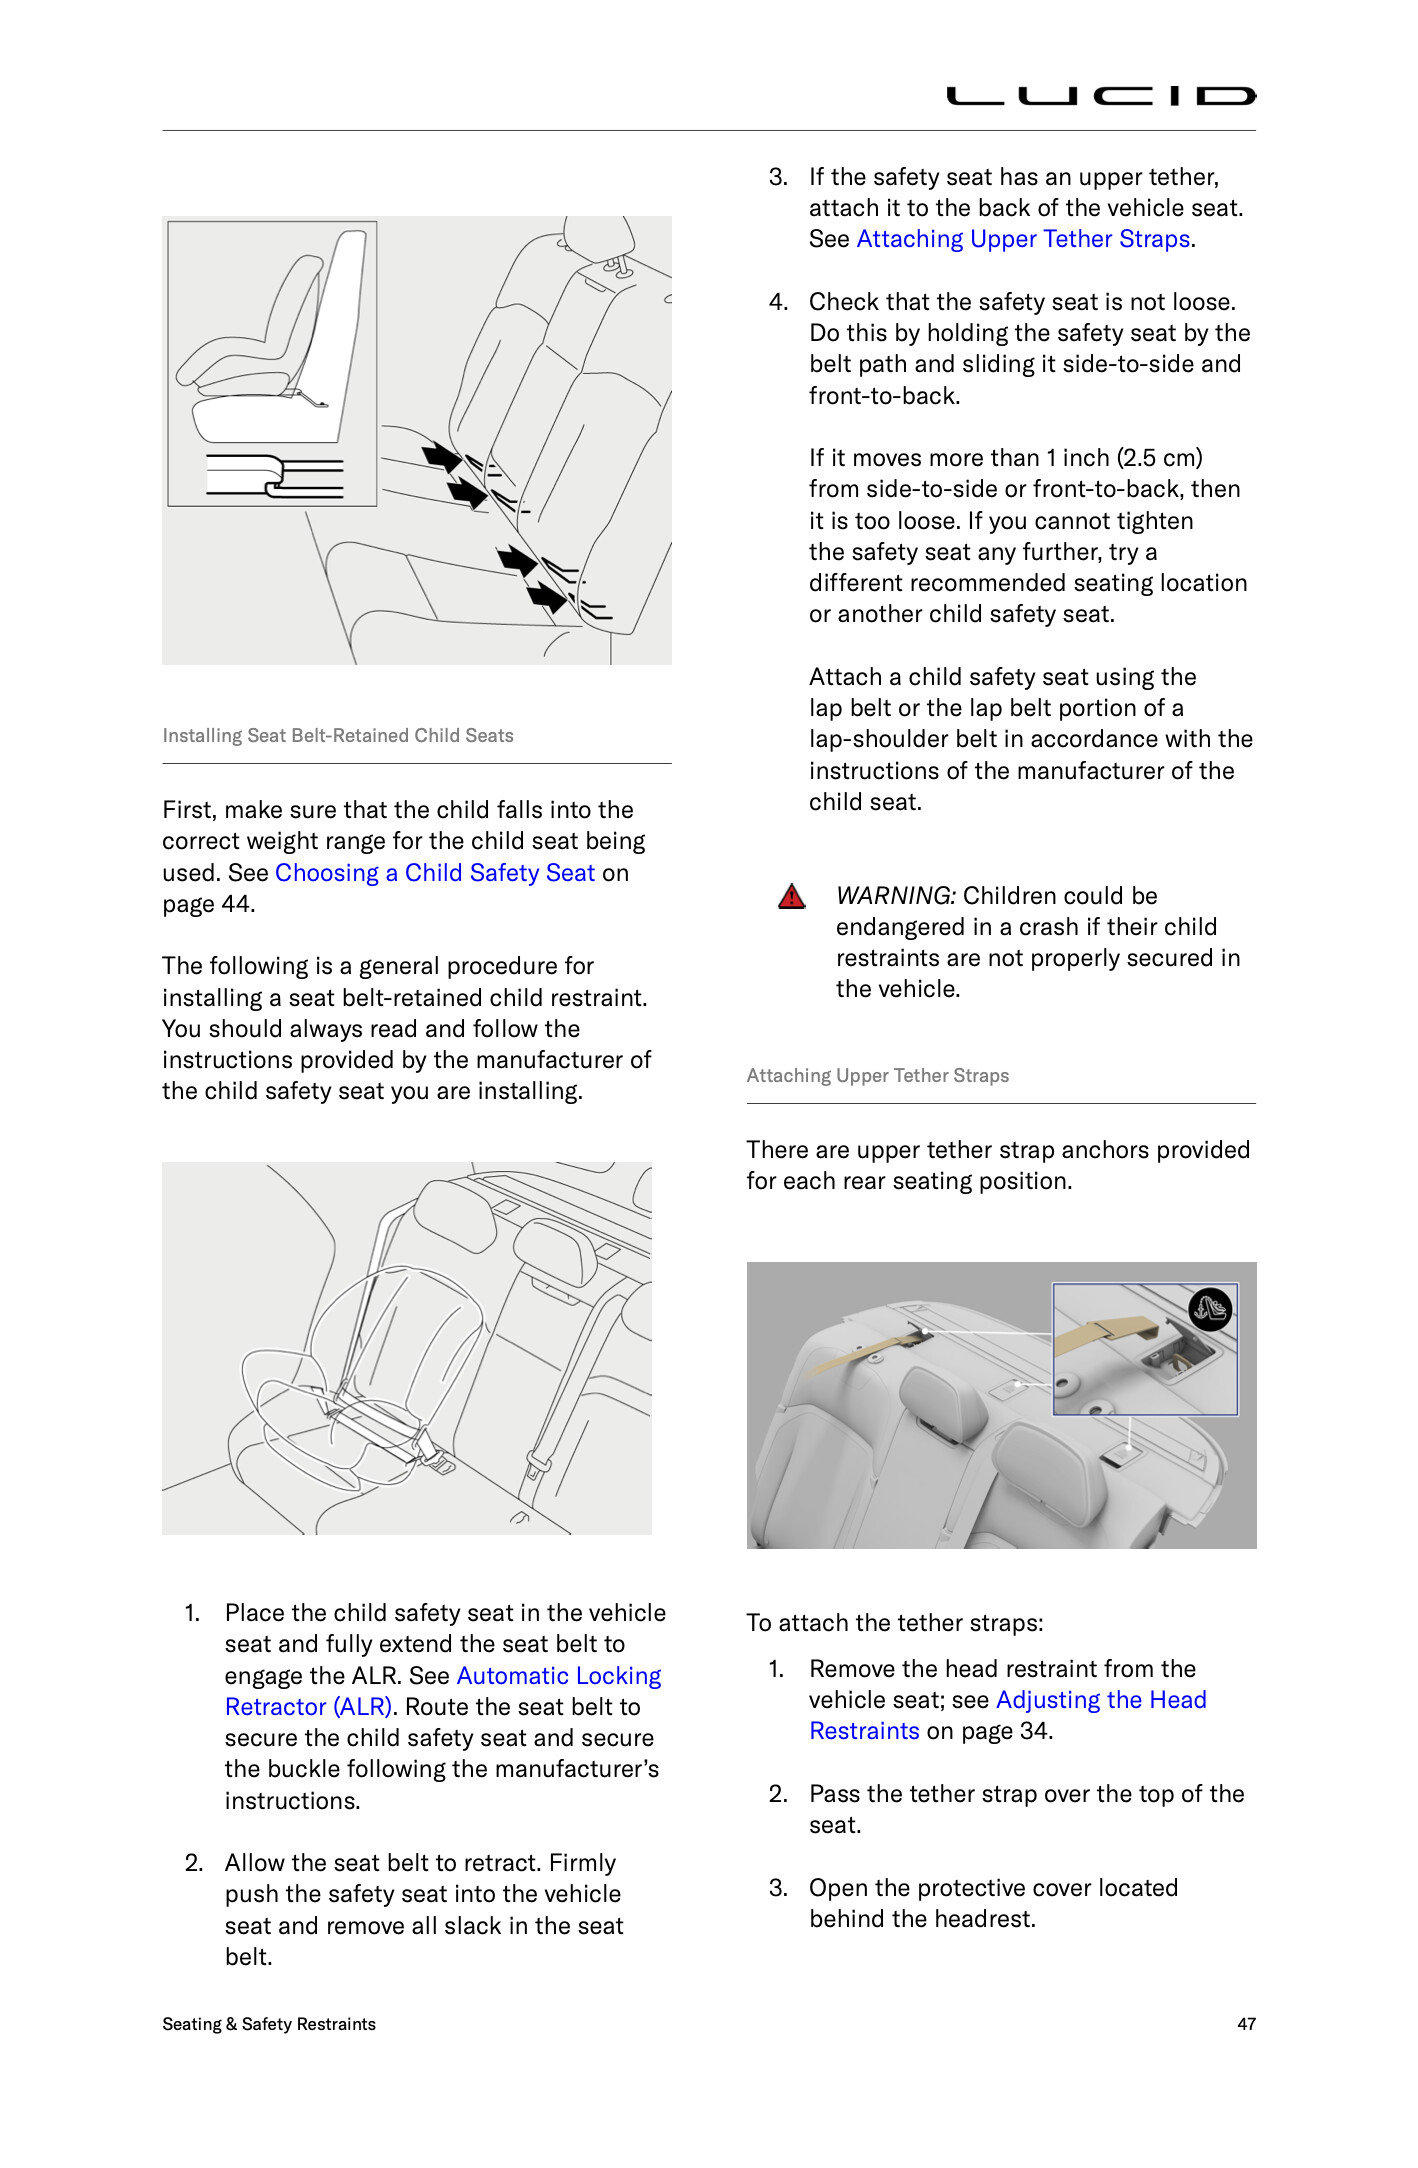
From the Lucid Air User's Guide (readily publicly-available via Lucid's Website) - all the towing related modeling, rigging, also retopologised and rigged a Ludic Air and rendered - all in Modo
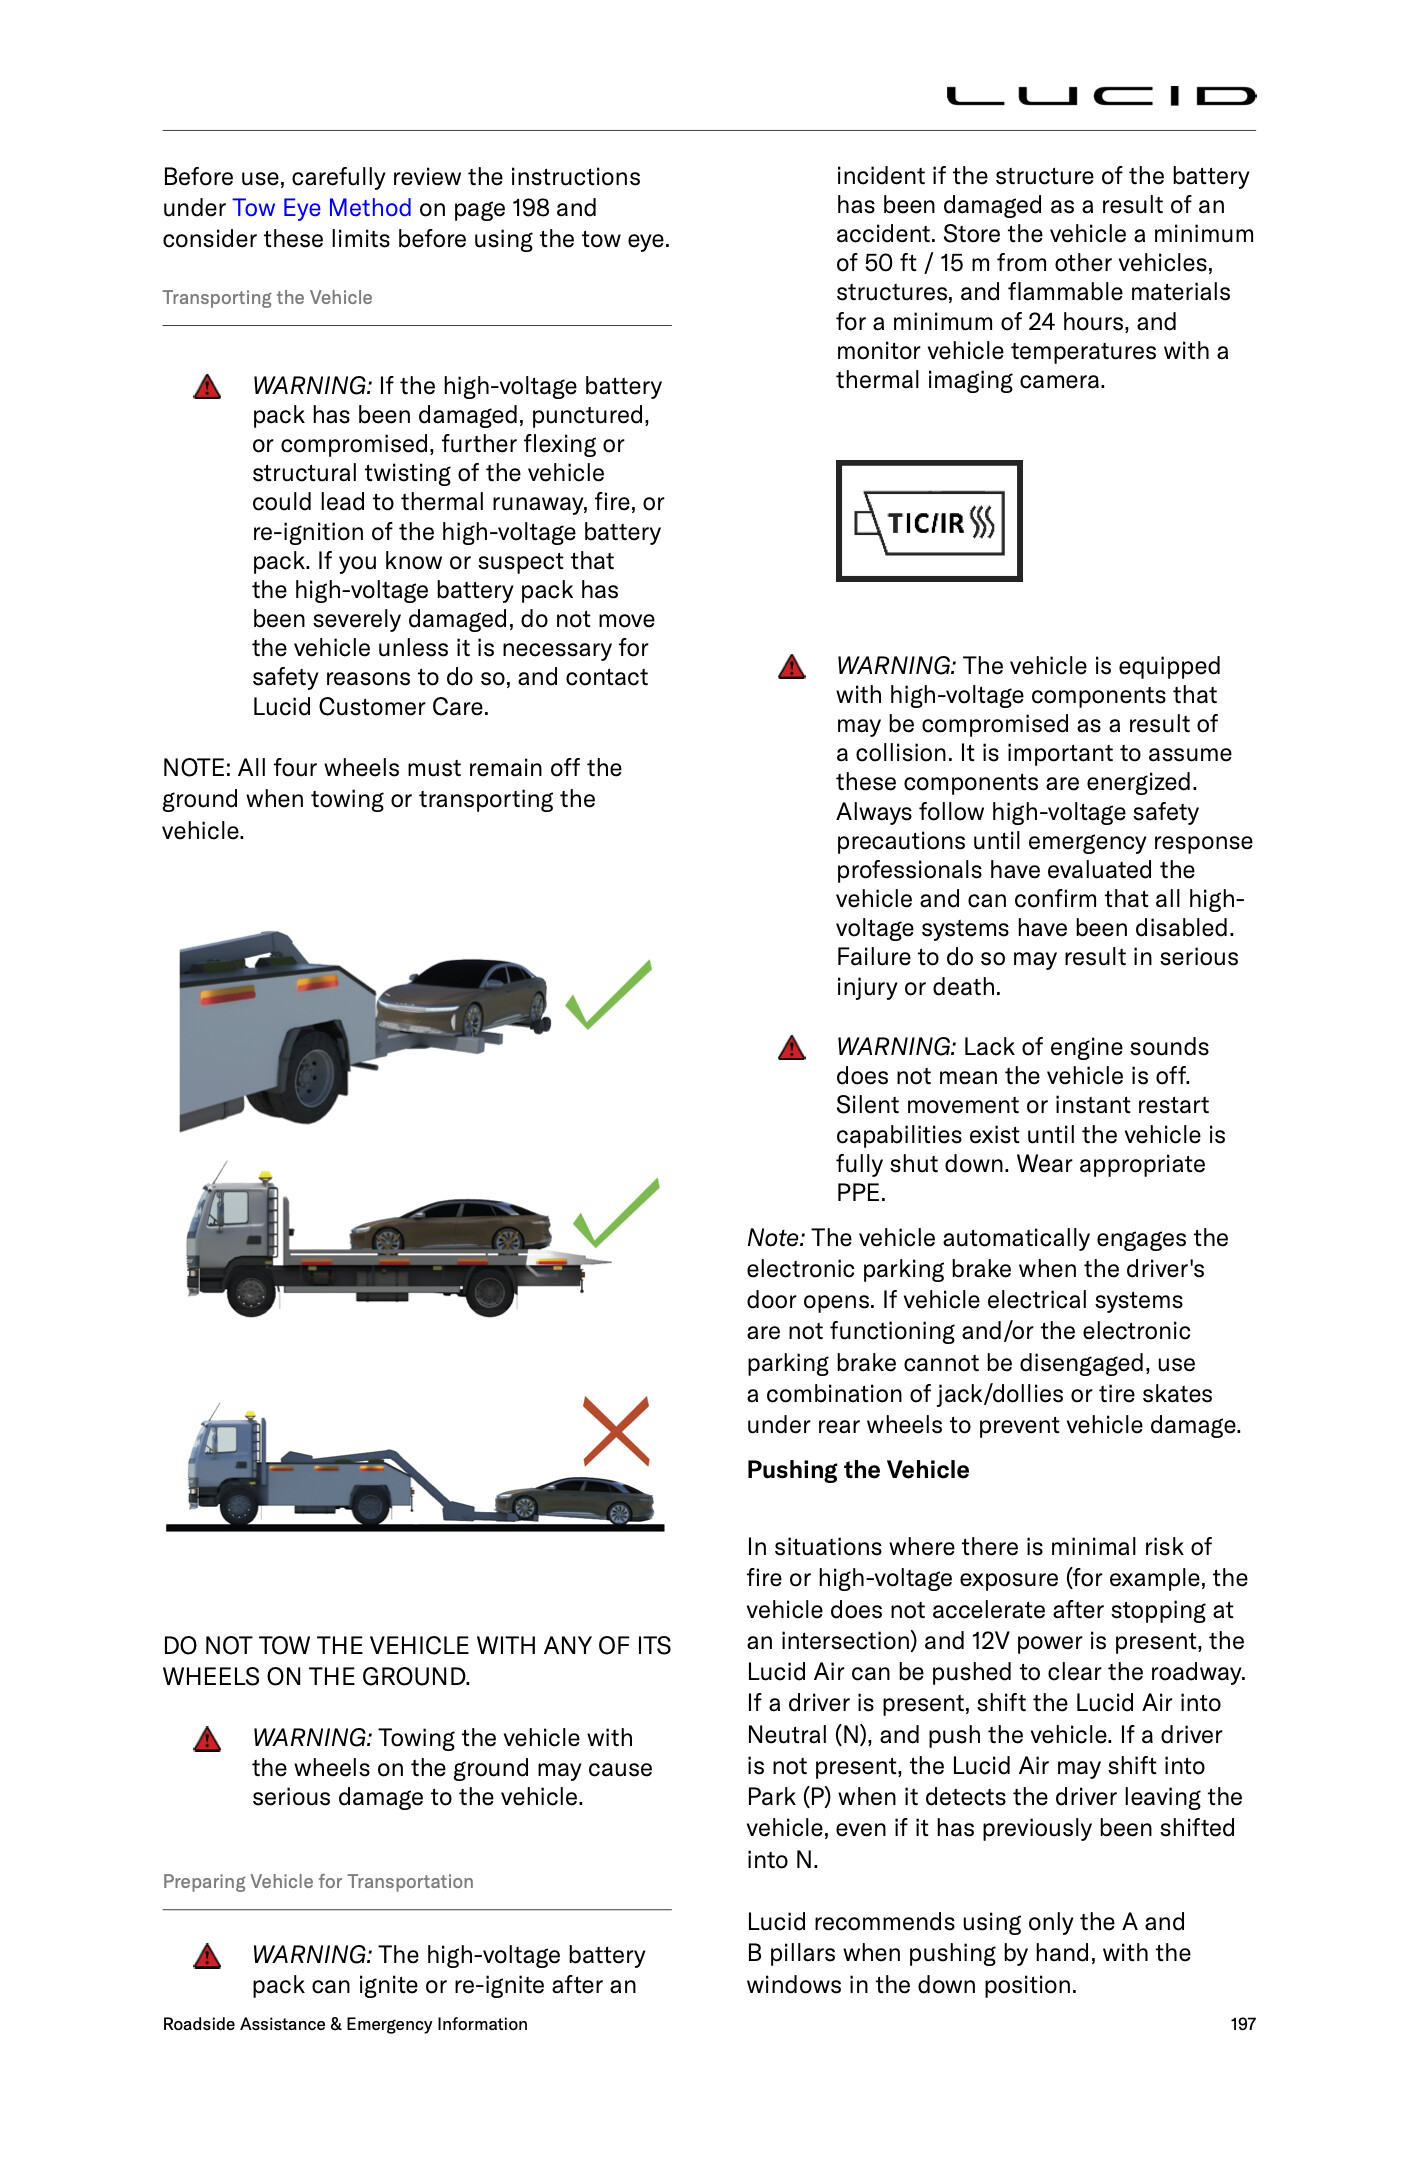
From the Lucid Air User's Guide (readily publicly-available via Lucid's Website) - all the towing related modeling, rigging, also retopologised and rigged a Ludic Air and rendered - all in Modo
From the Lucid Air User's Guide (readily publicly-available via Lucid's Website) - straight from Catia (3D CADD) to Keyshot and rendered there.
From the Lucid Air User's Guide (readily publicly-available via Lucid's Website) - in this rendered illustration, we had no CADD model for the child seat strap - the first item Dan had me model in Modo for use in Lucid TP work. Rendered in Keyshot.
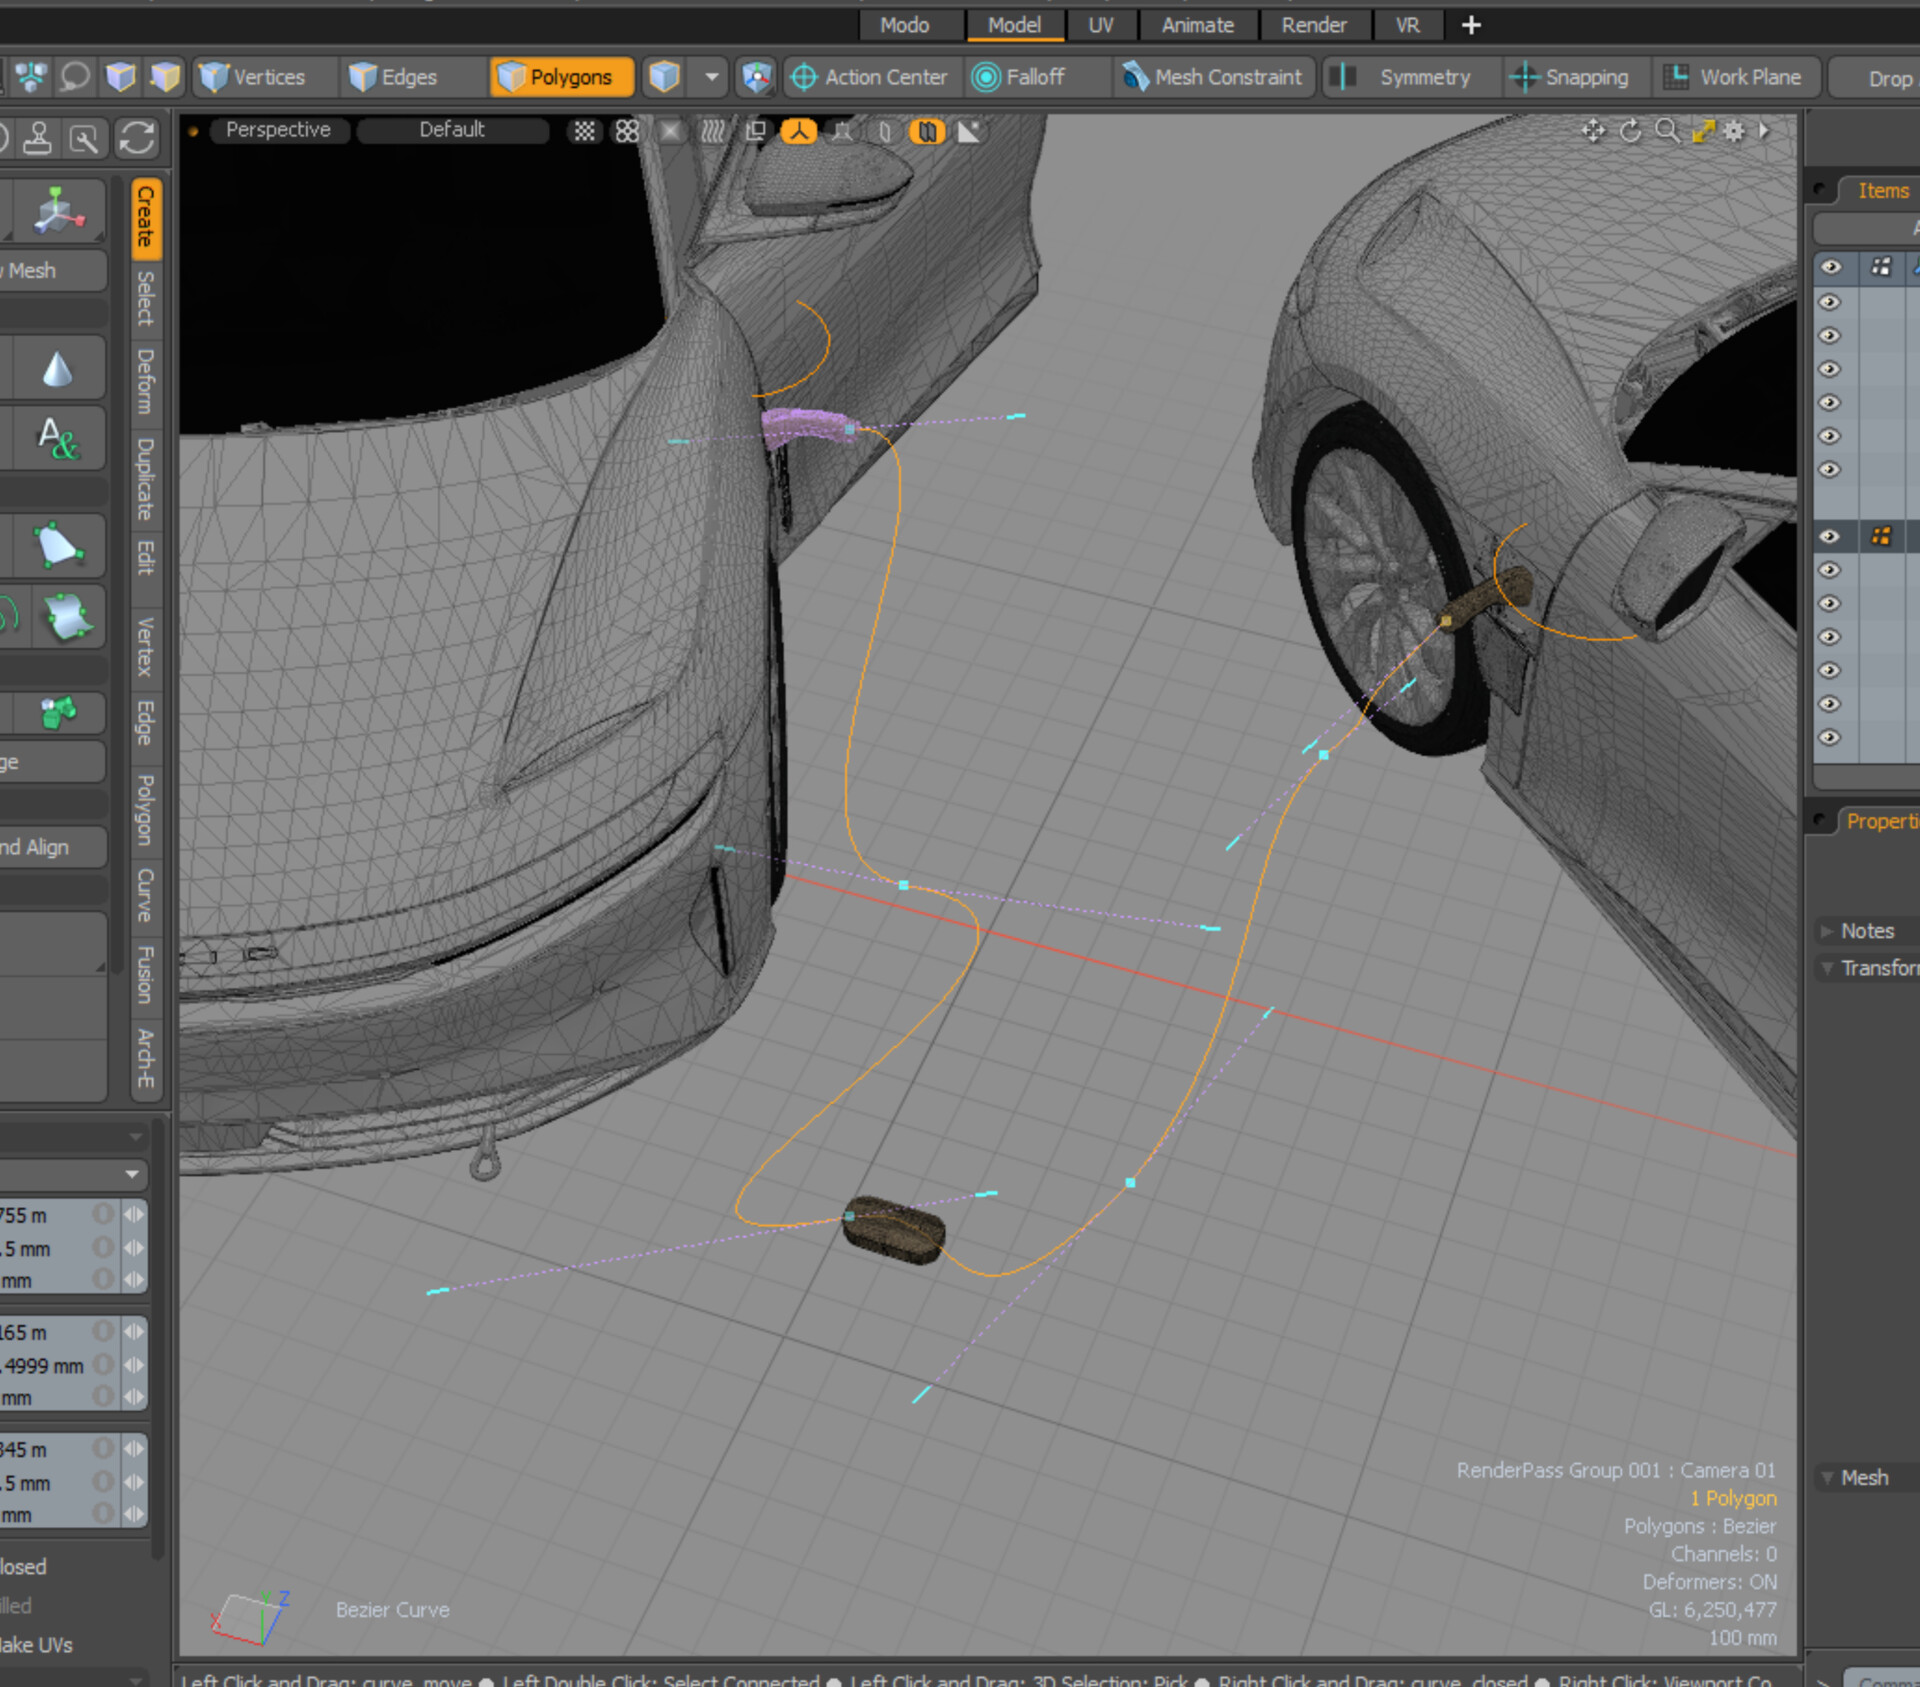
More sausage-making / behind the scenes: This shows how using a bezier deformer combined with some procedural geometry leads to an *easily* art-directable EV charging cable.
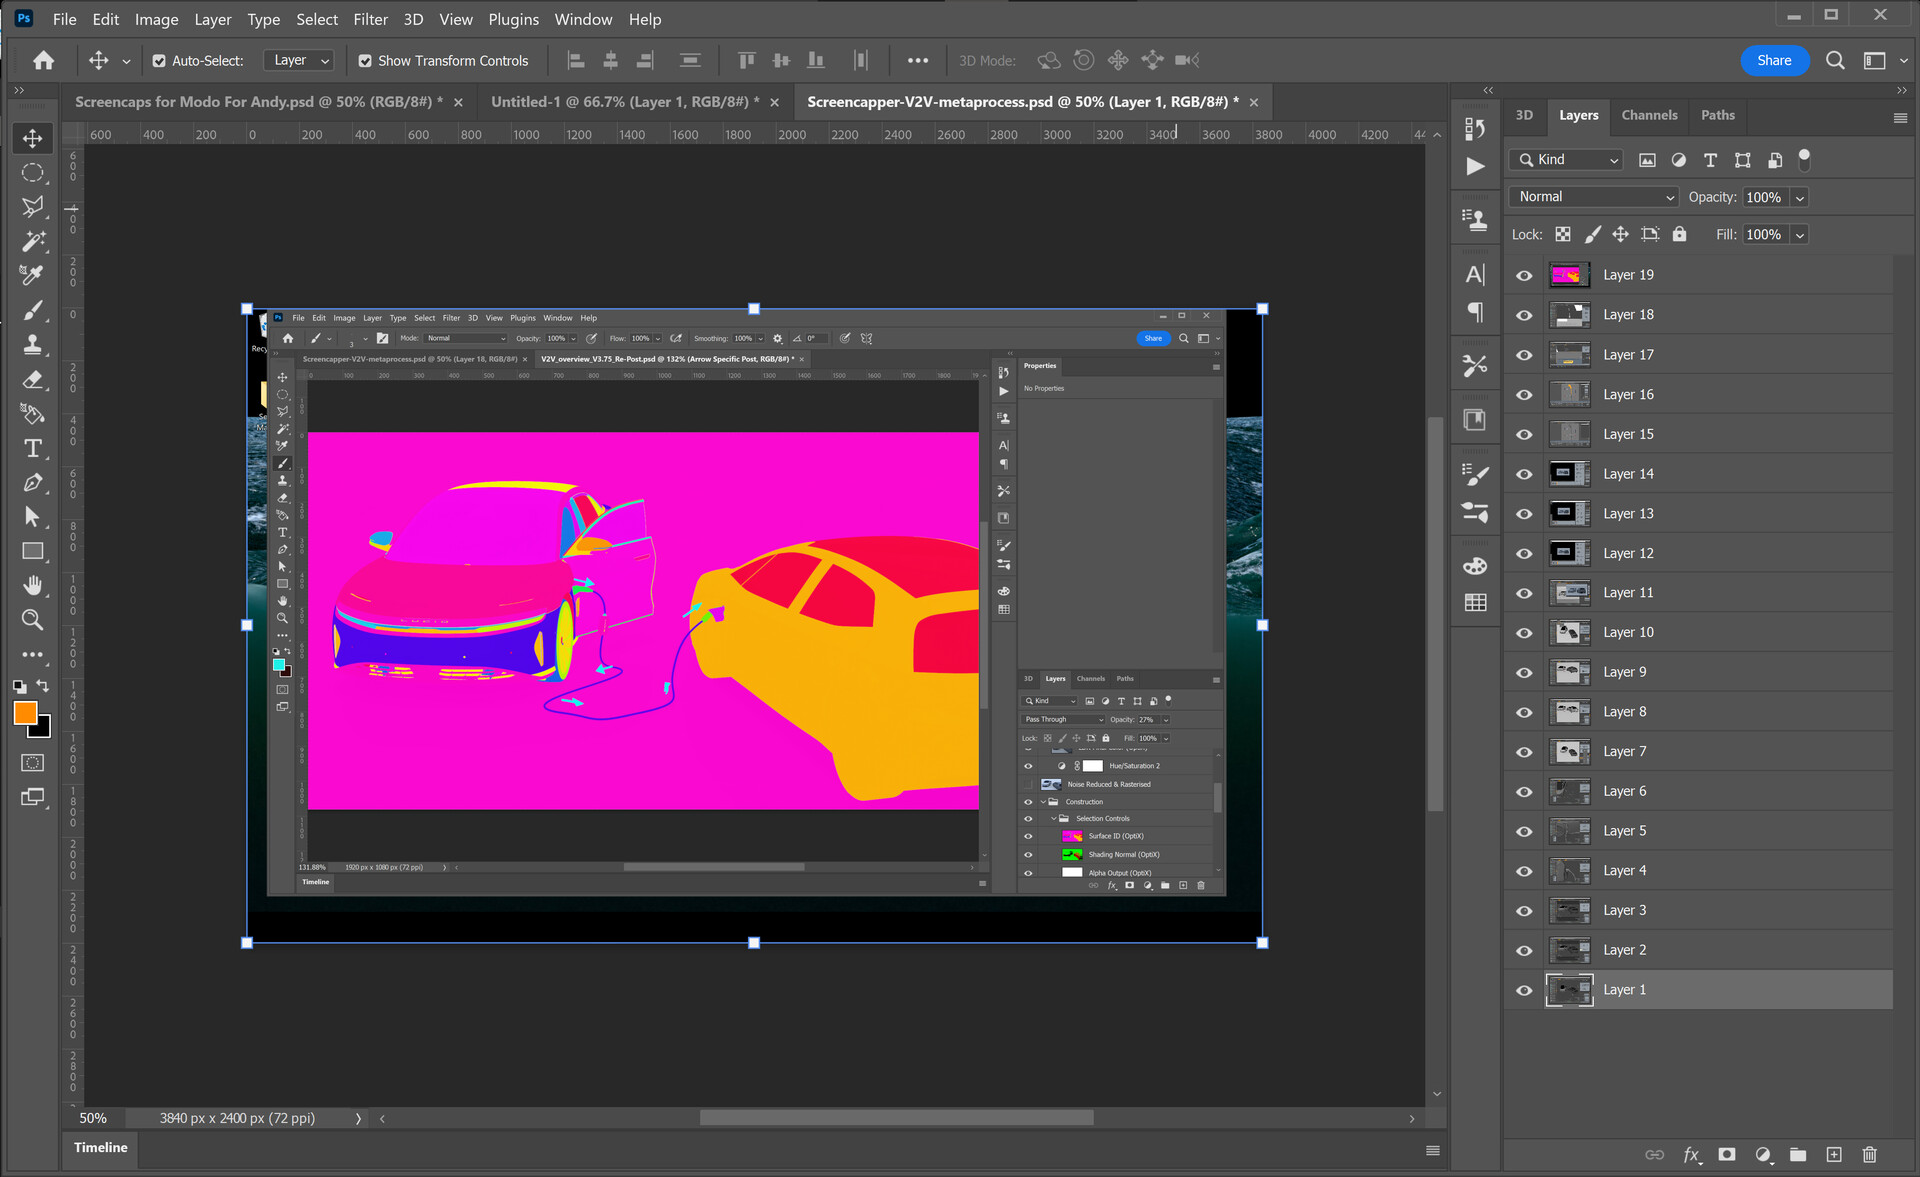
More sausage-making / behind the scenes: This shows how multi-render-pass output can be easily handled in post-production.
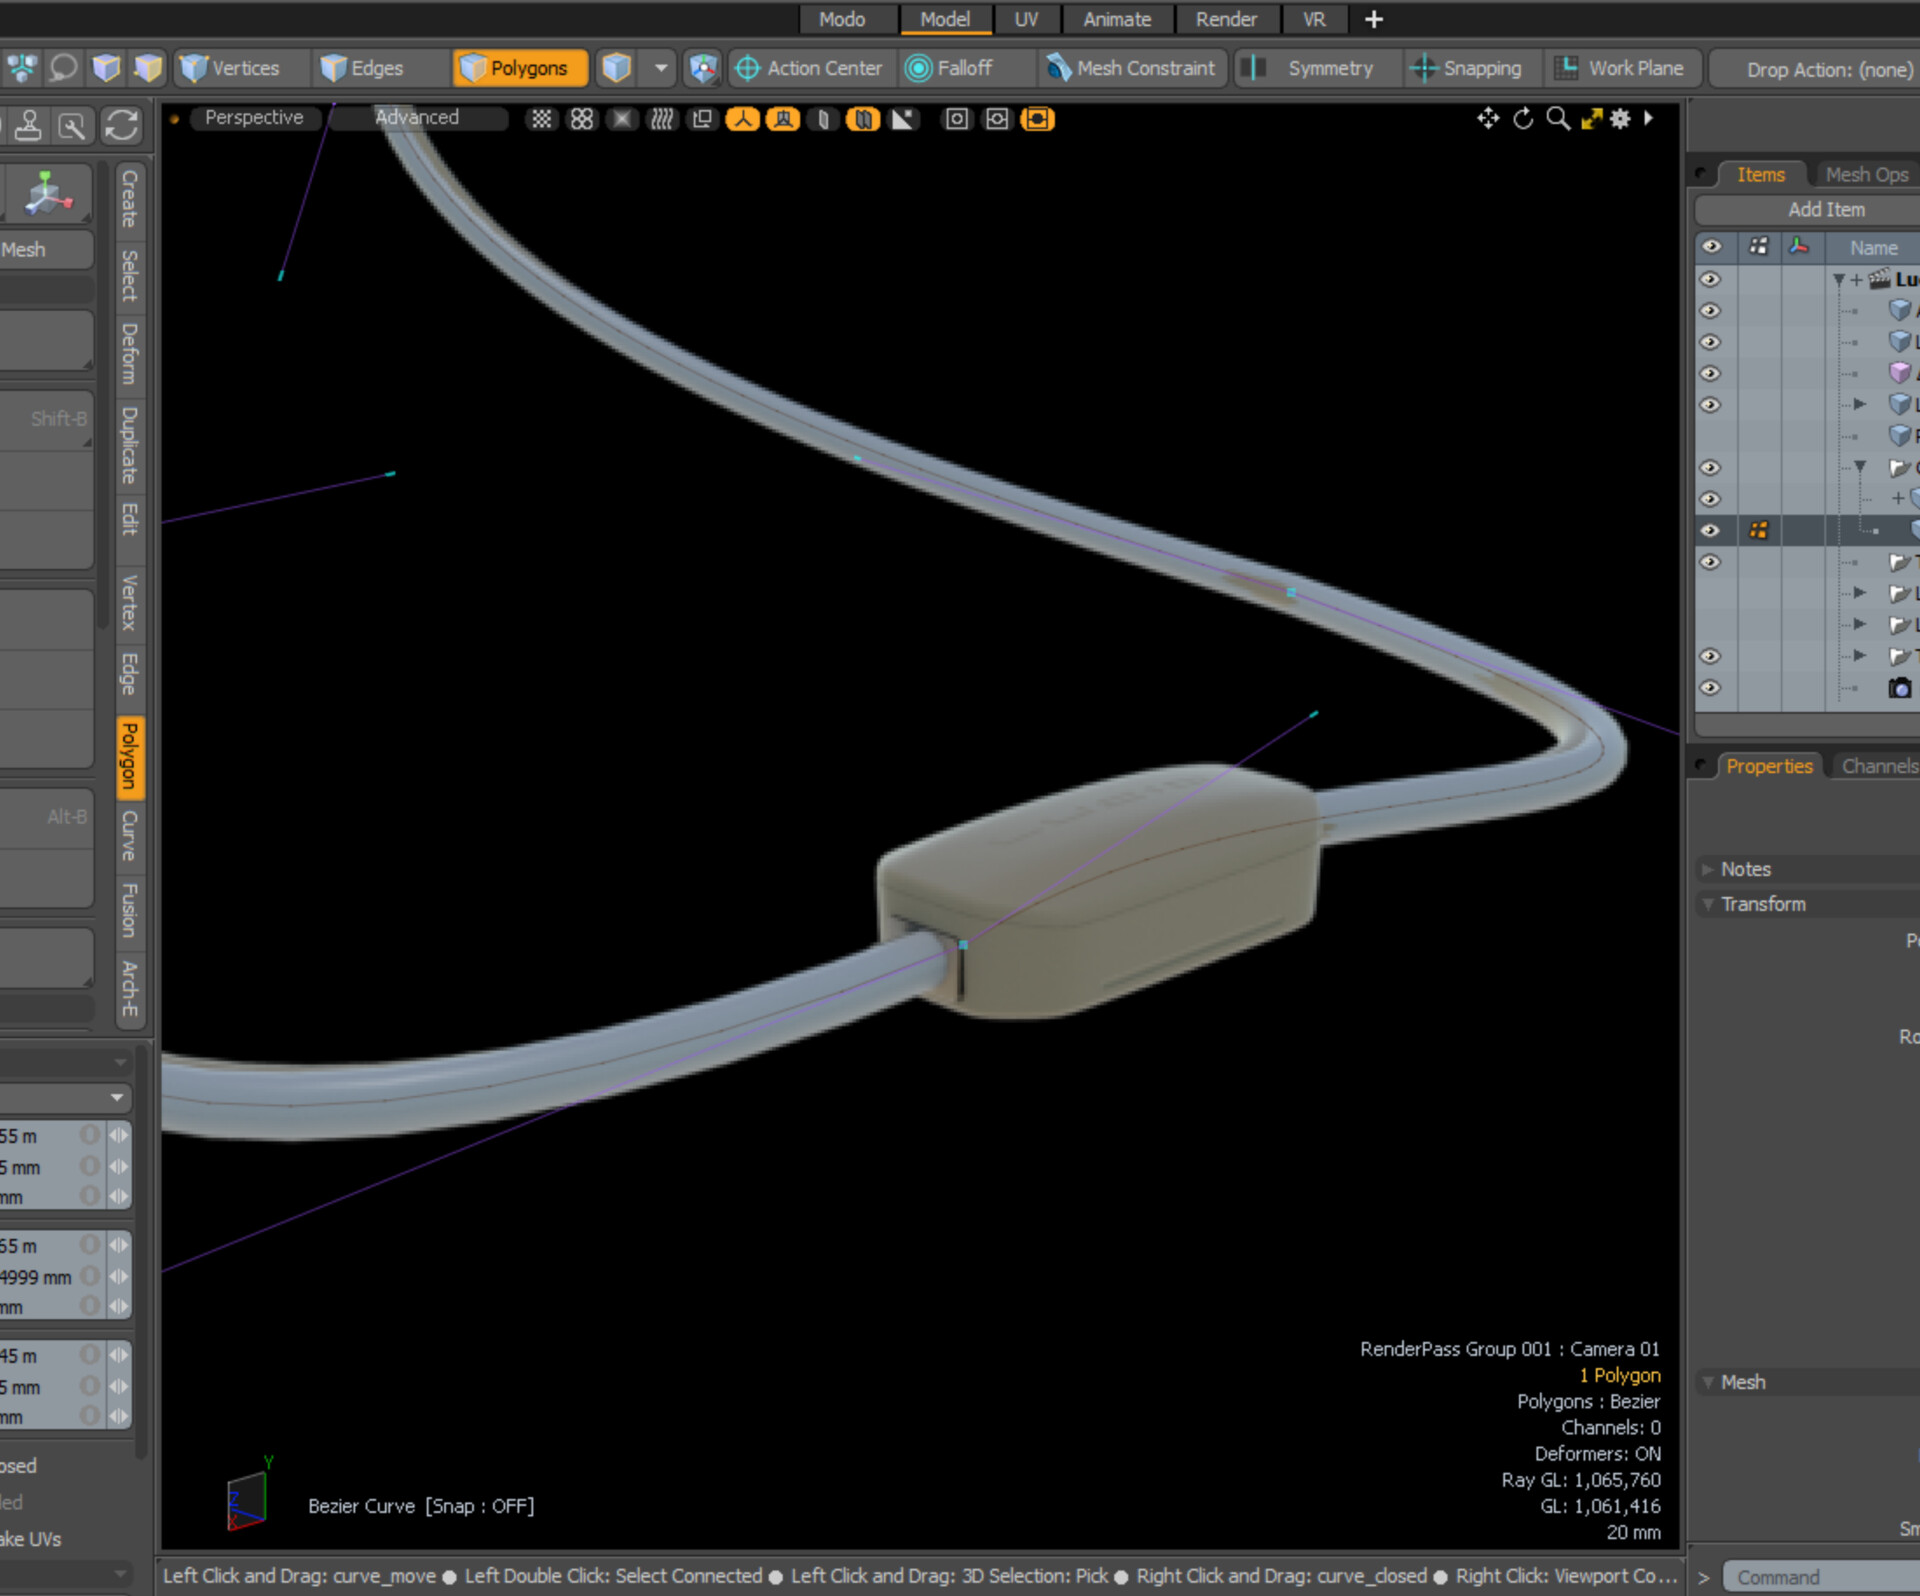
More sausage-making / behind the scenes: This shows how using a bezier deformer combined with some procedural geometry leads to an *easily* art-directable EV charging cable.
More sausage-making / behind the scenes: This shows how using a bezier deformer combined with some procedural geometry leads to an *easily* art-directable EV charging cable.
More sausage-making / behind the scenes: This shows how using a bezier deformer combined with some procedural geometry leads to an *easily* art-directable EV charging cable.

More sausage-making / behind the scenes: This shows how using a bezier deformer combined with some procedural geometry leads to an *easily* art-directable EV charging cable.
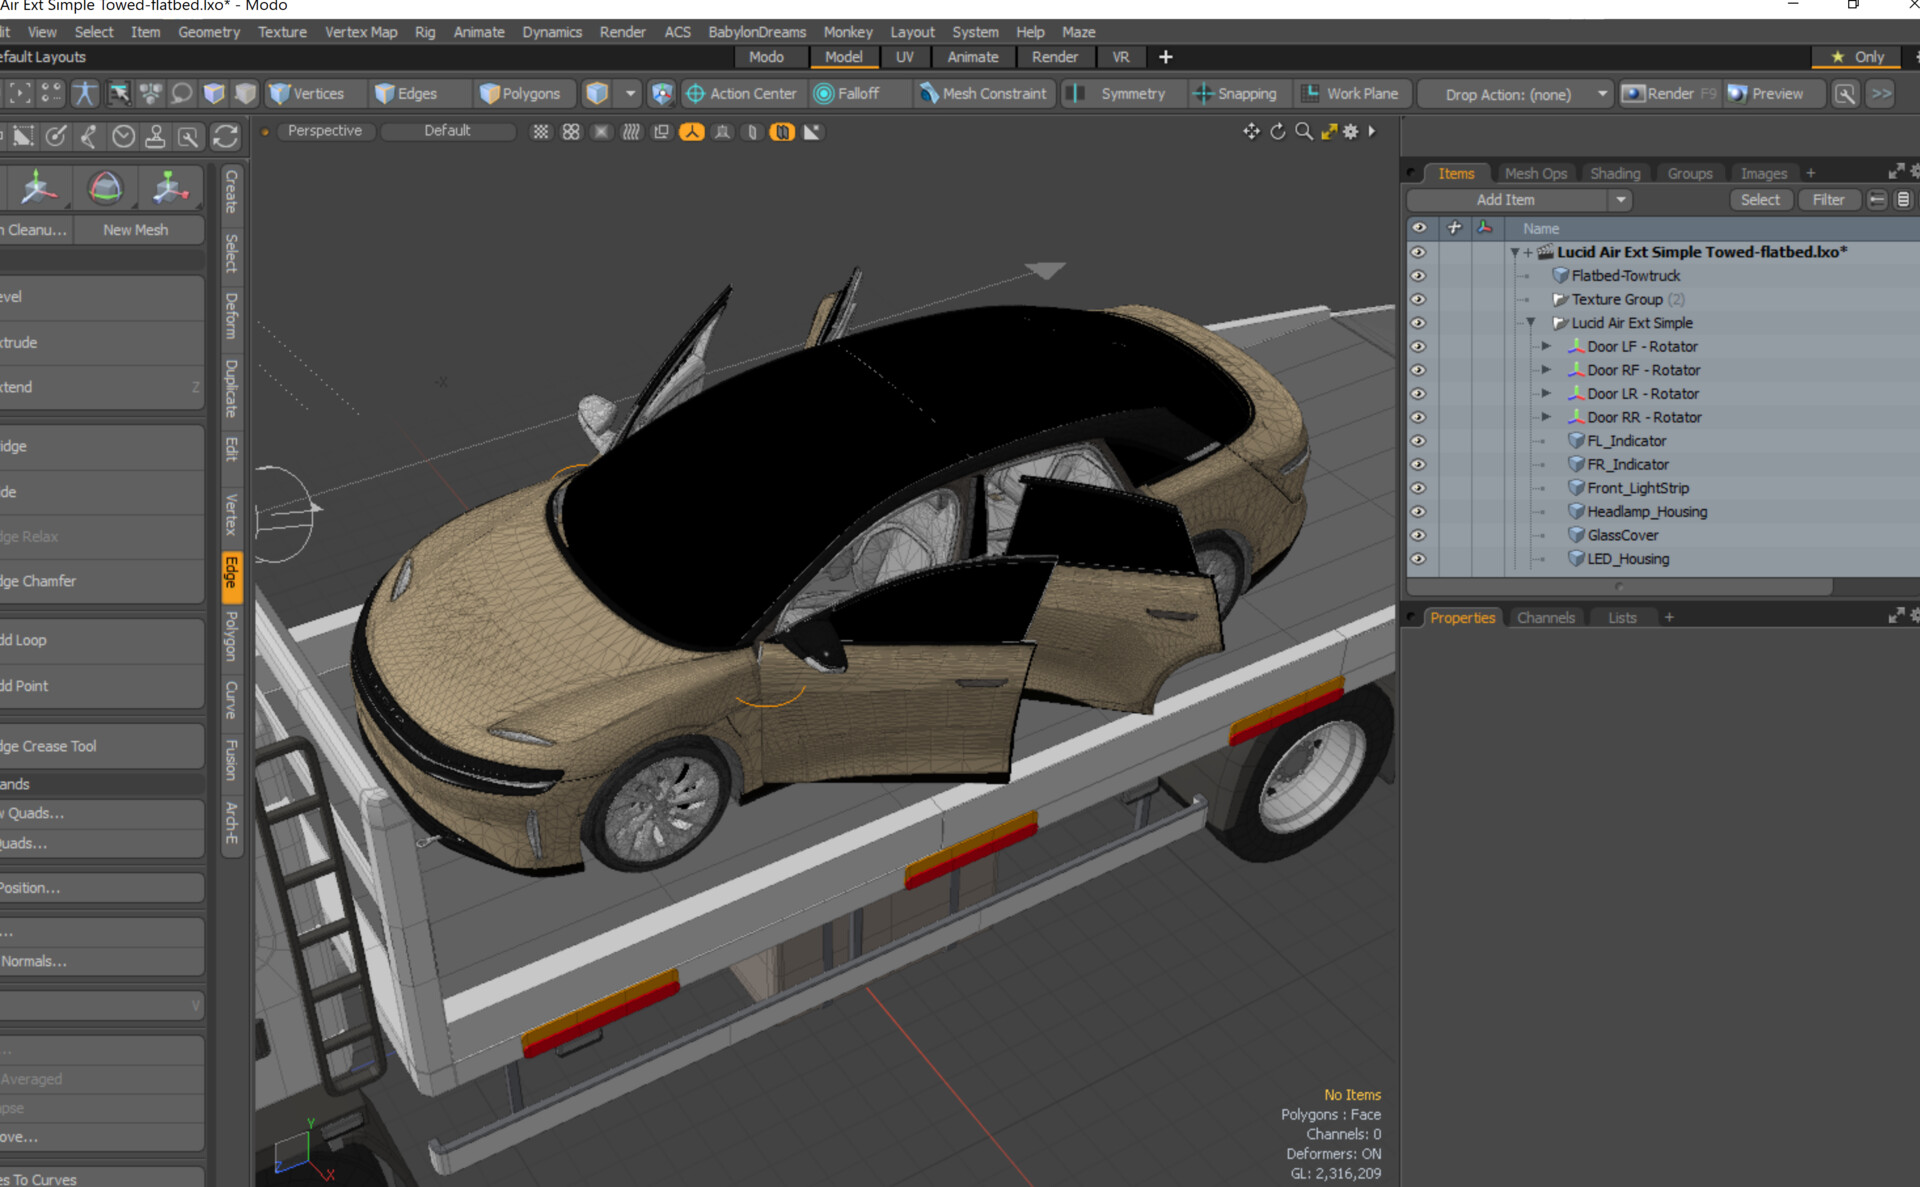
More sausage-making / behind the scenes: This shows how custom locators with discretely-preselected-commands give quick rigging for door opening.
More sausage-making / behind the scenes: This shows how using a bezier deformer combined with some procedural geometry leads to an *easily* art-directable EV charging cable.
More sausage-making / behind the scenes: This shows how using a bezier deformer combined with some procedural geometry leads to an *easily* art-directable EV charging cable.
Quick thumbnailed version of an animated figure produced to explain the basic concept behind brake fluid driving the brake calipers
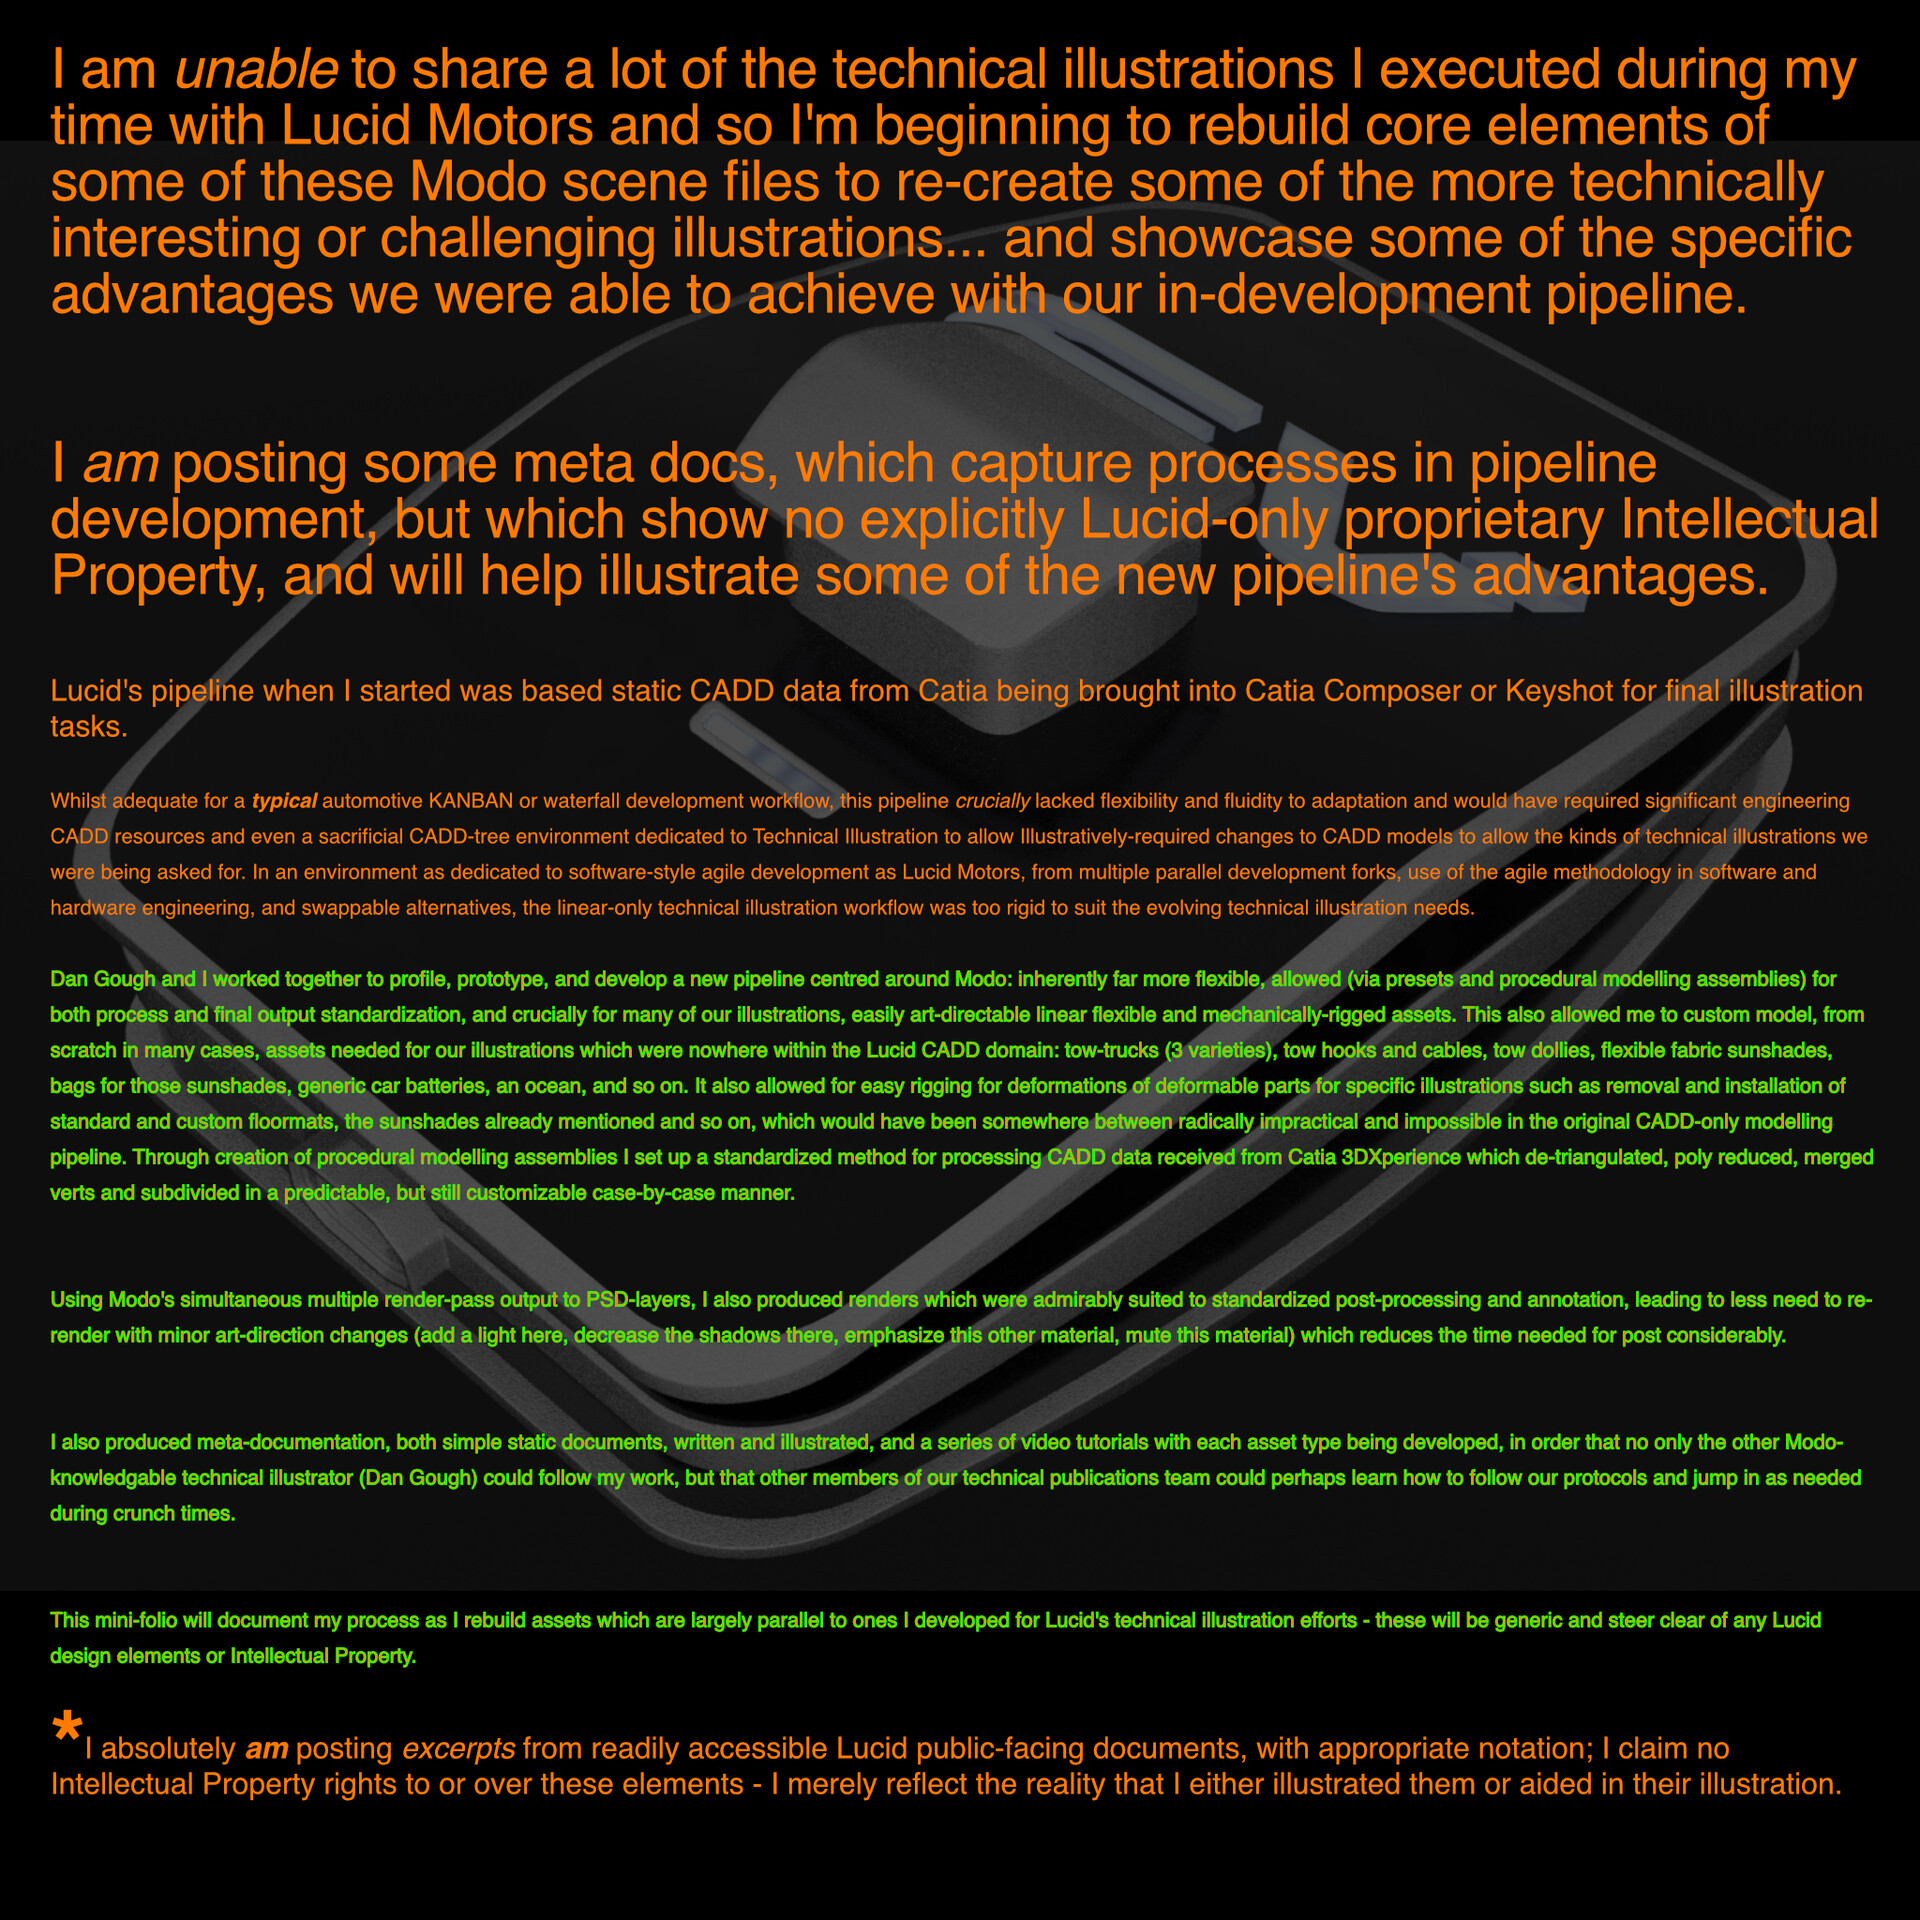
I am unable to share a lot of the technical illustrations I executed during my time with Lucid Motors and so I'm beginning to rebuild core elements of some of these Modo scene files to re-create some of the more technically interesting or challenging illustrations... and showcase some of the specific advantages we were able to achieve with our in-development pipeline.
I am posting some meta docs, which capture processes in pipeline development, but which show no explicitly Lucid-only proprietary Intellectual Property, and will help illustrate some of the new pipeline's advantages.
Lucid's pipeline when I started was based static CADD data from Catia being brought into Catia Composer or Keyshot for final illustration tasks.
Whilst adequate for a typical automotive KANBAN or waterfall development workflow, this pipeline crucially lacked flexibility and fluidity to adaptation and would have required significant engineering CADD resources and even a sacrificial CADD-tree environment dedicated to Technical Illustration to allow Illustratively-required changes to CADD models to allow the kinds of technical illustrations we were being asked for. In an environment as dedicated to software-style agile development as Lucid Motors, from multiple parallel development forks, use of the agile methodology in software and hardware engineering, and swappable alternatives, the linear-only technical illustration workflow was too rigid to suit the evolving technical illustration needs.
Dan Gough and I worked together to profile, prototype, and develop a new pipeline centred around Modo: inherently far more flexible, allowed (via presets and procedural modelling assemblies) for both process and final output standardization, and crucially for many of our illustrations, easily art-directable linear flexible and mechanically-rigged assets. This also allowed me to custom model, from scratch in many cases, assets needed for our illustrations which were nowhere within the Lucid CADD domain: tow-trucks (3 varieties), tow hooks and cables, tow dollies, flexible fabric sunshades, bags for those sunshades, generic car batteries, an ocean, and so on. It also allowed for easy rigging for deformations of deformable parts for specific illustrations such as removal and installation of standard and custom floormats, the sunshades already mentioned and so on, which would have been somewhere between radically impractical and impossible in the original CADD-only modelling pipeline. Through creation of procedural modelling assemblies I set up a standardized method for processing CADD data received from Catia 3DXperience which de-triangulated, poly reduced, merged verts and subdivided in a predictable, but still customizable case-by-case manner.
Using Modo's simultaneous multiple render-pass output to PSD-layers, I also produced renders which were admirably suited to standardized post-processing and annotation, leading to less need to re-render with minor art-direction changes (add a light here, decrease the shadows there, emphasize this other material, mute this material) which reduces the time needed for post considerably.
I also produced meta-documentation, both simple static documents, written and illustrated, and a series of video tutorials with each asset type being developed, in order that no only the other Modo-knowledgable technical illustrator (Dan Gough) could follow my work, but that other members of our technical publications team could perhaps learn how to follow our protocols and jump in as needed during crunch times.
This mini-folio will document my process as I rebuild assets which are largely parallel to ones I developed for Lucid's technical illustration efforts - these will be generic and steer clear of any Lucid design elements or Intellectual Property.
*I absolutely am posting excerpts from readily accessible Lucid public-facing documents, with appropriate notation; I claim no Intellectual Property rights to or over these elements - I merely reflect the reality that I either illustrated them or aided in their illustration.